Blog

  • $2.2 Million Brian Cushing House in Houston, Texas

    $2.2 Million Brian Cushing House in Houston, Texas

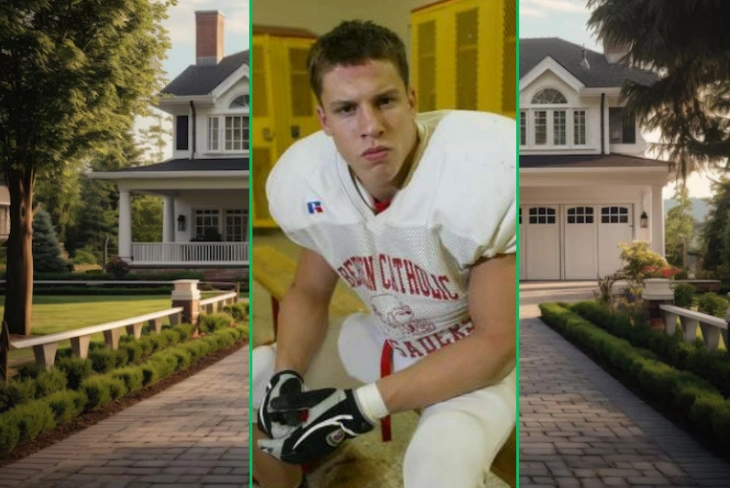
    Brian Cushing, the former NFL linebacker, has made quite a name for himself both on and off the field. But today, we’re not talking about his tackles or touchdowns. We’re diving into something a bit more personal – his house. Cushing’s home in Houston, Texas, is a testament to his success and taste.

    Let’s take a closer look at where this football star hangs his helmet when he’s not on the gridiron.

    Who is Brian Cushing?

    Brian Cushing is a retired American football linebacker who spent his entire NFL career with the Houston Texans. He was a force to be reckoned with on the field, known for his aggressive play style and leadership. Off the field, Cushing has built quite a comfortable life for himself.

    While we don’t have exact figures for all of Cushing’s assets, we do know that his net worth is estimated to be around $20 million. This wealth comes from his NFL career earnings, which totaled over $45 million during his nine seasons with the Texans. As for cars, yachts, and private jets, there’s no public information available. However, we do know about one significant asset – his house in Houston.

    Cushing isn’t known for flaunting multiple homes or private islands. He seems to prefer a more grounded lifestyle, focusing on his family and his home in Houston. This approach aligns with his reputation as a dedicated athlete and family man.

    Brian Cushing at a Glance

    Detail Information
    Full Name Brian Patrick Cushing
    Date of Birth January 24, 1987
    Place of Birth Park Ridge, New Jersey
    Height 6 ft 3 in (1.91 m)
    Weight 255 lb (116 kg)
    Position Linebacker
    NFL Team Houston Texans (2009-2017)
    College University of Southern California
    NFL Draft 2009 / Round: 1 / Pick: 15
    Career Highlights NFL Defensive Rookie of the Year (2009), Pro Bowl (2009)
    Estimated Net Worth $20 million
    Known Real Estate House in Houston, Texas

    Where Does Brian Cushing Live Now?

    Brian Cushing currently resides in Houston, Texas. He’s made this city his home since being drafted by the Houston Texans in 2009. The exact neighborhood isn’t publicly disclosed, but we know it’s in the Houston area where he bought a house in 2014.

    Houston, the largest city in Texas, is known for its diverse culture, thriving economy, and of course, its love for football. It’s no wonder Cushing chose to put down roots here after his NFL career. The city offers a perfect blend of urban amenities and suburban comfort, ideal for a retired athlete and his family.

    Brian Cushing House: Overview

    In 2014, Brian Cushing and his wife, Megan, purchased a beautiful home in the Houston area for $2.2 million. This house isn’t just a place to live; it’s a testament to Cushing’s success in the NFL and his commitment to making Houston his home.

    1. Where Is Brian Cushing’s House Located?

    Cushing’s house is located in the affluent city of West University Place, a suburb of Houston. This area is known for its tree-lined streets, excellent schools, and high-end homes. It’s a popular spot for Houston’s elite, offering a perfect blend of suburban tranquility and easy access to the city’s amenities.

    West University Place, often called “West U” by locals, is just a stone’s throw away from Rice University and the Texas Medical Center. It’s also close to the vibrant shopping and dining scenes of Rice Village. This location offers Cushing and his family the best of both worlds – a quiet, family-friendly neighborhood with all the perks of city living just minutes away.

    Brian Cushing House Features

    2. Features of Brian Cushing House

    Cushing’s house is a stunning example of traditional architecture with modern amenities. Built in 2014, the year Cushing purchased it, the house spans over 5,400 square feet of living space. It’s a three-story home that perfectly balances luxury and comfort.

    The architectural style of the house is described as Traditional, which typically means it has a classic, timeless look. These homes often feature symmetrical windows, pitched roofs, and elegant entryways. In Cushing’s case, the house likely incorporates high-quality materials and craftsmanship to create a stately appearance that fits well with the upscale West University neighborhood.

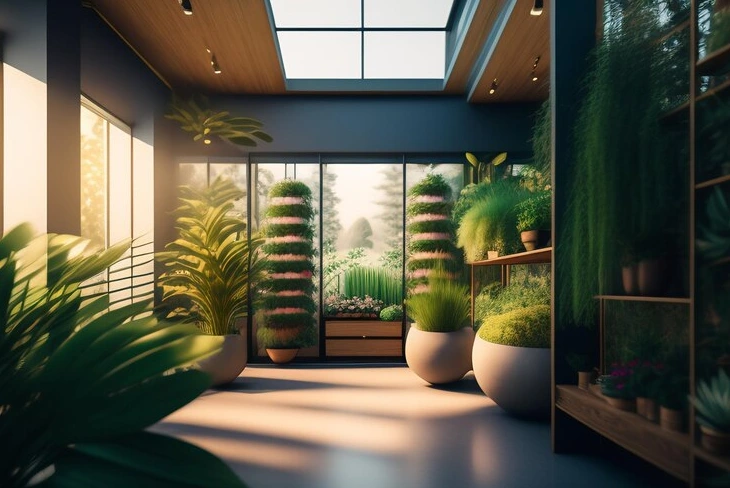
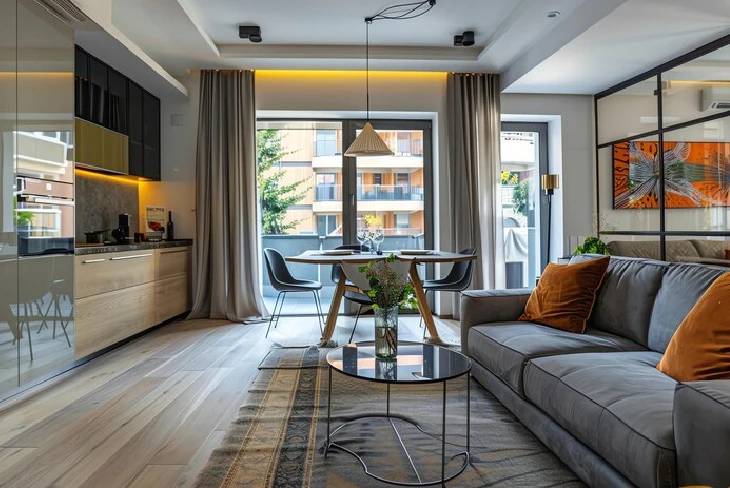
    Inside, the house is designed with an open floor plan, creating a spacious and airy feel. High ceilings and large windows allow plenty of natural light to flood the rooms, enhancing the sense of space and connecting the indoors with the lush, tree-lined exterior.

    3. Is Brian Cushing House Listed for Sale?

    As of the latest available information, Brian Cushing’s house is not listed for sale. The Cushing family seems to have settled comfortably in their Houston home since purchasing it in 2014. There have been no reports or listings indicating that they plan to sell the property.

    4. House Amenities

    Cushing’s house is packed with luxurious amenities that make it a true dream home. Here’s a list of some of the standout features:

    • Chef’s kitchen
    • Formal living room
    • Formal dining room
    • Library/study
    • Game room
    • Wine cellar
    • Spiral staircase
    • Elevator shaft (to service all levels)
    • Four bedrooms
    • Five bathrooms
    • Vaulted interiors
    • Pool
    • Spa
    • First-floor veranda
    • Second-floor covered balcony

    5. Neighborhood Area

    West University Place, where Cushing’s house is located, is one of Houston’s most desirable neighborhoods. It’s often referred to as a “city within a city” due to its independent government and services. The area is known for its small-town charm, excellent schools, and beautiful parks.

    The neighborhood is primarily residential, filled with well-maintained homes and manicured lawns. It’s a family-friendly area with plenty of community events and activities throughout the year. The local parks, like Colonial Park and Friends Park, offer great spaces for outdoor recreation.

    West U is also known for its strict zoning laws, which help maintain the neighborhood’s character and property values. This means Cushing’s investment in his home is likely to be well-protected.

    For shopping and dining, residents don’t have to go far. Rice Village, a popular shopping district, is just a short drive away. It offers a mix of national chains and local boutiques, as well as a variety of restaurants.

    Market Value

    Detail Information
    Build Year 2014
    Purchase Year 2014
    Purchase Value $2.2 million
    Current Estimated Value $2.5 – $3 million (estimated)
    House Condition Excellent

    The exact current value of Cushing’s house isn’t publicly available. However, given the desirable location in West University Place and the general trend of increasing property values in Houston, it’s likely that the home has appreciated since its purchase in 2014. The estimated current value range is based on similar properties in the area and the overall real estate market trends in Houston.

    Brian Cushing Real Estate Portfolio

    While we don’t have information about other properties owned by Brian Cushing, we do know about a previous home he owned and sold.

    In 2013, Cushing put his Missouri City home on the market. This Mediterranean-style estate was located in a gated, master-planned community and offered 7,000 square feet of living space. Some notable features of this home included:

    • Five bedrooms
    • Six bathrooms
    • In-house movie theater with a wet bar
    • Game room
    • Media room
    • Nearly 500-square-foot master bedroom
    • Lakefront property
    • Pool and spa

    This home was listed for $1.3 million, significantly less than his current West University Place home. The sale of this property likely facilitated the purchase of his current home in 2014, allowing Cushing to upgrade to a more upscale neighborhood closer to the heart of Houston.

    Conclusion

    Brian Cushing’s house in Houston is more than just a place to live – it’s a reflection of his successful NFL career and his commitment to making Houston his home. Located in the prestigious West University Place, the $2.2 million property offers luxury, comfort, and a family-friendly environment. From its spacious interiors to its high-end amenities, the house is a testament to Cushing’s taste and success. While we may not know all the details about Cushing’s real estate portfolio, it’s clear that he’s made a significant investment in creating a comfortable home base in the city where he made his mark in professional football.

  • $2.5 Million Mark Stoops House in Lexington, Kentucky

    $2.5 Million Mark Stoops House in Lexington, Kentucky

    Mark Stoops House has become a topic of interest for many football fans and real estate enthusiasts alike. The head coach of the University of Kentucky’s football team has made quite a name for himself in the world of college football, and his home reflects his success.

    Let’s dive into the details of Mark Stoops’ residence and learn more about the man behind the impressive property.

    Who is Mark Stoops?

    Mark Stoops is a well-known figure in the world of college football. He’s been the head coach of the University of Kentucky Wildcats since 2012, turning the program around and leading them to several bowl game appearances. But Stoops isn’t just about football; he’s also made some smart moves off the field, particularly in real estate.

    Stoops has done well for himself financially, with an estimated net worth of around $12 million. While he may not have a fleet of cars or a private yacht like some celebrities, his main asset is his beautiful home in Lexington, Kentucky. As for private jets, there’s no information suggesting he owns one, but he certainly travels in style for recruiting trips and games.

    Mark Stoops at a Glance

    Detail Information
    Full Name Mark Thomas Stoops
    Born July 9, 1967
    Occupation Head Football Coach, University of Kentucky
    Net Worth Estimated $12 million
    Primary Residence Lexington, Kentucky
    House Value Approximately $2.5 million
    Cars Not publicly disclosed
    Yacht None known
    Private Jet None known

    Where Does Mark Stoops Live Now?

    Mark Stoops currently resides in a beautiful home in Lexington, Kentucky. Lexington is known for its picturesque horse farms, vibrant downtown area, and of course, being home to the University of Kentucky. The city offers a perfect blend of southern charm and modern amenities, making it an ideal location for someone in Stoops’ position.

    Lexington’s proximity to the university campus allows Stoops to be close to his work while enjoying the perks of living in a quieter, more upscale neighborhood. The area is known for its lush greenery, rolling hills, and a strong sense of community, which perfectly complements Stoops’ high-profile yet down-to-earth lifestyle.

    Mark Stoops House: Overview

    Mark Stoops’ house is a testament to his success as a college football coach. Located in one of Lexington’s most desirable neighborhoods, the property is both impressive and tasteful. The house strikes a balance between luxury and comfort, reflecting Stoops’ status while maintaining a family-friendly atmosphere.

    1. Where Is Mark Stoops House Location?

    Mark Stoops’ house is situated in the upscale Beaumont neighborhood of Lexington, Kentucky. This area is known for its beautiful homes, tree-lined streets, and proximity to both the university and downtown Lexington. The Beaumont neighborhood offers a perfect blend of suburban tranquility and urban convenience, making it an ideal location for someone of Stoops’ stature.

    The exact address isn’t publicly disclosed for privacy reasons, but the neighborhood is easily accessible from the University of Kentucky campus. This convenient location allows Stoops to maintain a good work-life balance, being close enough to the football facilities while still having a peaceful retreat away from the hustle and bustle of campus life.

    Mark Stoops House Features

    2. Features of Mark Stoops House

    The Mark Stoops house is a stunning example of modern architecture with traditional touches. The property boasts a spacious layout, covering approximately 6,000 square feet. The architectural style blends seamlessly with the surrounding landscape, featuring a mix of brick and stone exteriors that give the home a timeless appeal.

    The house design emphasizes open spaces and natural light, with large windows that offer views of the beautifully landscaped yard. The exterior features a mix of gabled roofs and clean lines, creating an attractive and balanced facade. Inside, the home likely features high ceilings, hardwood floors, and custom finishes that reflect Stoops’ taste and status.

    3. Is Mark Stoops House Listed for Sale?

    As of now, there’s no information suggesting that Mark Stoops’ house is listed for sale. Given his ongoing commitment to the University of Kentucky football program and his deep roots in the Lexington community, it seems likely that Stoops plans to stay in his current residence for the foreseeable future.

    4. House Amenities

    The Mark Stoops house is equipped with a range of amenities befitting a successful college football coach. While specific details aren’t publicly available, homes in this price range and neighborhood typically include:

    • Gourmet kitchen with high-end appliances
    • Spacious master suite
    • Multiple guest bedrooms
    • Home office or study
    • Home theater or media room
    • Fitness center
    • Wine cellar
    • Outdoor swimming pool
    • Outdoor kitchen and entertainment area
    • Multi-car garage
    • Smart home technology
    • Security system

    5. Neighborhood Area

    The Beaumont neighborhood where Mark Stoops’ house is located is one of Lexington’s most desirable areas. It’s known for its mix of luxury homes, well-maintained streets, and a strong sense of community. The neighborhood offers a perfect balance of privacy and accessibility, making it an ideal choice for high-profile residents like Stoops.

    Residents of Beaumont enjoy easy access to some of Lexington’s best amenities. The area is close to top-rated schools, making it perfect for families. There are also numerous parks and green spaces nearby, offering opportunities for outdoor recreation. Golf enthusiasts will appreciate the proximity to several excellent courses in the area.

    Shopping and dining options abound in the vicinity, with both local boutiques and national chains represented. The nearby Summit at Fritz Farm offers a mix of upscale shopping and dining experiences. For those who enjoy a night out, downtown Lexington is just a short drive away, offering a vibrant scene of restaurants, bars, and cultural attractions.

    Market Value

    The Mark Stoops house represents a significant investment in Lexington’s real estate market. Here’s an overview of its market value:

    Detail Information
    Build Year Approximately 2010
    Purchase Year 2013
    Purchase Value Estimated $1.45 million
    Current Estimated Value Approximately $2.5 million
    House Condition Excellent

    The substantial increase in value since purchase reflects both the overall growth in Lexington’s real estate market and the desirability of the Beaumont neighborhood. The house’s excellent condition and any upgrades made by Stoops likely contribute to its increased value.

    Mark Stoops Real Estate Portfolio

    While the Lexington property is Mark Stoops’ primary residence, there’s limited public information about other real estate holdings. However, it’s worth noting his previous residences related to his coaching career:

    1. Tallahassee, Florida: Before moving to Kentucky, Stoops served as the defensive coordinator at Florida State University. During this time, he likely rented or owned a home in the Tallahassee area.
    2. Tucson, Arizona: Before his time at Florida State, Stoops was the defensive coordinator at the University of Arizona. He would have had a residence in Tucson during this period.
    3. Miami, Florida: Earlier in his career, Stoops coached at the University of Miami, suggesting he lived in the Miami area for a time.

    While these previous residences were likely tied to his coaching positions, his current home in Lexington represents a more permanent investment, reflecting his long-term commitment to the University of Kentucky program.

    Conclusion

    Mark Stoops’ house in Lexington, Kentucky, is a reflection of his successful career as a college football coach. Located in the desirable Beaumont neighborhood, the property combines luxury, comfort, and convenience. With its estimated value of $2.5 million, the house stands as a testament to Stoops’ achievements and his commitment to the Lexington community. As he continues to lead the Kentucky Wildcats, this beautiful home provides the perfect backdrop for his personal and professional life.

  • $7.5 Million Joe Burrow House in Cincinnati

    $7.5 Million Joe Burrow House in Cincinnati

    Joe Burrow’s house is making waves in the real estate world. The Cincinnati Bengals quarterback recently snagged a stunning $7.5 million mansion in Anderson Township, a suburb of Cincinnati. This purchase has got everyone talking, and for good reason. It’s not just any house – it’s a statement piece that reflects Burrow’s rising star status in the NFL.

    Who is Joe Burrow?

    Joe Burrow is a name that’s been on everyone’s lips in the football world. He’s the star quarterback for the Cincinnati Bengals, and he’s been making big moves both on and off the field. With a net worth of about $50 million, Burrow’s not just throwing footballs – he’s throwing some serious cash around too.

    When it comes to cars, Burrow’s got a taste for the finer things. He’s been spotted cruising around in a custom Lordstown EV Pickup Truck, a Porsche Taycan Supercar, and an Acura NSX Supercar. But he’s not all about Flash – rumor has it he’s got a golf cart for zipping around Cincinnati too.

    As for yachts and private islands? Well, those aren’t Burrow’s style. He’s more of a down-to-earth kind of guy. But he does have a couple of homes to his name. Before his big $7.5 million purchase, he owned a more modest home in Cincinnati’s Columbia Tusculum neighborhood.

    And private jets? Not for Joe. He’s known for being smart with his money. He’s said he plans to save all his NFL contract money and live off his endorsement deals. Now that’s a game plan!

    Joe Burrow at a Glance

    Detail Information
    Full Name Joseph Lee Burrow
    Date of Birth December 10, 1996
    Place of Birth Ames, Iowa, USA
    Age 27 years old
    Height 6 feet 4 inches (1.93 m)
    Weight 215 lbs (98 kg)
    Profession NFL Quarterback
    Team Cincinnati Bengals
    Net Worth Approximately $50 million
    Cars Lordstown EV Pickup Truck, Porsche Taycan Supercar, Acura NSX Supercar
    Houses $7.5 million mansion in Anderson Township, Cincinnati
    Previous home in Columbia Tusculum, Cincinnati
    Endorsements Nike, Bose, Fanatics, Buffalo Wild Wings, Nerf, Lowe’s

    Where Does Joe Burrow Live Now?

    Joe Burrow now calls Anderson Township home. This Cincinnati suburb is where he’s set up shop in his new $7.5 million mansion. The area is known for its beautiful homes and scenic views of the Ohio River. It’s a quiet, upscale neighborhood that’s perfect for a star athlete looking for some peace and privacy.

    The house sits on a sprawling 3-acre lot, giving Burrow plenty of space to relax and unwind after tough games. It’s not just about the house, though. The whole property is a slice of paradise, with lush greenery, mature trees, and even a pond. It’s the kind of place where you can forget about the pressures of being an NFL quarterback and just enjoy the simple things in life.

    And get this – Burrow’s new digs are right next door to his teammate, Joe Mixon. Talk about keeping the team spirit alive off the field! Another Bengals player, Orlando Brown Jr., also lives in the neighborhood. It’s like a mini Bengals community right there in Anderson Township.

    Joe Burrow House: Overview

    Joe Burrow’s new house is nothing short of spectacular. Built in 2016, this stucco mansion is a modern masterpiece that spans over 7,000 square feet. It’s got five bedrooms and seven bathrooms, so there’s plenty of space for Burrow to host his teammates or family.

    The house sits on what used to be a horse ranch, which explains the expansive grounds. It’s got that perfect mix of luxury and comfort that you’d expect from a top NFL player’s home. But it’s not all about showing off – the house has a warm, inviting feel that matches Burrow’s down-to-earth personality.

    One of the standout features of the property is its stunning views of the Ohio River. Imagine waking up every morning to that vista – it’s enough to make anyone feel like a champion. The house is designed to make the most of these views, with large windows and outdoor spaces that let you soak in the scenery.

    1. Where Is Joe Burrow’s House Located?

    Joe Burrow’s house is located in Anderson Township, a suburb on the eastern edge of Cincinnati, Ohio. It’s about 5 miles northeast of downtown Cincinnati and Paul Brown Stadium, where Burrow plays his home games for the Bengals.

    Anderson Township is known for its beautiful homes and scenic landscapes. It’s a place where you can enjoy the perks of suburban living while still being close to the city. The area is full of parks, good schools, and friendly neighborhoods – perfect for a young star athlete looking to put down roots.

    Burrow’s house is situated in a particularly picturesque part of Anderson Township. It overlooks the Ohio River, providing breathtaking views that change with the seasons. The property is secluded enough to offer privacy, but still close enough to the city for easy commutes to practice and games.

    Joe Burrow House Features

    2. Features of Joe Burrow House

    Joe Burrow’s house is a stunning example of modern architecture. The stucco exterior gives it a sleek, contemporary look that stands out even in this upscale neighborhood. But it’s not just about looks – the design is practical too, making the most of the property’s natural features and views.

    The house covers about 7,300 square feet, spread across multiple levels. It’s got an open floor plan that creates a sense of spaciousness and flow. High ceilings add to this feeling, making the interior feel even larger than it is.

    One of the coolest things about the house is how it blends indoor and outdoor living. There are lots of large windows and glass doors that let in natural light and provide easy access to the outdoor spaces. This design makes the most of those Ohio River views.

    The architectural style could be described as modern luxury with a touch of rustic charm. It’s got clean lines and high-end finishes, but some elements nod to the property’s history as a horse ranch. It’s a perfect blend of sophistication and comfort.

    3. Is Joe Burrow House Listed for Sale?

    No, Joe Burrow’s house is not listed for sale. He just bought it in July 2023 for $7.5 million, so it’s likely he plans to stay there for a while. This purchase came right before he signed his massive $275 million contract extension with the Bengals, showing his commitment to staying in Cincinnati long-term.

    Burrow seems to have gotten a good deal on the property too. Some real estate websites estimate the market value of the house at over $8 million. So not only did he score an amazing home, but he also made a smart investment.

    4. House Amenities

    Indoor Amenities:

    • Gourmet kitchen
    • Home theater
    • Gym
    • Wine cellar
    • Spa-like bathrooms
    • Walk-in closets
    • Home office
    • Game room
    • Elevator

    Outdoor Amenities:

    • Swimming pool
    • Hot tub
    • Private courtyard
    • Fire pit
    • Outdoor Kitchen
    • Pond
    • Landscaped gardens
    • Patio areas
    • Garage for multiple cars

    5. Neighborhood Area

    The neighborhood around Joe Burrow’s house is one of the most desirable areas in Cincinnati. Anderson Township is known for its excellent schools, beautiful parks, and a strong sense of community. It’s a place where you can enjoy a quiet, suburban lifestyle while still being close to all the action of the city.

    One of the big draws of the area is its natural beauty. There are lots of green spaces and walking trails, perfect for staying active or just enjoying the outdoors. The Ohio River is a major feature, offering opportunities for boating, fishing, or just enjoying the view.

    The community is tight-knit, with lots of local events and activities throughout the year. There are great restaurants, shops, and entertainment options nearby too. It’s the kind of place where you can feel at home, whether you’re a famous quarterback or just a regular Joe.

    For Burrow, the location is ideal. It’s close enough to the Bengals’ facilities for easy commutes, but far enough away to provide a peaceful retreat after games and practices. And with teammates like Joe Mixon living nearby, he’s got a built-in support system right in the neighborhood.

    Market Value

    Detail Information
    Build Year 2016
    Purchase Year 2023
    Purchase Value $7.5 million
    Current Estimated Value Over $8 million
    House Condition Excellent

    Joe Burrow’s house is a relatively new build, constructed in 2016. This means it’s equipped with all the modern amenities and features you’d expect in a luxury home. Burrow purchased the property in July 2023 for $7.5 million, which was a bit of a bargain considering its current estimated value.

    Real estate websites like Zillow and Redfin estimate the current market value of the property at over $8 million. This suggests that Burrow not only got a great home but also made a smart investment. The house is in excellent condition, as you’d expect from a property of this caliber and age.

    It’s worth noting that property values in this area of Cincinnati have been on the rise, which bodes well for the future value of Burrow’s investment. And with his long-term commitment to the Bengals, it’s likely he’ll be enjoying this home for years to come.

    Joe Burrow’s Real Estate Portfolio

    While Joe Burrow’s $7.5 million Anderson Township mansion is his most impressive real estate purchase to date, it’s not his only property. Let’s take a look at his real estate journey:

    1. Childhood Home: Burrow grew up in Athens County, Ohio. While this isn’t a property he owns, it’s where his football journey began. His parents still own this home, and Burrow has been known to stay there during off-seasons.
    2. Columbia Tusculum Home: In June 2020, shortly after being drafted by the Bengals, Burrow purchased his first home in Cincinnati’s Columbia Tusculum neighborhood. This 2,900-square-foot home cost him $835,000. It was built in 2014 and served as his starter home in Cincinnati.
    3. Anderson Township Mansion: This is Burrow’s current home, purchased in July 2023 for $7.5 million. As we’ve discussed, it’s a stunning 7,300-square-foot property on 3 acres of land overlooking the Ohio River.

    Burrow’s real estate choices reflect his career progression and his commitment to Cincinnati. He started with a modest (by NFL standards) home when he first joined the Bengals and has now upgraded to a luxury mansion as he’s become one of the league’s top quarterbacks. His decision to invest in high-end Cincinnati real estate shows he’s planning to be a Bengal for the long haul.

    Conclusion

    Joe Burrow’s house in Anderson Township, Cincinnati, is more than just a luxury home – it’s a symbol of his success and his commitment to the city of Cincinnati. At just 27 years old, Burrow has already made his mark both on and off the field. His $7.5 million mansion reflects his status as one of the NFL’s top quarterbacks, while also showing his smart approach to investing his earnings.

    From its stunning views of the Ohio River to its luxurious amenities, Burrow’s house is truly a touchdown in the real estate world. It’s a place where he can relax and recharge, all while staying close to his teammates and the city he represents on the field. As Burrow continues to lead the Bengals and make Cincinnati his home, this house will undoubtedly play a big role in his story.

  • $250 Million John Travolta House in Florida

    $250 Million John Travolta House in Florida

    John Travolta’s house is more than just a home – it’s a private airport! The Hollywood star’s $10 million mansion in Ocala, Florida sits on an exclusive aviation community called Jumbolair Aviation Estates. But this isn’t your average luxury estate. Travolta’s property features two runways that lead right up to his front door, allowing him to park his private jets just steps from his house.

    Who is John Travolta?

    John Travolta is an iconic American actor, producer, dancer, and singer who has been a major Hollywood star for decades. With a net worth of $250 million, Travolta has amassed quite a fortune through his successful acting career and savvy investments.

    But Travolta’s true passion lies in aviation. He’s an accomplished pilot who owns multiple private jets, including a Boeing 707 and several Gulfstream aircraft. His love of flying is reflected in his unique Florida estate, which combines luxury living with the ultimate convenience of a jet-setting lifestyle.

    In addition to his planes, Travolta owns several high-end properties. His main residence is the $4.9 million estate in Florida with private runways. He also previously owned an $18 million property in Brentwood, California which he sold in 2020. While Travolta doesn’t have any private islands, his aviation-themed mansion provides plenty of exclusivity and privacy.

    John Travolta at a Glance

    Fact Detail
    Full Name John Joseph Travolta
    Date of Birth February 18, 1954
    Age 70
    Nationality American
    Occupation Actor, Producer, Dancer, Singer
    Net Worth $250 million
    Spouse Kelly Preston (m. 1991, d. 2020)
    Children Jett (deceased), Ella Bleu, Benjamin
    Notable Films Grease, Pulp Fiction, Saturday Night Fever
    Aviation Assets Boeing 707, Gulfstream Jets, Eclipse 500
    Real Estate $10 million Florida estate, Previously owned $18 million Brentwood property

    Where Does John Travolta Live Now?

    John Travolta currently resides in his unique aviation estate in Ocala, Florida. This isn’t just any luxury home – it’s part of the exclusive Jumbolair Aviation Estates, a private residential airpark.

    Ocala is located in north central Florida, about 80 miles northwest of Orlando. The area is known for its horse farms and natural springs, providing a picturesque setting for Travolta’s aviation-themed mansion. The property sits on the Greystone Airport, allowing Travolta and other residents to literally fly home.

    John Travolta House: Overview

    Travolta’s Florida mansion is truly one-of-a-kind. Built-in the 1990s, the midcentury-style home spans nearly 7,000 square feet and sits on about 9.5 acres of land. But what sets this property apart is the two runways that lead directly to Travolta’s front door.

    The house features five bedrooms and five-and-a-half bathrooms, providing plenty of space for Travolta and his family. Large windows throughout the home offer panoramic views of the surrounding landscape and, of course, the private runways.

    1. Where Is John Travolta’s House Located?

    John Travolta’s house is located in the Jumbolair Aviation Estates in Ocala, Florida. This unique community is situated on the Greystone Airport, allowing residents like Travolta to park their planes right outside their homes.

    The estate is part of a larger 550-acre property that includes various aviation-related amenities. Travolta and his late wife Kelly Preston were among the first residents to purchase land in this exclusive community, drawn by the ability to combine luxury living with their love of flying.

    John Travolta House Features

    2. Features of John Travolta House

    Travolta’s house is a testament to his passion for aviation and his eye for design. The midcentury-style home was designed by architect Dana Smith and interior designer Sherri James of the Southern California-based Michael James Design Team.

    The house’s exterior features a striking orange facade, adding a pop of color to the Florida landscape. Inside, the home boasts an open floor plan with spacious living areas, perfect for entertaining.

    One of the most unique features is the vintage Thunderbird located on the front drive, a nod to Travolta’s love of classic vehicles as well as aircraft.

    3. Is John Travolta House Listed for Sale?

    As of the latest information available, John Travolta’s Florida aviation estate is not currently listed for sale. Travolta purchased the land for $4.9 million and there were reports in 2019 that the property was listed for $10.5 million. However, it appears Travolta continues to own and reside in this unique home.

    4. House Amenities

    John Travolta’s Florida mansion boasts an impressive array of amenities, both indoors and outdoors. Here’s a list of some of the key features:

    Indoor Amenities:

    • Five bedrooms
    • Five-and-a-half bathrooms
    • Two kitchens (one for everyday use, one for light fare)
    • Large great room with fireplace
    • 16-car garage (being converted to a parkour-style gym)
    • Private control center
    • Vintage airport lounge-style bar

    Outdoor Amenities:

    • Two airplane parking pavilions
    • 7,500-foot runway extended to Travolta’s backdoor
    • Swimming pool with slide
    • Indoor cabana
    • Outdoor dining area
    • Dance floor with stonework flooring
    • Golf course

    5. Neighborhood Area

    The Jumbolair Aviation Estates where Travolta’s house is located is a unique neighborhood designed for aviation enthusiasts. The community is built around the Greystone Airport, allowing residents to fly in and out at their convenience.

    The estate includes about 550 acres of land, featuring not just Travolta’s property but also a 3,600-foot runway, a 7,600-square-foot mansion that once belonged to horse breeder Muriel Vanderbilt, an 8,700-square-foot conference center, and approximately seventeen unsold estates with runway access.

    This exclusive community caters to those who, like Travolta, want the ultimate convenience of being able to park their aircraft right outside their home. It’s a neighborhood where the sound of jet engines is as common as the chirping of birds, creating a truly unique living experience for its residents.

    Market Value

    Detail Information
    Build Year 1990s
    Purchase Year 2001
    Purchase Value $4.9 million
    Current Estimated Value $10.5 million (as of 2019 listing)
    House Condition Excellent, well-maintained

    John Travolta’s Real Estate Portfolio

    While John Travolta’s Florida aviation estate is his most famous property, it’s not the only real estate he’s owned over the years. Here’s a look at some of his other properties:

    1. Brentwood, California: Travolta previously owned an $18 million property in this upscale Los Angeles neighborhood. He sold this home in 2020.
    2. Clearwater, Florida: In 2017, Travolta and his late wife Kelly Preston purchased a waterfront home in Clearwater for $3 million. This 6,162-square-foot home features five bedrooms, five-and-a-half bathrooms, and a pool. Travolta sold this property in 2024 for $4 million.
    3. Maine Estate: Travolta owned a traditional estate on an island in Maine, which he purchased with Preston in 1991. In 2024, he listed this property for $5 million after dropping the price by $750,000.
    4. Calabasas, California: In 2019, Travolta purchased a Mediterranean-style villa in Calabasas for $2.7 million.

    These properties, along with his Florida aviation estate, showcase Travolta’s diverse real estate portfolio and his preference for unique, luxurious homes in various locations across the United States.

    Conclusion

    John Travolta’s house in Florida is more than just a luxury mansion – it’s a testament to his passion for aviation and his unique lifestyle. This $10 million estate, complete with private runways and airplane parking, perfectly blends Travolta’s love of flying with high-end living. From its midcentury design to its aviation-themed amenities, every aspect of this home reflects the Hollywood star’s personality and interests. As Travolta continues to call this aviation paradise home, it remains one of the most distinctive celebrity residences in the world.

  • How to Install Under-Cabinet Lighting in Your Kitchen

    How to Install Under-Cabinet Lighting in Your Kitchen

    Brightening up your kitchen workspace has never been easier or more stylish. Under-cabinet lighting is a game-changer, offering both functionality and ambiance to your culinary haven. Whether you’re a seasoned DIY enthusiast or a novice looking to upgrade your kitchen, installing under-cabinet lighting can transform your space from drab to fab.

    Imagine prepping meals with perfect visibility, showcasing your beautiful countertops, or simply creating a warm glow for those late-night snack runs. Under-cabinet lighting does it all, and the best part? It’s a project you can tackle yourself, saving money while adding value to your home.

    In this comprehensive guide, we’ll walk you through the process of installing under-cabinet lighting in your kitchen. From choosing the right fixtures to the final wiring, we’ve got you covered. So, roll up your sleeves, and let’s shed some light on your kitchen’s hidden potential!

    Under-Cabinet Lighting Options: Overview

    Before diving into the installation process, it’s crucial to understand the various types of under-cabinet lighting available. This knowledge will help you make an informed decision based on your kitchen’s needs and your personal preferences.

    LED strip lights are a popular choice due to their flexibility, energy efficiency, and long lifespan. These thin, adhesive-backed strips can be easily cut to size and installed in even the tightest spaces. They come in a variety of colors and brightness levels, allowing you to customize the look of your kitchen.

    Puck lights are another option, offering a more focused beam of light. These small, circular fixtures can be surface-mounted or recessed and are available in both battery-operated and wired versions. They’re great for creating spotlighting effects on your countertops.

    For a more traditional look, you might consider linear lights. These long, thin fixtures provide bright, even illumination and can be hardwired for a clean, professional appearance. They’re ideal for larger cabinet spans and offer consistent lighting across your entire workspace.

    Planning Your Under-Cabinet Lighting Project

    Before you start drilling holes or running wires, it’s essential to plan your lighting project carefully. This step will save you time, frustration, and potentially costly mistakes down the line.

    Start by measuring the length of each cabinet section where you want to install lighting. This will help you determine how many fixtures or how many LED strips you’ll need. Remember to account for any gaps between cabinets or obstacles like range hoods.

    Next, consider the power source for your lights. Will you be hardwiring them into your kitchen’s electrical system, or do you prefer a plug-in option? If you’re not comfortable working with electrical wiring, a plug-in system might be the safer choice. However, hardwired systems often look cleaner and more professional.

    Think about the color temperature of your lights as well. Warm white (2700-3000K) creates a cozy, inviting atmosphere, while cool white (4000-5000K) offers a crisp, clean look that’s great for task lighting. Some systems even allow you to adjust the color temperature to suit different times of day or moods.

    Gathering Your Tools and Materials

    With your plan in place, it’s time to gather the necessary tools and materials. Having everything on hand before you start will make the installation process smoother and more efficient.

    Here’s a basic list of what you’ll need:

    • Under-cabinet lights (LED strips, puck lights, or linear fixtures)
    • Mounting hardware (included with most lighting kits)
    • Screwdriver
    • Drill and drill bits
    • Wire stripper (for hardwired installations)
    • Electrical tape
    • Measuring tape
    • Pencil
    • Safety glasses
    • Gloves

    If you’re installing LED strips, you might also need:

    • LED controllers and power supplies
    • Connectors and extension cables
    • Aluminum mounting channels (optional, but recommended for a cleaner look)

    For hardwired installations, you’ll additionally need:

    • Electrical wire
    • Wire nuts
    • Junction boxes (if required by local code)

    Remember, safety should always be your top priority. If you’re not confident in your electrical skills, it’s best to consult a professional electrician.

    Preparing Your Kitchen for Installation

    Before you start installing your under-cabinet lighting, it’s important to prepare your kitchen space. This preparation will ensure a smooth installation process and help you achieve the best results.

    Start by clearing out the cabinets and removing any items from your countertops. This will give you unobstructed access to the underside of your cabinets and make it easier to work.

    Next, clean the underside of your cabinets thoroughly. Use a mild detergent and water solution to remove any grease or grime that might prevent adhesives from sticking properly. Allow the surfaces to dry completely before proceeding.

    If you’re installing hardwired lighting, you’ll need to turn off the power to your kitchen at the circuit breaker. Use a voltage tester to confirm that the power is indeed off before you start working with any electrical connections.

    For LED strip installations, take some time to plan out your light placement. Use a pencil to lightly mark where you’ll be placing your strips or mounting channels. Remember to leave some space at the ends for connectors and to account for any under-cabinet obstacles like support braces.

    Installing Your Under-Cabinet Lighting

    Now that you’ve prepared your kitchen and gathered your materials, it’s time for the main event: installing your under-cabinet lighting. The exact process will vary depending on the type of lighting you’ve chosen, but here’s a general guide to get you started.

    For LED strip lights:

    1. If using mounting channels, cut them to size and attach them to the underside of your cabinets using the provided adhesive or screws.
    2. Cut your LED strips to the appropriate length, making sure to cut only at the designated markings.
    3. Peel off the adhesive backing and carefully stick the strips into the mounting channels or directly onto the cabinet surface.
    4. Connect the strips using the provided connectors or extension cables.
    5. Connect the strips to the power supply and controller.

    For puck lights or linear fixtures:

    1. Mark the positions for your lights, ensuring even spacing.
    2. If your fixtures require it, drill pilot holes for the mounting screws.
    3. Attach the mounting brackets or the fixtures themselves to the underside of the cabinets.
    4. If hardwiring, connect the fixtures to your home’s electrical system, following all local codes and safety precautions.
    5. For plug-in systems, simply plug the lights into a nearby outlet.

    Remember to work carefully and double-check all connections before turning on your new lights. If you’re unsure about any step, especially when it comes to electrical work, don’t hesitate to consult a professional.

    Hiding Wires and Finishing Touches

    Once your lights are installed, you’ll want to ensure a clean, professional look by hiding any visible wires. This step not only improves the aesthetics of your kitchen but also protects the wiring from potential damage.

    For hardwired systems, most of the wiring will be hidden inside the cabinets or walls. However, for plug-in systems or LED strips with external power supplies, you’ll need to get creative.

    Use adhesive-backed cable clips to secure wires to the underside of your cabinets, keeping them out of sight. You can also use cord concealers that match your cabinet color to hide wires running along the backsplash or down to an outlet.

    If you have the option, consider drilling small holes in the back of your cabinets to route wires through. This can create a nearly invisible installation, especially for lights that span multiple cabinet sections.

    Finally, take a step back and admire your work! Turn on your new under-cabinet lights and adjust their positioning if necessary. This is also a good time to experiment with different brightness levels or color temperatures if your system allows for it.

    Maintenance and Troubleshooting

    Congratulations on installing your under-cabinet lighting! To keep your new lights functioning optimally, it’s important to perform some basic maintenance and know how to troubleshoot common issues.

    LED lights are generally low-maintenance, but they can accumulate dust over time. Every few months, gently wipe down your fixtures with a soft, dry cloth. For tougher grime, use a slightly damp cloth, being careful not to let moisture get into any electrical components.

    If you notice any flickering or dimming, first check all connections to ensure they’re secure. For hardwired systems, you may need to tighten wire nuts or replace worn electrical tape. With LED strips, sometimes simply reconnecting the strips to their power supply can solve the issue.

    For battery-operated puck lights, replace the batteries as needed. If you’re using rechargeable batteries, follow the manufacturer’s recommendations for charging cycles to maximize their lifespan.

    If a section of your LED strip stops working, you may be able to replace just that section rather than the entire strip. Most LED strips can be cut and reconnected, allowing for easy repairs.

    Benefits of Under-Cabinet Lighting

    Now that you’ve successfully installed your under-cabinet lighting, let’s explore the numerous benefits this upgrade brings to your kitchen.

    First and foremost, under-cabinet lighting significantly improves task lighting in your kitchen. It eliminates shadows on your countertops, making food preparation safer and more efficient. Whether you’re chopping vegetables, reading recipes, or measuring ingredients, you’ll appreciate the clear, focused light.

    Aesthetically, under-cabinet lighting can transform the look of your kitchen. It adds depth and dimension to your space, highlighting your backsplash and countertops. This subtle lighting can make your kitchen appear larger and more inviting, especially in the evening when overhead lights might feel too harsh.

    Energy efficiency is another major benefit, particularly if you’ve chosen LED lighting. These lights use significantly less energy than traditional bulbs, potentially lowering your electricity bills. They also generate less heat, which can be a welcome feature in a warm kitchen.

    Under-cabinet lighting can also increase your home’s value. It’s a relatively inexpensive upgrade that can make a big impact on potential buyers if you ever decide to sell your home. It’s seen as a modern, desirable feature in kitchens.

    Conclusion

    Installing under-cabinet lighting in your kitchen is a rewarding DIY project that can dramatically improve both the functionality and aesthetics of your space. From choosing the right type of lighting to the final installation and maintenance, this guide has walked you through each step of the process.

    Remember, the key to a successful installation lies in careful planning, proper preparation, and attention to detail. Whether you’ve opted for sleek LED strips, focused puck lights, or traditional linear fixtures, your new under-cabinet lighting will provide improved task lighting, enhanced ambiance, and potentially even energy savings.

    Don’t be afraid to get creative with your lighting design. Experiment with different color temperatures, brightness levels, and placement to find the perfect lighting scheme for your kitchen. And always prioritize safety, especially when working with electrical systems.

    With your new under-cabinet lighting in place, you’ll wonder how you ever cooked without it. Enjoy your brighter, more beautiful kitchen!

  • 15 Timeless Kitchen Lighting Ideas [Illuminate Your Culinary Space]

    15 Timeless Kitchen Lighting Ideas [Illuminate Your Culinary Space]

    Lighting can make or break your kitchen’s ambiance. But, did you know that proper kitchen lighting can increase your home’s value by up to 3%? That’s right! Good lighting isn’t just about seeing what you’re cooking; it’s about creating a warm, inviting space that’s the heart of your home.

    So, let’s dive into 15 kitchen lighting ideas that’ll brighten up your culinary world and maybe even fatten up your wallet!

    1. Pendant Lights Over Kitchen Island

    Pendant lights are like jewelry for your kitchen island. They’re not just pretty; they’re practical too. Hang them low enough to light up your workspace, but high enough so you don’t bump your head. And here’s a pro tip: odd numbers look best. Try three pendants for a medium-sized island or five for a longer one.

    But don’t just slap any old pendant up there. Choose ones that match your kitchen’s style. Going for a modern look? Sleek, metallic pendants might be your jam. More of a farmhouse fan? Rustic, wooden pendants could be perfect.

    Remember, these lights aren’t just for show. They need to provide enough light for you to chop, dice, and slice without accidentally adding a finger to the recipe.

    2. Under-Cabinet LED Strips

    Under-cabinet LED strips are like the unsung heroes of kitchen lighting. They’re out of sight but not out of mind. These little strips of light can make a big difference in your kitchen’s functionality and mood.

    Stick these babies under your cabinets, and suddenly, your countertops are bathed in a warm glow. No more squinting to read recipes or struggling to see if that chicken is fully cooked. Plus, they’re energy-efficient and long-lasting. Win-win!

    And here’s a cool trick: get color-changing LEDs. Want a cozy, warm light for everyday cooking? Done. Need a cool, bright light for detailed tasks? Just switch it up. It’s like having multiple kitchens in one!

    3. Recessed Ceiling Lights

    Recessed ceiling lights are like the backup singers of the kitchen lighting world. They might not be the stars of the show, but boy, do they make everything else look good. These lights sit flush with your ceiling, providing overall illumination without taking up any visual space.

    The key with recessed lights is placement. You don’t want to end up with weird shadows or dark corners. A good rule of thumb is to space them about 4 to 6 feet apart. And don’t forget to put them over key areas like the sink and stove.

    But here’s where it gets fun: you can use recessed lights to highlight cool features in your kitchen. Do you have a fancy backsplash? Use a recessed light to make it pop. Want to show off your cookbook collection? A well-placed recessed light can turn your shelves into a display.

    4. Statement Chandelier

    A statement chandelier in the kitchen? You bet! It’s like putting a tiara on your kitchen’s head. A chandelier can turn your kitchen from “meh” to “marvelous” faster than you can say “dinner’s ready”.

    Now, we’re not talking about those massive, crystal-dripping monsters you’d find in a ballroom. Think more along the lines of a modern, sculptural piece or a rustic, farmhouse-style fixture. The key is to choose something that fits your kitchen’s personality.

    But remember, size matters. A chandelier that’s too big will overwhelm your space, while one that’s too small will look lost. Measure your table or island and aim for a chandelier that’s about one-third the width of the surface it’s hanging over.

    5. Track Lighting Systems

    Track lighting is like the Swiss Army knife of kitchen lighting. It’s versatile, adjustable, and can tackle just about any lighting challenge you throw at it. Plus, it’s a great way to add a modern touch to your kitchen.

    The beauty of track lighting is that you can point the lights wherever you need them. Do you have a dark corner? Swivel a light that way. Want to highlight your fancy new appliances? There’s a light for that too. And if you decide to rearrange your kitchen later, you can just adjust the lights to fit your new layout.

    But don’t go overboard. Too many tracks can make your ceiling look cluttered. Stick to one or two tracks and choose fixtures that complement your kitchen’s style.

    6. Minimalist Globe Pendants

    Minimalist globe pendants are like the little black dress of kitchen lighting. They’re simple, elegant, and go with just about everything. These round, unadorned lights can add a touch of sophistication to any kitchen, whether it’s ultra-modern or cozy and traditional.

    The key to making globe pendants work is in the arrangement. A single large globe can make a statement over a small table or in a corner. For larger spaces, try a cluster of smaller globes at different heights. It’s like creating your little solar system right in your kitchen!

    And here’s a neat trick: choose frosted globes for a softer, more diffused light. It’s perfect for creating a warm, inviting atmosphere for those late-night snack raids.

    7. Industrial-Style Fixtures

    Industrial-style fixtures are like adding a dash of Brooklyn loft to your kitchen. They’re bold, they’re edgy, and they’re not afraid to show a little metal. These fixtures often feature exposed bulbs, metal cages, or pipes, giving your kitchen a cool, urban vibe.

    But don’t worry, you don’t need to live in a converted warehouse to pull this look off. Industrial fixtures can work in all sorts of kitchens. They add a nice contrast to softer, more traditional elements. It’s like mixing leather and lace – unexpected, but oh-so-stylish.

    Just remember, with industrial fixtures, less is often more. One or two statement pieces can add character without overwhelming your space. And if you’re feeling bold, mix metals for an eclectic, collected-over-time look.

    8. Smart Lighting Solutions

    Smart lighting is like having a tiny lighting designer living in your kitchen. These high-tech solutions allow you to control your lights with your voice or smartphone. It’s like living in the future, but today.

    Imagine walking into your kitchen and saying, “Hey Google, turn on the cooking lights.” Boom! Your workspace is perfectly lit for chopping veggies. Or maybe you’re having a romantic dinner. A quick tap on your phone and the lights dim to create the perfect mood.

    But smart lighting isn’t just about convenience. It can also help you save energy. Many systems can be programmed to turn off when you leave the room or adjust based on the natural light coming in. It’s like your lights are doing their part to save the planet!

    9. Layered Lighting Approach

    Layered lighting is like creating a perfect outfit – it’s all about combining different pieces to create a cohesive whole. In kitchen lighting terms, this means using a mix of ambient, task, and accent lighting to create a well-lit, functional, and beautiful space.

    Start with your ambient lighting – this is your overall illumination, often provided by ceiling fixtures or recessed lights. Then, add task lighting where you need it most, like under-cabinet lights for food prep areas. Finally, sprinkle in some accent lighting to highlight architectural features or decorative elements.

    The beauty of layered lighting is that it allows you to adjust the mood of your kitchen for different activities. Cooking dinner? Turn on all the lights. Have a cozy breakfast? Maybe just the pendant over the table and some accent lights. It’s like having multiple kitchens in one!

    10. Accent Lighting for Shelves

    Accent lighting for shelves is like putting a spotlight on your favorite kitchen stars. It’s a great way to show off your fancy dishes, family heirlooms, or that quirky salt and pepper shaker collection.

    LED strip lights or small puck lights work great for this. Tuck them under or behind shelves to create a warm glow that makes your display items pop. It’s like creating your little museum exhibit right in your kitchen!

    But accent lighting isn’t just about looks. It can also add depth to your kitchen, making the space feel larger and more inviting. And if you’re the type who likes to change things up often, accent lighting can help your new displays shine (literally) every time.

    11. Task Lighting for Workspaces

    Task lighting is like having a personal assistant for your eyes. It’s all about providing focused light exactly where you need it most. In the kitchen, this usually means your prep areas, stove, and sink.

    Under-cabinet lights are great for illuminating countertops. Pendant lights can provide focused light over an island or peninsula. And don’t forget about the sink – a well-placed sconce or recessed light can make dishwashing (slightly) less of a chore.

    The key to task lighting is to avoid harsh shadows. You don’t want to be chopping onions in the dark because your own body is blocking the light. So, think about installing lights slightly in front of you rather than directly overhead.

    12. Dimmable Fixtures

    Dimmable fixtures are like having a volume control for your lights. They allow you to adjust the brightness of your kitchen to suit any mood or activity. It’s like magic, but real.

    Cooking a complex recipe that requires your full attention? Crank those lights up to full brightness. Have a relaxed family dinner? Dim them down for a cozy atmosphere. Late-night snack run? Set them low enough to see but not so bright that you feel like you’re being interrogated.

    And here’s a pro tip: install dimmers on all your kitchen lights, not just the main ones. This gives you ultimate control over your kitchen’s ambiance. It’s like being the director of your kitchen lighting show!

    13. Oversized Decorative Pendants

    Oversized decorative pendants are like the exclamation points of kitchen lighting. They’re big, they’re bold, and they’re not afraid to steal the show. These fixtures can serve as a focal point in your kitchen, adding personality and style.

    Think of a large, woven bamboo pendant over your dining table or a massive industrial-style fixture above your island. These lights don’t just illuminate; they make a statement. It’s like hanging a piece of functional art in your kitchen.

    But remember, with great size comes great responsibility. Make sure your oversized pendant is in proportion to your space. You want it to be a showstopper, not a space-eater.

    14. Backlit Backsplash

    A backlit backsplash is like giving your kitchen its sunrise. It creates a warm, diffused glow that can transform your kitchen from ordinary to extraordinary. And the best part? It works with any style of backsplash.

    To create this effect, install LED strip lights behind a translucent backsplash material like frosted glass or onyx. The light shines through, creating a soft, ambient glow. It’s like having a window where there isn’t one!

    This type of lighting isn’t just pretty; it’s practical too. It can provide gentle illumination for late-night snacking or early-morning coffee runs when you don’t want to be blinded by bright overhead lights.

    15. Vintage-Inspired Sconces

    Vintage-inspired sconces are like the cherry on top of your kitchen lighting sundae. They add a touch of nostalgia and charm that can warm up even the most modern of kitchens. It’s like bringing a bit of grandma’s cozy kitchen into your sleek, contemporary space.

    These fixtures work great flanking a window, on either side of your range hood, or even as task lighting over a prep area. And don’t be afraid to mix and match styles. A pair of vintage sconces can add character to a minimalist kitchen, while sleek, modern sconces can add edge to a traditional space.

    Just remember, when it comes to vintage-inspired lighting, authenticity is key. Look for fixtures with quality materials and interesting details. It’s like hunting for treasure, but the reward is a beautifully lit kitchen!

    Conclusion

    Lighting your kitchen isn’t just about banishing shadows; it’s about creating a space that’s functional, beautiful, and uniquely yours. From pendant lights that dazzle to smart solutions that adapt to your needs, there’s a world of possibilities to explore. So go ahead, mix and match these ideas, and create a kitchen that truly shines. After all, good lighting is the secret ingredient to every great kitchen!

  • How to Choose the Best Paint Colors for Your Kitchen

    How to Choose the Best Paint Colors for Your Kitchen

    Picking the perfect paint colors for your kitchen can transform your cooking space from drab to fab. It’s not just about slapping on a trendy shade; it’s about creating a place where you’ll love to whip up meals and make memories. In 2024, kitchens are all about feeling cozy and connected to nature. People want their cooking spaces to be warm and inviting, not cold and clinical.

    So, how do you choose the best paint colors for your kitchen? It’s all about balancing your style with the latest trends and some practical considerations. Whether you’re into bold and bright or calm and subtle, there’s a perfect palette out there for you.

    Let’s dive in and explore the world of kitchen colors, from hot trends to timeless classics, and everything in between.

    Popular Kitchen Paint Colors for 2024

    As we step into 2024, kitchen color trends are taking an exciting turn. Gone are the days of all-white kitchens dominating every home decor magazine. This year, it’s all about creating a warm and inviting atmosphere that makes you want to linger over your morning coffee or spend hours cooking up a storm.

    One of the standout trends is the rise of blue in all its glorious shades. From deep navy to soft sky blue, this versatile color is making waves in kitchens across the country. Several major paint companies have named different shades of blue as their Color of the Year for 2024. It’s no wonder, as blue can create a sense of calm and serenity in your cooking space.

    But blue isn’t the only color making a splash. Sage Green has emerged as a top contender for kitchen cabinets. This muted, earthy tone brings a touch of nature indoors and pairs beautifully with wooden elements. For those who prefer a more neutral palette, warm beige is having a moment. It’s the perfect backdrop for both modern and traditional kitchen styles.

    Here’s a quick rundown of some popular kitchen paint colors for 2024:

    • Navy Blue: Bold and sophisticated
    • Sage Green: Natural and calming
    • Warm Beige: Cozy and versatile
    • Creamy White: Bright but not stark
    • Soft Gray: Modern and elegant

    Trending Color Palettes

    In 2024, kitchen color palettes are all about creating harmony and balance. Designers are moving away from monochromatic schemes and embracing combinations that add depth and interest to the space. The key is to choose colors that complement each other and reflect your style.

    One trending palette is the “earth and sky” combination. This involves pairing a deep blue or navy with warm, earthy tones like terracotta or sand. The result is a kitchen that feels grounded yet open and airy. Another popular choice is the “nature-inspired” palette, which combines various shades of green with natural wood tones and creamy whites.

    For those who love a bit of drama, the “moody modern” palette is gaining traction. This involves using dark, rich colors like charcoal gray or deep forest green as a base, then adding pops of metallic accents in gold or copper. It’s a bold choice that can make a real statement in your kitchen.

    Here are some trending color palettes to consider:

    • Earth and Sky: Navy blue + Terracotta + Sand
    • Nature-Inspired: Sage green + Natural wood + Creamy white
    • Moody Modern: Charcoal gray + Metallic gold accents
    • Warm Minimalist: Soft beige + Light gray + White
    • Coastal Cool: Sea blue + Sandy beige + Crisp white

    Factors to Consider When Selecting Kitchen Colors

    Choosing the best paint colors for your kitchen isn’t just about picking your favorite shade. There are several important factors to consider that can make or break your kitchen’s overall look and feel.

    First up is lighting. The amount and type of light in your kitchen can dramatically affect how colors appear. Natural daylight shows the truest color, while incandescent lighting brings out warm tones and yellows. Fluorescent lighting, on the other hand, can cast a sharp blue tone. Before you commit to a color, test it out at different times of the day to see how it changes in various lighting conditions.

    Next, think about the size of your kitchen. Dark colors can make a small kitchen feel even smaller, while light colors can help open up the space. If you have a tiny kitchen but love dark colors, consider using them as accents rather than painting the entire room.

    The style of your kitchen also plays a big role in color selection. A modern, minimalist kitchen might look best with crisp whites and grays, while a farmhouse-style kitchen could shine with warm, earthy tones. Think about the overall vibe you want to create and choose colors that support that vision.

    Don’t forget about existing elements in your kitchen. Your countertops, backsplash, and flooring all contribute to the color scheme. Choose a paint color that complements these features rather than clashing with them.

    Color Psychology in Kitchen Design

    Ever wonder why some kitchens just feel right? It might have something to do with color psychology. This fascinating field explores how different colors can affect our mood, behavior, and even our appetite. When it comes to kitchen design, understanding color psychology can help you create a space that not only looks good but feels good too.

    Let’s start with red. It’s a bold choice for a kitchen, but there’s a reason you see it in so many restaurants. Red is believed to stimulate appetite and encourage conversation. It’s energizing and can create a lively atmosphere, perfect for families who love to gather in the kitchen. However, too much red can be overwhelming, so it’s often best used as an accent color.

    On the other hand, blue is known for its calming effects. It can lower heart rate and blood pressure, creating a sense of tranquility. While this might seem great for a hectic kitchen, be careful. Blue is known to suppress appetite, which is why you don’t see it used much in restaurants. If you love blue, consider using it in a breakfast nook or on an accent wall rather than as the main color in your cooking area.

    Green is a fantastic choice for kitchens. It’s associated with nature, health, and renewal. Seeing green can make us think of fresh fruits and vegetables, which can promote healthier eating habits. Plus, it’s easy on the eyes and can create a sense of balance in your space.

    Yellow is another popular kitchen color, and for good reason. It’s associated with happiness and can brighten up even the darkest of spaces. Yellow is thought to increase metabolism and energy levels, making it a great choice for a busy kitchen. Just be careful not to go overboard – too much yellow can be overstimulating.

    Matching Paint Colors with Kitchen Elements

    Creating a cohesive look in your kitchen isn’t just about choosing a great paint color. It’s about how that color works with all the other elements in your space. From countertops to cabinets, each component plays a role in your kitchen’s overall color scheme.

    Let’s start with cabinets. They take up a big chunk of visual space in your kitchen, so they’re a key player in your color scheme. If you have wood cabinets, consider paint colors that complement the wood’s undertones. For example, warm woods like cherry or oak pair well with warm paint colors like beige or soft yellow. Cool-toned woods like ash or maple look great with cool paint colors like light blue or gray.

    Countertops are another important factor. If you have busy granite or marble countertops with lots of patterns, you might want to choose a more neutral wall color to balance things out. On the flip side, if you have solid-colored countertops, you have more freedom to go bold with your wall color.

    Don’t forget about your backsplash. If it’s a focal point with lots of color or pattern, you might want to keep your wall color simple. But if your backsplash is neutral, a pop of color on the walls can make your kitchen come alive.

    Flooring is often overlooked, but it’s a crucial part of your kitchen’s color scheme. Dark floors can ground space and allow for lighter wall colors, while light floors can open up a room and pair well with deeper wall colors.

    Paint Finishes for Kitchen Walls and Cabinets

    When it comes to choosing the best paint colors for your kitchen, don’t forget about the finish! The sheen of your paint can make a big difference in how the color looks and how well it holds up to the demands of a busy kitchen.

    For kitchen walls, a semi-gloss or satin finish is often the way to go. These finishes are durable and easy to clean, which is crucial in a space that’s prone to splatters and spills. They also have a slight sheen that can help bounce light around the room, making your kitchen feel brighter and more spacious. If you’re worried about the finish highlighting imperfections in your walls, an eggshell finish is a good compromise between durability and a smooth look.

    When it comes to cabinets, many pros swear by semi-gloss or high-gloss finishes. These are super durable and can stand up to frequent cleaning. Plus, they give cabinets a polished, high-end look. However, if you’re going for a more modern, matte look, there are now specialty cabinet paints that offer a durable flat finish.

    When painting cabinets, preparation is key. Make sure to clean them thoroughly, sand them down, and use a good primer before applying your chosen paint. This will help ensure a smooth, long-lasting finish that will keep your kitchen looking fresh for years to come.

    DIY Painting Tips for Kitchen Makeovers

    Ready to roll up your sleeves and give your kitchen a fresh new look? Painting your kitchen yourself can be a rewarding project that saves you money and gives you complete control over the final result. Here are some tips to help you choose the best paint colors for your kitchen and apply them like a pro.

    First things first: preparation is key. Before you even open a paint can, make sure your kitchen is ready. This means cleaning all surfaces thoroughly, repairing any cracks or holes, and sanding down rough spots. For the best results, remove all hardware from cabinets and drawers. It might seem like extra work, but trust us, it’s worth it for a smooth, professional-looking finish.

    When it comes to choosing paint, don’t skimp on quality. Kitchen paint needs to stand up to heat, moisture, and frequent cleaning. Look for paints specifically designed for kitchens and bathrooms. These often have added mildew resistance and are more durable than standard wall paint.

    Before you commit to a color, always test it out. Paint a large swatch on your wall or a piece of poster board and look at it at different times of the day. Colors can change dramatically depending on the light, so what looks great in the store might not work in your kitchen.

    Color Combinations for Different Kitchen Styles

    Every kitchen has its unique style, and the best paint colors for your kitchen will depend on the overall look you’re going for. Whether you’re aiming for a cozy farmhouse vibe or a sleek modern aesthetic, the right color combination can bring your vision to life.

    For a farmhouse kitchen, think creamy whites paired with warm wood tones. A popular combination is to use a soft white on the walls and cabinets, with pops of color in accessories or on an accent wall. Sage green or a muted blue can work beautifully for this accent color.

    For a modern kitchen, crisp whites and cool grays are often the go-to choices. But don’t be afraid to add a bold splash of color. A sleek white kitchen with one wall in a deep navy or charcoal can create a striking, contemporary look.

    If you’re into the industrial look, consider using deeper, more saturated colors. A deep green or blue can create a moody, atmospheric feel that pairs well with metal accents and exposed brick.

    For those who love a bit of vintage charm, pastel colors can work wonders. Soft mint green, pale yellow, or light pink can create a retro feel that’s both fun and sophisticated.

    Final Words

    Choosing the best paint colors for your kitchen is a journey of self-expression and creativity. Whether you’re drawn to the calming blues of 2024’s trends or the timeless appeal of a classic white kitchen, the perfect color is out there waiting for you. Consider your kitchen’s lighting, size, and existing elements, and don’t be afraid to trust your instincts. With the right colors, your kitchen can become more than just a place to cook – it can be the heart of your home, a space that inspires culinary creativity and brings people together. So grab those paint samples and start imagining the possibilities. Your dream kitchen is just a brush stroke away!

    Meta Description: Discover the best paint colors for your kitchen in 2024. From trendy blues to timeless neutrals, learn how to choose colors that reflect your style and create a welcoming space.

    Image Alt Text: Kitchen with trendy blue cabinets and white walls showcasing the best paint colors for 2024.

  • Tips for Choosing the Right Kitchen Sink and Faucet

    Tips for Choosing the Right Kitchen Sink and Faucet

    Looking to spruce up your kitchen? The sink and faucet combo is where it’s at! These workhorses are the heart of your kitchen, handling everything from washing veggies to scrubbing pots. But with so many options out there, how do you pick the perfect pair? Don’t worry, we’ve got your back!

    In this guide, we’ll walk you through some handy tips to help you choose a kitchen sink and faucet that’ll make your daily chores a breeze and your kitchen look amazing.

    Whether you’re a cooking enthusiast or just someone who wants a functional kitchen, getting the right sink and faucet is super important. It’s not just about looks – though that matters too! – it’s about finding something that fits your lifestyle and makes your time in the kitchen more enjoyable.

    So, let’s dive in and explore how to pick the best kitchen sink and faucet for your home.

    Assess Your Kitchen Needs

    Before you start shopping, take a moment to think about how you use your kitchen. This step is crucial in finding the perfect sink and faucet combo that’ll work for you.

    First off, consider how often you cook. If you’re always whipping up meals, you might want a bigger sink to handle those large pots and pans. On the flip side, if you’re more of a takeout person, a smaller sink might do the trick.

    Next, think about your cleaning routine. Do you like to let dishes soak? A deeper sink could be your best friend. Or maybe you prefer to wash as you go? In that case, a double-basin sink might be just what you need.

    Don’t forget about your family size either. Larger families usually mean more dishes, so a bigger sink or even a double basin could be a lifesaver. It’s all about making your kitchen work for you!

    Sink Materials Matter

    When it comes to kitchen sinks, the material you choose can make a big difference. Let’s break down some popular options:

    Stainless steel is a classic choice. It’s tough, easy to clean, and won’t break the bank. Plus, it goes with pretty much any kitchen style. Just keep in mind that it can show water spots and scratches over time.

    If you’re after something a bit fancier, consider a granite or composite sink. These are super durable and come in lots of colors. They’re great at resisting scratches and stains, but they can be on the pricier side.

    For a traditional look, porcelain sinks are hard to beat. They’re beautiful and easy to clean, but they can chip if you’re not careful. Cast iron sinks are another option – they’re super strong but pretty heavy.

    Remember, each material has its pros and cons. Think about what matters most to you – is it looks, durability, or easy maintenance?

    Size and Configuration

    Alright, let’s talk about size and shape. The right size sink can make your kitchen life so much easier.

    First up, measure your cabinet space. This will give you an idea of how big your sink can be. Standard kitchen sinks are usually between 22 and 33 inches wide, but there’s no one-size-fits-all rule here.

    Depth is important too. A sink that’s 8 to 10 inches deep is pretty standard and works well for most people. But if you’re always dealing with big pots, you might want to go deeper.

    Now, let’s chat about configuration. Single-bowl sinks are great for washing big items, while double-bowl sinks let you multitask – wash on one side, rinse in the other. There are even triple-basin sinks if you really want to get fancy!

    Here’s a quick comparison:

    Sink Type Pros Cons
    Single Bowl Great for large items, simple design Less versatile for multitasking
    Double Bowl Good for multitasking, separates tasks Smaller individual basins
    Triple Bowl Maximum flexibility Requires more space

    Remember, the best configuration depends on how you use your kitchen. There’s no right or wrong choice – it’s all about what works for you!

    Faucet Styles and Features

    Now that we’ve covered sinks, let’s talk faucets. The right faucet can make your sink even more useful and add a touch of style to your kitchen.

    There are a few main types of faucets to consider. Pull-down faucets have a spray head that pulls straight down, which is great for rinsing dishes or filling pots. Pull-out faucets work similarly, but the spray head pulls out towards you. These are super handy for reaching all corners of your sink.

    Single-handle faucets are simple and easy to use – just one lever controls both temperature and flow. Double-handle faucets give you more precise control but take up more space.

    Don’t forget about special features! Touchless faucets are awesome if you’re often cooking with messy hands. Some faucets even come with built-in water filtration systems.

    When picking a faucet, think about how tall it is too. You want to make sure it’s high enough to fit your biggest pots underneath.

    Matching Your Kitchen Style

    Your sink and faucet should look good in your kitchen too! They’re like the jewelry of your kitchen – they can really tie the whole look together.

    If you’ve got a modern kitchen, sleek stainless steel sinks and faucets with clean lines could be perfect. For a more traditional look, consider a farmhouse-style sink with a bridge faucet.

    Color is important too. Chrome and stainless steel are classic choices that go with everything. But don’t be afraid to try something different! Brushed nickel or bronze can add warmth, while matte black faucets are super trendy right now.

    Remember, your sink and faucet should complement each other and your overall kitchen style. It’s all about creating a cohesive look that makes you happy every time you walk into your kitchen.

    Installation Considerations

    Before you fall in love with a sink or faucet, think about installation. Some choices might need more work than others.

    Undermount sinks, which attach under the countertop, look sleek but can be trickier to install. Drop-in sinks are easier to put in but have a visible rim. Farmhouse sinks look amazing but might require you to modify your cabinets.

    For faucets, check how many holes your sink has. Some faucets need one hole, others need three or four. If your sink and faucet don’t match up, you might need to drill new holes or cover unused ones.

    If you’re not super handy, it might be worth getting a pro to install your new sink and faucet. They can make sure everything’s properly sealed and working right.

    Budget Considerations

    Let’s talk money. Sinks and faucets come in a wide range of prices, so it’s important to set a budget before you start shopping.

    Stainless steel sinks are usually the most affordable option. They’re durable and look good, making them great value for money. On the other hand, high-end materials like granite composite or custom-made sinks can be pretty pricey.

    For faucets, basic models start pretty cheap, but prices can go up quickly as you add features like touchless operation or special finishes. Remember, sometimes it’s worth spending a bit more for quality – a good faucet can last for years.

    Don’t forget to factor in installation costs if you’re not doing it yourself. And keep some wiggle room in your budget for unexpected expenses.

    Maintenance and Durability

    Nobody wants to spend all their time cleaning the kitchen sink. That’s why it’s smart to think about maintenance when you’re choosing your sink and faucet.

    Stainless steel is pretty low-maintenance – a quick wipe-down usually does the trick. Granite composite sinks are also easy to care for and resist stains well. Porcelain sinks look beautiful but might need a bit more TLC to keep them looking their best.

    For faucets, look for finishes that resist water spots and fingerprints. Some materials, like brushed nickel, are great at hiding small scratches and marks.

    Durability is key too. You want a sink and faucet that can stand up to daily use. Read reviews and check warranties before you buy. Sometimes, spending a bit more upfront can save you money in the long run if it means your sink and faucet last longer.

    Making the Final Decision

    Alright, you’ve got all the info – now it’s time to make a choice! Here are some final tips to help you decide:

    1. Make a list of your must-haves. What features can’t you live without?
    2. Set a budget and stick to it.
    3. Measure your space carefully to make sure everything will fit.
    4. Think about your long-term plans. Are you staying in this home for a while, or is this a quick update before selling?
    5. Don’t be afraid to ask for help. Kitchen pros can offer great advice.

    Remember, there’s no perfect choice for everyone. The best sink and faucet for you is the one that fits your needs, your style, and your budget. Take your time, do your research, and trust your gut. With these tips, you’re sure to find a kitchen sink and faucet combo that you’ll love for years to come!

    Meta Description: Discover essential tips for choosing the right kitchen sink and faucet. Learn about materials, styles, and features to find the perfect combo for your home.

    Image Alt Text: Modern kitchen with stylish sink and faucet, showcasing tips for choosing the right kitchen sink and faucet.

    Wrapping It Up

    So there you have it, folks! Choosing the right kitchen sink and faucet doesn’t have to be as tricky as solving a Rubik’s cube blindfolded. Remember, it’s all about finding what works best for you and your kitchen. Think about size, style, material, and features that’ll make your daily kitchen tasks a breeze. Don’t forget to consider your budget and installation options too!

    At the end of the day, your perfect sink and faucet combo is out there waiting for you. Armed with these tips, you’re ready to make a choice that’ll have you whistling while you work (or at least while you wash dishes).

    So go ahead, and dive into the world of kitchen sinks and faucets. Your kitchen’s about to get a whole lot more awesome!

  • How to Add More Storage to Your Kitchen Without Expanding

    How to Add More Storage to Your Kitchen Without Expanding

    Are you tired of cluttered countertops and overflowing cabinets? It’s time to add more storage to your kitchen! Whether you’re working with a tiny apartment galley or a spacious family kitchen, there’s always room for improvement when it comes to organization.

    Let’s dive into some clever ways to maximize your kitchen’s potential and create a more functional, stress-free cooking space.

    Imagine walking into a kitchen where everything has its place. No more frantically searching for that one spice jar or struggling to find a home for your new gadget. With the right storage solutions, you can transform your kitchen into an efficient culinary haven.

    From simple DIY tricks to innovative design ideas, we’ll explore a wide range of options to help you make the most of every nook and cranny.

    Maximize Cabinet Space

    When it comes to adding more storage to your kitchen, your cabinets are the perfect place to start. These hidden spaces often hold untapped potential. With a few smart adjustments, you can dramatically increase their storage capacity.

    First, let’s talk about drawer organizers. These simple inserts can work wonders in keeping your utensils, cutlery, and small gadgets in order. No more jumbled mess every time you open a drawer! You can find adjustable organizers that fit most standard drawer sizes, or even create your own using small boxes or dividers.

    Another game-changer for cabinet storage is pull-down shelves. These nifty additions bring hard-to-reach items right to you. Install them in upper cabinets to easily access dishes, glasses, or rarely used appliances. They’re especially helpful for shorter individuals or those with mobility issues.

    Don’t forget about the power of extra shelves. Many cabinets have more vertical space than we utilize. By adding an extra shelf or two, you can effectively double your storage capacity. Look for adjustable shelf inserts or consider having custom shelves installed to fit your specific needs.

    Utilize Vertical Space

    When floor space is at a premium, it’s time to look up! Vertical storage solutions can add a significant amount of storage without taking up valuable real estate on your counters or floor.

    Wall-mounted racks are a versatile option for vertical storage. They come in various styles and sizes, perfect for holding everything from pots and pans to spices and utensils. Install a rack near your cooking area for easy access to frequently used items. Some racks even come with hooks or shelves, offering multiple storage options in one unit.

    Speaking of pots and pans, hanging storage is a classic solution that never goes out of style. A ceiling-mounted pot rack not only frees up cabinet space but also adds a touch of rustic charm to your kitchen. If you’re not keen on ceiling installation, consider a wall-mounted version or even a freestanding rack that can be placed against a wall.

    For knife storage, magnetic knife strips are a space-saving alternative to bulky knife blocks. They keep your knives within easy reach while freeing up drawer or counter space. Plus, they allow your knives to air dry, which can help prevent rust and extend their lifespan.

    Optimize Countertop Storage

    Countertop space is precious in any kitchen. By optimizing how you use this area, you can add more storage to your kitchen without sacrificing workspace.

    Kitchen islands are a fantastic way to add both storage and counter space. If you have room for a permanent island, consider one with built-in cabinets or drawers. For smaller kitchens or those who prefer flexibility, a rolling island can be a great option. These can be moved as needed and often come with shelves or hooks for additional storage.

    Corner organizers can turn awkward counter spaces into useful storage areas. Tiered corner shelves or lazy Susans can help you make the most of these often-underutilized spots. Use them to store spices, oils, or small appliances that you use frequently but don’t want to clutter your main work area.

    Stackable containers are another excellent way to maximize counter space. Look for sets that are designed to fit together neatly, creating vertical storage for dry goods, snacks, or even produce. Clear containers not only look neat but also allow you to easily see what’s inside, reducing the chances of forgetting about items tucked away in the back of a cabinet.

    Enhance Pantry Organization

    A well-organized pantry can significantly increase your kitchen’s storage capacity. Even if you don’t have a dedicated pantry room, these tips can help you make the most of any food storage area.

    Door-mounted organizers are a pantry game-changer. These systems attach to the inside of your pantry door, creating additional storage space for spices, snacks, or small canned goods. It’s an easy way to add more storage to your kitchen without any major renovations.

    Lazy Susans aren’t just for corner cabinets. In the pantry, they can make it easy to access items stored on deep shelves. Place one on each shelf to keep canned goods, baking supplies, or condiments within easy reach. No more digging through the back of the shelf to find what you need!

    Clear storage bins are essential for keeping your pantry organized. Use them to group similar items, making it easy to see what you have and what you need to restock. Label each bin for even easier identification. This system not only keeps your pantry tidy but can also help reduce food waste by preventing items from getting lost and forgotten.

    Clever Under-Sink Storage

    The space under your sink is often overlooked, but it can provide valuable storage for cleaning supplies and other kitchen essentials. With the right organization, you can turn this area into a storage powerhouse.

    Stackable drawers are a great option for under-sink storage. Look for units designed to fit around plumbing pipes. These drawers can hold cleaning products, sponges, trash bags, and more. The ability to stack them allows you to make the most of the vertical space available.

    Pull-out organizers are another excellent choice for under-sink storage. These units slide out like drawers, giving you easy access to items stored in the back. Some models even have adjustable shelves or compartments, allowing you to customize the storage to fit your specific needs.

    For a budget-friendly solution, try using tension rods to create hanging storage for spray bottles. Install a rod across the width of your under-sink cabinet, and you can hang cleaning supplies by their triggers. This keeps them off the bottom of the cabinet, freeing up space for other items.

    Innovative Appliance Storage

    Kitchen appliances can take up a lot of space, but with some innovative storage solutions, you can keep them accessible without cluttering your counters.

    Appliance garages are a clever way to store frequently used items like toasters or coffee makers. These built-in spaces, often with roll-up doors, keep appliances hidden when not in use but easily accessible when needed. If a full renovation isn’t in your budget, consider a countertop version that can achieve a similar effect.

    Pull-out appliance shelves can be installed in existing cabinets to make heavy appliances more accessible. These shelves extend fully, allowing you to easily lift out your stand mixer or food processor without straining. When not in use, simply slide the shelf back into the cabinet, keeping your counters clear.

    Don’t forget about the space above your refrigerator! This area is often underutilized but can provide valuable storage. Install a cabinet or open shelving to store items you don’t use every day, like large serving platters or seasonal cookware.

    Maximize Small Spaces

    Even the tiniest kitchens can benefit from smart storage solutions. With a bit of creativity, you can add more storage to your kitchen without making it feel cramped.

    Foldable or extendable surfaces can provide extra workspace when you need it, without taking up permanent space. Consider a fold-down table attached to the wall or a pull-out cutting board that tucks away when not in use. These solutions are perfect for small kitchens where every inch counts.

    Narrow rolling carts can fit into tight spaces, providing additional storage and a mobile work surface. Look for carts with multiple tiers to maximize vertical storage. These can be used to store everything from pantry items to cookware and can be easily moved out of the way when not needed.

    Over-the-door organizers aren’t just for closets. They can be a great addition to your kitchen, especially if you’re short on cabinet space. Use them on the back of your pantry door or even on a kitchen closet door to store spices, utensils, or cleaning supplies.

    Smart Refrigerator Organization

    Your refrigerator is more than just a place to keep food cold. With the right organization, it can become a storage powerhouse, helping you make the most of this valuable kitchen real estate.

    Stackable bins are a game-changer for fridge organization. Use them to group similar items, like dairy products or leftovers. Clear bins allow you to see what’s inside at a glance, reducing the time you spend searching for items and helping prevent food waste.

    Magnetic organizers can turn the sides of your fridge into useful storage space. Use magnetic spice tins to keep herbs and spices handy, or attach magnetic hooks to hang kitchen towels or oven mitts. This frees up drawer and cabinet space for other items.

    Don’t forget about the power of the Lazy Susan in your fridge! Place one on a shelf to easily access condiments or small jars. No more knocking everything over trying to reach that jar of pickles in the back!

    Efficient Drawer Organization

    Well-organized drawers can significantly increase your kitchen’s storage capacity. With a few simple tricks, you can transform cluttered, chaotic drawers into efficient storage spaces.

    Custom dividers are a great way to keep drawers organized. You can buy adjustable dividers or make your own using materials like wood or acrylic. These dividers can be arranged to fit your specific needs, creating dedicated spaces for different types of utensils or gadgets.

    Tiered organizers are perfect for maximizing vertical space in deep drawers. Use them for storing spices, small jars, or even cutlery. With multiple levels, you can see and access everything easily without having to dig through a jumbled mess.

    Utensil trays are a classic for a reason. They keep your forks, spoons, and knives neatly separated and easy to grab. Look for expandable trays that can grow with your collection, or consider custom inserts that fit your drawer dimensions perfectly.

    Open Shelving Solutions

    Open shelving can be a stylish and practical way to add more storage to your kitchen. It not only provides easy access to frequently used items but also creates an opportunity to display attractive dishes or decorative elements.

    Floating shelves are a popular choice for open shelving. They can be installed almost anywhere and come in a variety of styles to match your kitchen decor. Use them to store everyday dishes, cookbooks, or even plants to add a touch of greenery to your kitchen.

    If you have windows in your kitchen, consider installing glass shelving. These shelves allow light to pass through, keeping your kitchen bright while providing additional storage space. They’re perfect for displaying glassware or colorful dishes.

    Corner shelving units can turn awkward spaces into useful storage areas. Look for units designed specifically for corners, which can maximize the use of these often-underutilized spots. Use them to store cookbooks, small appliances, or decorative items.

    Adding more storage to your kitchen doesn’t have to be a daunting task. With these smart solutions, you can transform your kitchen into an organized, efficient space that’s a joy to cook in. Remember, the key is to make the most of every available space, from your cabinets to your walls to your refrigerator. By implementing even a few of these ideas, you’ll be well on your way to a clutter-free, storage-rich kitchen.

    Happy organizing!

  • How to Upgrade Your Kitchen on a Tight Budget

    How to Upgrade Your Kitchen on a Tight Budget

    Dreaming of a fresh, new kitchen but worried about the cost? You’re not alone. In 2024, many homeowners are looking to upgrade their kitchens without breaking the bank. The good news is, that it’s totally possible to give your kitchen a makeover on a shoestring budget.

    Let’s dive into some clever ways to transform your cooking space without emptying your wallet.

    Understanding Kitchen Remodel Costs

    Before we jump into budget-friendly ideas, it’s important to know what you’re up against. In 2024, the average kitchen remodel costs around $26,256, or about $150 per square foot. That’s a lot of dough! But don’t worry, you don’t need to spend that much to make a big impact.

    Small projects can cost as little as $10,000, which might include painting, replacing the sink, installing a tile backsplash, and changing cabinet fronts. The key is to focus on what matters most to you and your family.

    Here’s a quick breakdown of average costs for different kitchen sizes:

    • Small Kitchen (less than 70 sq ft): $5,000 – $15,000
    • Medium Kitchen (70-150 sq ft): $10,000 – $25,000
    • Large Kitchen (over 150 sq ft): $15,000 – $35,000

    Remember, these are just averages. Your actual costs will depend on the materials you choose and how much work you’re willing to do yourself.

    Budget-Friendly Kitchen Makeover Strategies

    Now, let’s get to the good stuff. How can you upgrade your kitchen without spending a fortune? It’s all about being smart with your choices and getting creative.

    First off, planning is key. Take some time to think about what you want to change in your kitchen. Make a list of must-haves and nice-to-haves. This will help you focus your budget on the things that matter most.

    One of the biggest money-savers is doing some of the work yourself. While you should leave electrical and plumbing to the pros, there’s a lot you can do on your own. Painting cabinets, installing new hardware, or even laying peel-and-stick tiles are all DIY-friendly projects that can save you big bucks.

    Another smart strategy is to keep your current layout. Moving plumbing or electrical outlets can eat up a huge chunk of your budget. By keeping your sink, oven, and fridge where they are, you can save thousands.

    Low-Cost High-Impact Updates

    Sometimes, it’s the little things that make the biggest difference. Here are some low-cost updates that can transform your kitchen:

    1. Paint your cabinets: A fresh coat of paint can make old cabinets look brand new. White remains the most popular color, but don’t be afraid to go bold!
    2. Update hardware: Swapping out old knobs and pulls is like giving your kitchen a new piece of jewelry. It’s amazing how much this small change can update the whole look.
    3. Add a backsplash: Peel-and-stick tiles are budget-friendly and easy to install. They come in tons of styles, so you can find one that fits your taste.
    4. Upgrade lighting: New light fixtures can change the whole mood of your kitchen. Look for sales or even second-hand options to save money.

    Remember, you don’t have to do everything at once. Tackling one project at a time can help spread out the cost and make the process less overwhelming.

    Affordable Countertop Solutions

    Countertops can be one of the most expensive parts of a kitchen remodel. But there are ways to get a great look without spending a fortune. Laminate countertops have come a long way in recent years. They now come in styles that mimic the look of granite or marble at a fraction of the cost.

    Another budget-friendly option is the butcher block. It’s warm, and natural, and can be a DIY project if you’re feeling handy. Plus, it’s easy to sand and refinish if it gets scratched or stained.

    If you’re set in stone, consider using it sparingly. Maybe use it on an island or a small section of countertop, and use a less expensive material for the rest. This way, you get the look you want without blowing your budget.

    Smart Appliance Upgrades

    Appliances can eat up a big part of your budget, but they’re also where you can save a lot of money in the long run. Look for energy-efficient models that will help lower your utility bills. And don’t forget to check for rebates or tax credits for energy-efficient appliances.

    Consider buying during sales periods like Black Friday or end-of-year clearances. You can often find great deals on last year’s models, which are still fantastic appliances.

    If your appliances are still in good working order, consider giving them a facelift instead of replacing them. You can paint a refrigerator with appliance paint or add new panels to a dishwasher to match your new kitchen style.

    Creative Storage Solutions

    One of the biggest complaints about kitchens is lack of storage. But adding new cabinets can be expensive. Instead, think creatively about how to maximize the space you have.

    Open shelving is a trendy and budget-friendly option. It can make your kitchen feel more open and gives you a chance to display pretty dishes or cookbooks. Just be sure to keep things neat and organized to avoid a cluttered look.

    Another smart idea is to use the inside of cabinet doors. Add hooks for measuring cups or spices, or install a small whiteboard for grocery lists. These little touches can make a big difference in how functional your kitchen feels.

    Don’t forget about vertical space. A pot rack hanging from the ceiling can free up cabinet space and add a professional chef’s touch to your kitchen.

    Lighting on a Budget

    Good lighting can make or break a kitchen, and luckily, it doesn’t have to cost a fortune. Start by maximizing natural light. Clean your windows and consider removing heavy curtains to let in more sunshine.

    For artificial lighting, think in layers. You need task lighting for cooking areas, ambient lighting for overall illumination, and maybe some accent lighting to highlight special features. LED strip lights under cabinets are an affordable way to add both task lighting and a modern touch.

    Don’t be afraid to mix and match. You can find great deals on light fixtures at thrift stores or online marketplaces. Just make sure they’re in good condition and have them checked by an electrician before installing.

    Flooring Options for Less

    Flooring can be another big expense, but there are ways to get a great look for less. Vinyl plank flooring has come a long way in recent years. It’s durable, water-resistant, and comes in styles that mimic wood or tile at a fraction of the cost.

    If you’re feeling handy, peel-and-stick tiles can be a great DIY option. They come in a variety of styles and are easy to install. Just make sure your subfloor is in good condition before you start.

    For a budget-friendly option, consider painting your existing floor. This works best on wood floors, but with the right prep and paint, you can even paint over tile or linoleum.

    Backsplash on a Budget

    A new backsplash can change the look of your kitchen, and it doesn’t have to cost a lot. Peel-and-stick tiles are a popular choice for DIYers. They’re easy to install and come in a wide range of styles.

    If you’re feeling a bit more adventurous, consider using unconventional materials. Beadboard, corrugated metal, or even wallpaper covered with clear acrylic can make for unique and budget-friendly backsplashes.

    For a low-cost option, consider painting your existing backsplash. There are special paints designed for tile that can give you a whole new look for the cost of a few cans of paint.

    Sustainable and Cost-Effective Choices

    In 2024, more and more homeowners are looking for eco-friendly options in their kitchen remodels. The good news is, that many sustainable choices are also budget-friendly.

    Consider using reclaimed materials. Old barn wood can make beautiful open shelving, and salvaged cabinet doors can be repurposed into a unique kitchen island.

    When shopping for appliances, look for energy-efficient models. They might cost a bit more upfront, but they’ll save you money on your energy bills in the long run.

    Don’t forget about water conservation. Low-flow faucets and water-efficient dishwashers can help reduce your water usage and your bills.

    Financing Your Budget Kitchen Remodel

    Even with all these budget-friendly ideas, a kitchen remodel can still be a significant expense. Here are some ways to finance your project:

    1. Save up: This is the most budget-friendly option, as you won’t have to pay any interest.
    2. Home equity loan or line of credit: If you have equity in your home, this can be a low-interest way to finance your remodel.
    3. Personal loans: These usually have higher interest rates but can be a good option if you don’t have home equity.
    4. Credit card: Some cards offer 0% interest for a promotional period, which can be helpful if you can pay off the balance quickly.
    5. Manufacturer financing: Some appliance or cabinet manufacturers offer financing options.

    Remember, whatever financing option you choose, make sure you understand all the terms and can comfortably make the payments.

    Upgrading your kitchen on a tight budget is all about making smart choices and being willing to get your hands dirty. Focus on the changes that will make the biggest impact on your family, and don’t be afraid to tackle some projects yourself. With a little creativity and elbow grease, you can have a kitchen you love without breaking the bank.