Blog

  • Open vs Closed Kitchen Layouts: Which One is Right for You?

    Open vs Closed Kitchen Layouts: Which One is Right for You?

    When it comes to kitchen design, one of the biggest decisions homeowners face is whether to go for an open kitchen or a closed kitchen. It’s like choosing between a party-friendly space or a cozy culinary retreat. This choice can make or break your home’s flow, functionality, and overall vibe.

    So, let’s dive into the world of kitchen layouts and explore the ins and outs of open vs closed kitchens. We’ll look at everything from design trends to practical considerations, helping you make the best choice for your home and lifestyle.

    Understanding Open and Closed Kitchen Concepts

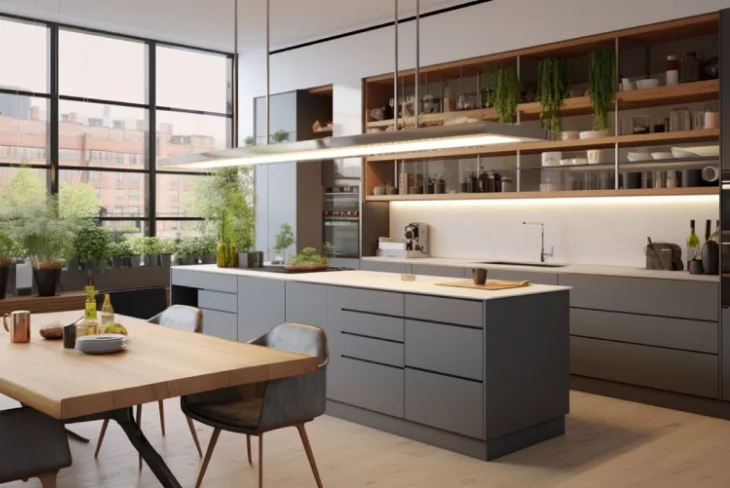
    Let’s start with the basics. An open kitchen is like a social butterfly. It’s a space that flows freely into other living areas, usually without walls or doors separating it from the dining or living room. It’s all about connectivity and creating a sense of spaciousness. On the other hand, a closed kitchen is more like a private sanctuary. It’s a separate room, enclosed by walls and a door, keeping cooking activities contained and out of sight from the rest of the house.

    The concept of open kitchens gained popularity in the late 20th century as homes started to embrace more casual, integrated living spaces. It’s a reflection of how our lifestyles have changed, with cooking becoming more of a social activity rather than a chore hidden away. Closed kitchens, while traditional, have been making a comeback in recent years as people rediscover the benefits of a dedicated cooking space.

    Pros and Cons of Open Kitchens

    Open kitchens have their fair share of advantages and disadvantages. Let’s break it down:

    Advantages Disadvantages
    Creates a spacious feel Cooking odors spread easily
    Enhances social interaction Noise travels throughout space
    Improves natural light flow Less privacy for the cook
    Facilitates multitasking Harder to hide kitchen messes
    Modern and trendy aesthetic Can be more expensive to heat/cool

    Open kitchen designs are great for those who love to entertain. They allow the cook to be part of the action, chatting with guests or keeping an eye on kids while preparing meals. The open concept also makes small spaces feel larger and brighter, as natural light can flow more freely throughout the area.

    However, it’s not all roses. With an open kitchen, there’s nowhere to hide those dirty dishes when unexpected guests pop by. And if you’re cooking up a storm, the whole house might end up smelling like your latest culinary experiment. Plus, the lack of walls means noise from appliances can travel easily, potentially disrupting activities in adjacent living spaces.

    Benefits and Drawbacks of Closed Kitchens

    Now, let’s look at what closed kitchens bring to the table:

    Advantages Disadvantages
    Contains cooking odors Can feel isolated
    Offers privacy for the cook May appear smaller
    Easier to keep the mess hidden Less natural light
    Better noise control Limited social interaction
    More wall space for storage Can feel outdated

    Closed kitchen layouts shine when it comes to containment. Cooking smells, messes, and noise stay put, which is great if you prefer to keep your culinary chaos under wraps. They also offer more privacy, which can be a blessing if you’re not keen on guests watching your every move as you cook.

    But closed kitchens aren’t without their drawbacks. They can feel isolated, cutting the cook-off from family activities or social gatherings. They might also appear smaller and darker compared to their open counterparts, especially if there’s limited natural light. In today’s real estate market, some buyers might view a closed kitchen as outdated, potentially impacting your home’s resale value.

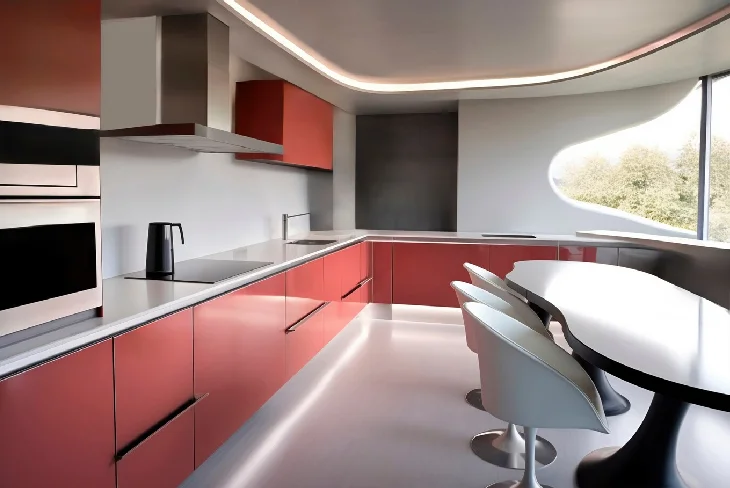
    Design Considerations for Open Kitchens

    When planning an open kitchen design, there are several key factors to keep in mind. First up is the kitchen island. It’s not just a workspace; it’s often the star of the show in an open layout. Islands can serve multiple purposes – from food prep areas to casual dining spots or even a home office nook. They’re great for creating a natural division between the kitchen and living spaces without putting up walls.

    Lighting is another crucial element in open kitchens. You’ll want to create a cohesive lighting scheme that works for both cooking and lounging. Think about layering your lighting with a mix of task lighting for food prep, ambient lighting for overall illumination, and maybe some statement pendant lights over the island for a touch of style.

    Color coordination is also key in open kitchens. Since the space is visible from other areas, you’ll want to choose a color palette that flows well with the rest of your home. This doesn’t mean everything has to match perfectly, but there should be a sense of harmony in your color choices.

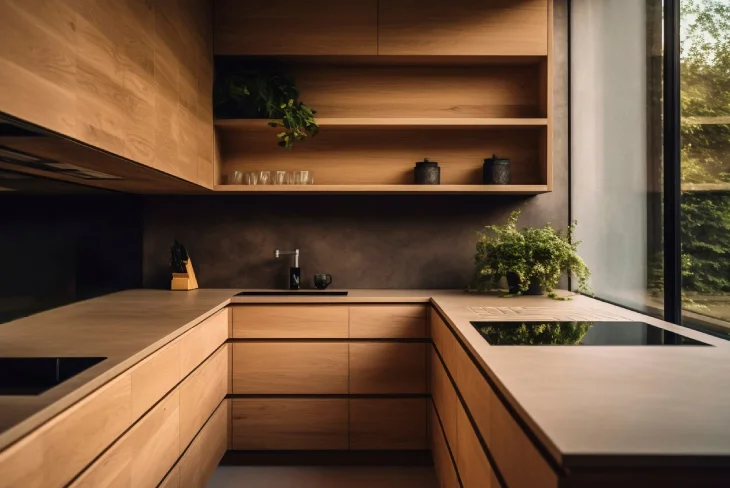
    Maximizing Functionality in Closed Kitchens

    While open kitchens might be trending, closed kitchen designs have their unique advantages when it comes to functionality. One of the biggest perks is the abundance of wall space. This means more room for kitchen cabinets, shelving, and appliances. You can maximize your storage options in a closed kitchen, which is great for keeping clutter at bay and organizing all your cooking gadgets.

    Ventilation is another area where closed kitchens shine. With a contained space, it’s easier to install an effective ventilation system that quickly removes cooking odors and steam. This can be especially beneficial if you do a lot of heavy-duty cooking or frying.

    In terms of layout, closed kitchens often follow the classic work triangle concept, placing the sink, stove, and refrigerator in a triangular configuration for optimal efficiency. This tried-and-true layout can make meal prep a breeze, minimizing unnecessary steps and maximizing productivity.

    Impact on Home Value and Resale

    When it comes to home value, the debate between open and closed kitchens isn’t clear-cut. In recent years, open kitchens have been a popular selling point, often associated with modern, updated homes. They can make a house feel more spacious and appealing to potential buyers who prioritize entertaining and family-friendly layouts.

    However, the tide might be turning. As more people work from home and seek privacy, closed kitchens are gaining renewed appreciation. They offer a separate space for messy cooking projects and can provide a quiet area for remote work or homework.

    Ultimately, the impact on resale value depends on various factors, including your local real estate market, the overall style of your home, and the preferences of potential buyers in your area. It’s always a good idea to consult with a local real estate agent to understand what’s most desirable in your specific market.

    Adapting Kitchen Layouts to Different Lifestyles

    Your kitchen layout should reflect your lifestyle and how you use the space. For busy families, an open kitchen might be ideal. It allows parents to keep an eye on kids while cooking and facilitates easy movement between homework, meal prep, and family time.

    On the flip side, if you’re a serious cook who loves to experiment with complex recipes, a closed kitchen might be more your style. It provides a dedicated space for culinary pursuits without worrying about messes or smells affecting the rest of the house.

    For those who frequently entertain, both layouts have their merits. An open kitchen allows the host to interact with guests while preparing food. A closed kitchen, however, can be great for more formal entertaining, keeping the mess out of sight and allowing for a big reveal when the meal is ready.

    Energy Efficiency and Ventilation Comparisons

    When it comes to energy efficiency, open and closed kitchens each have their pros and cons. Open kitchens can benefit from better natural light, potentially reducing the need for artificial lighting during the day. However, they can be more challenging to heat and cool efficiently, as the kitchen area is part of a larger space.

    Closed kitchens, being smaller and contained, are often easier to climate control. You can adjust the temperature specifically for the kitchen without affecting the rest of the house. This can be especially beneficial when using heat-generating appliances like ovens.

    Ventilation is another key consideration. In open kitchens, cooking odors can spread more easily throughout the house. This means you might need a more powerful ventilation system to keep smells under control. Closed kitchens, on the other hand, can contain cooking odors more effectively, potentially requiring less powerful (and less energy-intensive) ventilation systems.

    Storage Solutions

    Storage is a crucial aspect of any kitchen design, and the open vs closed debate brings different challenges and opportunities. In open kitchen layouts, you’ll need to be more mindful of how your storage solutions look, as they’re on display. This might mean opting for attractive open shelving to showcase your favorite dishes or stylish containers for pantry items.

    Closed kitchens typically offer more wall space for kitchen cabinets and shelving. This can be a big plus if you have a lot of kitchen gadgets or prefer to keep things hidden away. You might have room for a walk-in pantry or additional appliance garages to keep countertops clutter-free.

    In both cases, clever storage solutions are key. Think about pull-out drawers for pots and pans, vertical dividers for baking sheets, and lazy Susans for corner cabinets. The goal is to maximize every inch of space, regardless of your kitchen layout.

    Lighting Strategies for Both Kitchen Types

    Lighting can make or break a kitchen’s functionality and ambiance. In open kitchens, you’ll need to consider how the lighting works not just for cooking tasks, but also for the adjoining living spaces. Layered lighting is often the way to go, combining task lighting (like under-cabinet lights) with ambient lighting (such as recessed ceiling lights) and accent lighting (like pendant lights over an island).

    Closed kitchens might require a different approach. Without as much natural light, you might need to rely more heavily on artificial lighting. Good task lighting is crucial, especially over work areas. But don’t forget about ambient lighting to create a warm, inviting atmosphere. Consider adding a statement light fixture to inject some personality into the space.

    In both cases, dimmable lights are a great option. They allow you to adjust the brightness depending on whether you’re chopping vegetables or enjoying a quiet cup of coffee.

    Cost Analysis

    When it comes to kitchen renovations, the costs can vary significantly between open and closed layouts. Converting a closed kitchen to an open concept often involves removing walls, which can be a major expense. You might need to relocate plumbing, electrical, and HVAC systems, not to mention potential structural changes if you’re removing load-bearing walls.

    On the flip side, creating a closed kitchen from an open layout typically involves adding walls, which can be less expensive than removing them. However, you’ll need to factor in the cost of doors, additional electrical work, and possibly extending flooring and ceiling treatments.

    In terms of finishes, open kitchens might require higher-end materials throughout, as they’re more visible. With closed kitchens, you might be able to save by using less expensive finishes in areas that aren’t as visible.

    Remember, the most cost-effective option is often to work with your existing layout as much as possible. Major structural changes will always add significantly to your renovation budget.

    Trends in Kitchen Design for 2024 and Beyond

    As we look to the future of kitchen design, several trends are emerging that apply to both open and closed layouts. Smart kitchen technology is becoming increasingly popular, with voice-activated faucets, smart refrigerators, and app-controlled ovens leading the way.

    Sustainability is another key trend. We’re seeing a rise in eco-friendly materials like bamboo cabinetry, recycled glass countertops, and energy-efficient appliances. There’s also a growing interest in incorporating plants into kitchen design, whether through herb gardens, living walls, or simply more houseplants.

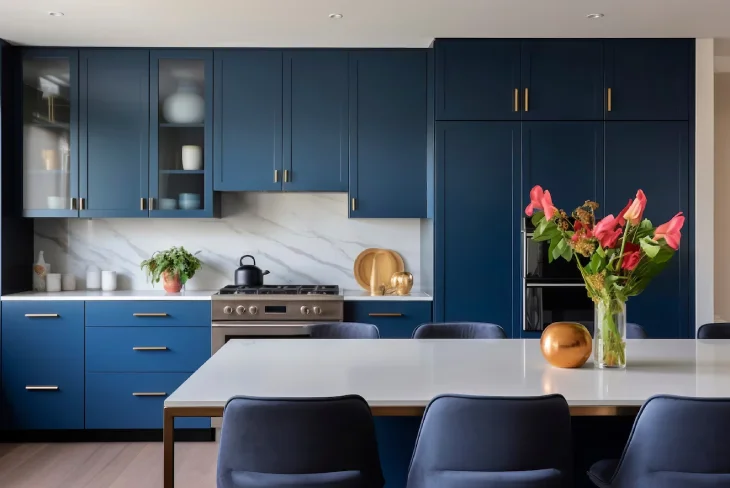
    Color-wise, while white kitchens remain popular, we’re seeing more bold color choices, especially in cabinetry. Deep blues, greens, and even black are making a statement in kitchens of all styles.

    In terms of layout, the “broken plan” concept is gaining traction. This is a middle ground between open and closed layouts, using partial walls, split levels, or furniture to create distinct zones within a larger space. It offers some of the openness of an open plan with the definition of separate rooms.

    Regardless of whether you choose an open or closed kitchen, the trend is toward personalization. Homeowners are increasingly looking for ways to make their kitchens uniquely their own, reflecting their personal style and specific needs.

    Conclusion

    The choice between an open and closed kitchen ultimately comes down to your personal preferences, lifestyle, and the specifics of your home. Both layouts have their merits, and with thoughtful design, either can create a beautiful, functional space that becomes the heart of your home. Whether you prefer the social buzz of an open kitchen or the cozy seclusion of a closed one, the most important thing is that it works for you and your family.

  • Best Kitchen Countertop Materials: A Complete Guide

    Best Kitchen Countertop Materials: A Complete Guide

    Are you scratching your head over which kitchen countertop material to choose for your home? Don’t worry, you’re not alone! Picking the best kitchen countertop materials can feel like trying to solve a puzzle with too many pieces. But here’s the good news: we’re about to make your life a whole lot easier. In this guide, we’ll walk you through everything you need to know about the top kitchen countertop options available today. From sleek quartz to classic granite, from warm butcher block to industrial-chic concrete, we’ve got you covered.

    We’ll dive into the nitty-gritty of durability, cost, maintenance, and style, so you can make a choice that’ll make your kitchen shine for years to come.

    So, grab a cup of coffee, get comfy, and let’s explore the wonderful world of kitchen countertop materials together!

    Top Kitchen Countertop Materials

    When it comes to kitchen countertop materials, there’s no shortage of options. Let’s take a closer look at some of the most popular choices that homeowners are loving in 2024.

    1. Quartz

    Quartz countertops are the rising stars of the kitchen world. They’re tough as nails and pretty as a picture. Made from ground quartz mixed with resins and pigments, these engineered stone counters offer the best of both worlds: the beauty of natural stone and the durability of man-made materials.

    But what makes quartz so special? For starters, it’s incredibly hard-wearing. You could probably tap dance on it with steel-toed boots, and it wouldn’t bat an eye (not that we recommend trying!). It’s also non-porous, which means it won’t soak up spills or harbor bacteria. That’s a big win for busy kitchens and neat freaks alike.

    And let’s talk about looks. Quartz countertops come in a rainbow of colors and patterns. Whether you’re after the classic look of marble or something more modern and uniform, there’s a quartz design out there for you. It’s like having a custom-tailored suit for your kitchen!

    2. Granite

    Ah, granite. The old faithful of kitchen countertop materials. This natural stone has been gracing kitchens for decades, and it’s not hard to see why. Each slab of granite is like a work of art, with unique patterns and colors that Mother Nature herself designed.

    Granite countertops are tough cookies. They can handle hot pots, sharp knives, and the occasional elbow without breaking a sweat. Plus, they add a touch of luxury to any kitchen. It’s like rolling out the red carpet for your cooking space!

    But granite isn’t just a pretty face. It’s also relatively low maintenance, especially when properly sealed. A quick wipe-down with soap and water is usually all it needs to keep looking its best. Talk about a low-drama diva!

    3. Marble

    If granite is the dependable workhorse of the kitchen countertop world, marble is the elegant show pony. With its classic good looks and timeless appeal, marble countertops can turn even the most humble kitchen into a showstopper.

    Marble has been used in architecture and art for thousands of years, and it’s easy to see why. Its soft, luminous appearance and distinctive veining make each slab a unique masterpiece. It’s like having a slice of the Sistine Chapel right in your kitchen!

    But here’s the catch: marble can be a bit high-maintenance. It’s softer and more porous than granite or quartz, which means it’s more prone to scratches and stains. But for many homeowners, the timeless beauty of marble is worth the extra TLC.

    4. Butcher Block

    Want to bring a touch of warmth and coziness to your kitchen? Say hello to butcher block countertops. Made from strips of wood glued together, these counters can turn your kitchen into a rustic paradise faster than you can say “country chic.”

    Butcher block isn’t just about looks, though. It’s also incredibly functional. You can chop veggies right on the surface (hence the name), and any nicks or scratches can usually be sanded out. It’s like having a giant cutting board built right into your kitchen!

    Plus, wood countertops age beautifully. Over time, they develop a rich patina that adds character to your kitchen. It’s like watching a fine wine get better with age, except you get to make sandwiches on it.

    5. Soapstone

    If you’re after something a little different, soapstone countertops might be right up your alley. This natural stone has a smooth, matte finish that’s cool to the touch. It’s like running your hand over a Riverstone but in your kitchen!

    Soapstone is non-porous and resistant to stains and bacteria, making it a great choice for busy kitchens. It’s also heat-resistant, so you can plop that hot casserole dish right on the counter without a second thought.

    One unique feature of soapstone is that it darkens over time, developing a beautiful patina. Some folks even speed up this process by applying mineral oil. It’s like watching your counter grow up before your very eyes!

    6. Concrete

    For those who love the industrial look, concrete countertops are hard to beat. These counters are made from the same stuff as sidewalks, but don’t let that fool you – they can be surprisingly chic and sophisticated.

    Concrete countertops are completely customizable. You can add pigments for color, embed objects for a unique look, or even shape them into any form you can imagine. It’s like having a blank canvas in your kitchen, except this canvas can hold up your coffee maker!

    Plus, concrete is incredibly durable and heat-resistant. You could probably park a car on it (not that you should). Just keep in mind that it needs to be sealed regularly to prevent staining.

    7. Laminate

    Don’t let anyone tell you that laminate countertops are outdated. These budget-friendly options have come a long way, baby! Modern laminate can mimic the look of stone, wood, or even metal, often at a fraction of the cost.

    Laminate countertops are made from layers of plastic bonded to particleboard or kraft paper. They’re lightweight, easy to install, and come in an endless variety of colors and patterns. It’s like playing dress-up with your kitchen, but without breaking the bank!

    While laminate isn’t as durable as some other options, it’s still a solid choice for many homeowners. Just be careful with hot pots and sharp knives, and your laminate counters can look great for years to come.

    8. Solid Surface

    Solid surface countertops are the chameleons of the kitchen world. Made from acrylic and polyester blends, these counters can be molded into virtually any shape and color. Want a counter that looks like stone but feels like plastic? Solid surface has got you covered.

    One of the biggest perks of solid surface countertops is that they’re non-porous and seamless. That means no grout lines for grime to hide in and no need for sealing. It’s like having a countertop that’s always ready for its close-up!

    Plus, if solid surface counters do get scratched or stained, they can often be sanded and buffed back to their original glory. It’s like having a reset button for your kitchen surfaces!

    9. Stainless Steel

    For a sleek, modern look, it’s hard to beat stainless steel countertops. These babies are the darlings of professional kitchens, and for good reason. They’re incredibly hygienic, heat-resistant, and virtually indestructible.

    Stainless steel counters are also a breeze to clean. A quick wipe-down is usually all it takes to keep them sparkling. It’s like having a kitchen that cleans itself (well, almost).

    The downside? Stainless steel can show fingerprints and scratches more easily than some other materials. But for many homeowners, the pros far outweigh the cons. Plus, there’s something undeniably cool about having a kitchen that looks like it belongs on a cooking show!

    10. Porcelain

    Last but not least, let’s talk about porcelain countertops. These newcomers to the kitchen countertop scene are making quite a splash. Made from fine, dense clay and fired at high temperatures, porcelain is incredibly hard and durable.

    Porcelain countertops can mimic the look of marble, wood, or even concrete, often with uncanny accuracy. But unlike some of these materials, porcelain is non-porous, stain-resistant, and can handle high heat. It’s like having a superhero disguised as your favorite natural material!

    Factors to Consider When Choosing a Countertop

    Picking the best kitchen countertop materials isn’t just about looks. There are several factors you need to consider to make sure you’re making the right choice for your home and lifestyle.

    First up, think about durability. How much wear and tear will your counters need to withstand? If you’re a budding chef who’s always experimenting in the kitchen, you might want to prioritize materials that can handle heat and scratches. On the other hand, if your idea of cooking is ordering takeout, you might be able to prioritize aesthetics over durability.

    Next, consider maintenance. Some materials, like granite and marble, need to be sealed regularly to prevent staining. Others, like quartz and solid surface, are virtually maintenance-free. Be honest with yourself about how much time and effort you’re willing to put into maintaining your counters.

    Don’t forget about cost. Kitchen countertop materials can vary widely in price, from budget-friendly laminate to luxury marble. Set a budget before you start shopping, and remember to factor in installation costs as well.

    Aesthetics are important too, of course. Your countertops are a big part of your kitchen’s overall look. Think about what style you’re going for – modern, traditional, rustic, or something in between – and choose a material that complements that style.

    Comparison of Countertop Materials

    To help you compare different kitchen countertop materials at a glance, here’s a handy table:

    Material Durability Cost Maintenance Heat Resistance Scratch Resistance
    Quartz High High Low Moderate High
    Granite High High Moderate High High
    Marble Moderate High High High Low
    Butcher Block Moderate Moderate High Low Low
    Soapstone High High Moderate High Moderate
    Concrete High Moderate High High Moderate
    Laminate Low Low Low Low Low
    Solid Surface Moderate Moderate Low Low Moderate
    Stainless Steel High High Low High Low
    Porcelain High High Low High High

    Remember, this is just a general guide. The specific properties can vary depending on the exact product and how it’s maintained.

    Trends in Kitchen Countertop Materials for 2024

    As we roll into 2024, some exciting trends are emerging in the world of kitchen countertop materials. Let’s take a peek at what’s hot and what’s not!

    First up, white countertops are still going strong. Whether it’s white quartz, marble, or even concrete, homeowners are loving the clean, bright look of white counters. It’s like having a fresh canvas in your kitchen every day!

    But it’s not all about white. Dark, dramatic countertops are also making a splash. Think deep blues, rich greens, and even black. These bold colors can add a touch of sophistication and drama to any kitchen. It’s like giving your kitchen a tuxedo!

    Veined quartz is another big trend. Manufacturers are getting better and better at mimicking the look of natural stone, creating quartz countertops with realistic veining that can fool even the most discerning eye. It’s like having the best of both worlds – the look of marble with the durability of quartz!

    Sustainability is also becoming a bigger concern for many homeowners. Eco-friendly countertop materials made from recycled materials or sustainable sources are gaining popularity. It’s like giving Mother Nature a high five every time you make a sandwich!

    Pros and Cons of Popular Countertop Materials

    Let’s break down the pros and cons of some of the most popular kitchen countertop materials:

    Quartz

    Pros:

    • Extremely durable
    • Non-porous (resistant to stains and bacteria)
    • Low maintenance
    • Wide range of colors and patterns

    Cons:

    • Can be expensive
    • Not as heat-resistant as some natural stones
    • May look “artificial” to some

    Granite

    Pros:

    • Highly durable
    • Heat-resistant
    • Each slab is unique
    • Adds value to your home

    Cons:

    • Requires periodic sealing
    • Can be expensive
    • Limited color options (dependent on nature)

    Marble

    Pros:

    • Timeless beauty
    • Heat-resistant
    • Each slab is unique

    Cons:

    • Prone to staining and etching
    • Requires regular sealing
    • Can be very expensive

    Butcher Block

    Pros:

    • Warm, natural look
    • Can be sanded and refinished
    • Ideal for food prep

    Cons:

    • Requires regular oiling
    • Can dent and scratch easily
    • Not heat-resistant

    Laminate

    Pros:

    • Affordable
    • Wide range of colors and patterns
    • Easy to install

    Cons:

    • Not as durable as other options
    • Can’t handle direct heat
    • May lower home value

    Cost Analysis of Different Countertop Materials

    When it comes to kitchen countertop materials, cost is often a major factor. Here’s a breakdown of what you might expect to pay for different materials:

    Material Price Range per Square Foot Installation Costs
    Laminate $10 – $40 $10 – $20 per square foot
    Butcher Block $40 – $100 $40 – $100 per square foot
    Tile $10 – $50 $30 – $50 per square foot
    Solid Surface $35 – $100 $50 – $100 per square foot
    Granite $40 – $200 $35 – $85 per square foot
    Quartz $50 – $200 $50 – $100 per square foot
    Marble $50 – $250 $40 – $100 per square foot
    Concrete $65 – $135 $55 – $135 per square foot
    Stainless Steel $70 – $200 $80 – $225 per square foot
    Porcelain $60 – $100 $60 – $100 per square foot

    How to Choose the Right Countertop for Your Kitchen Style

    Picking the right countertop material isn’t just about durability and cost – it’s also about finding a look that matches your kitchen’s style. Let’s explore how different materials can complement various kitchen aesthetics.

    For modern kitchens, quartz and stainless steel are popular choices. Their sleek, uniform appearance fits well with contemporary design. Concrete can also work well in modern spaces, especially when given a smooth, polished finish. It’s like giving your kitchen a chic, urban vibe!

    Traditional kitchens often benefit from the timeless beauty of granite or marble. These natural stones add a touch of elegance that complements classic design elements. It’s like adding a touch of luxury to your family recipes!

    For rustic or farmhouse-style kitchens, butcher block or soapstone countertops can be perfect. They add warmth and character that fits well with the cozy, homey feel of these styles. It’s like bringing a bit of the countryside into your home!

    Transitional kitchens, which blend elements of both traditional and contemporary design, can work well with a variety of materials. Quartz that mimics natural stone can be a great choice, offering the best of both worlds. It’s like having your cake and eating it too!

    Industrial-style kitchens often feature stainless steel or concrete countertops. These materials complement the raw, utilitarian aesthetic of industrial design. It’s like turning your kitchen into a hip, urban loft!

    Conclusion

    Choosing the best kitchen countertop materials can feel like a big task, but armed with the right information, you can make a decision that you’ll be happy with for years to come. Whether you opt for the durability of quartz, the natural beauty of granite, the warmth of butcher block, or any of the other fantastic options we’ve explored, the key is to choose a material that fits your lifestyle, budget, and personal style.

    Remember, there’s no one-size-fits-all solution when it comes to kitchen countertops. What works beautifully in one home might not be the best choice for another. Consider your cooking habits, your cleaning preferences, and your aesthetic tastes. Think about how much maintenance you’re willing to do, and how long you plan to stay in your home.

    Don’t be afraid to get creative! Mix and match materials, explore eco-friendly options, or try out the latest trends. Your kitchen should be a reflection of you, after all.

    And finally, don’t forget to enjoy the process. Choosing new kitchen countertop materials is an exciting part of creating or updating your home. It’s a chance to put your stamp on one of the most important rooms in your house. So have fun with it!

    Here’s to finding the perfect countertop for your dream kitchen.

    Happy renovating!

  • Dos and Don’ts of Kitchen Remodeling

    Dos and Don’ts of Kitchen Remodeling

    Are you dreaming of a kitchen renovation that’ll make your space more functional and beautiful? Well, you’re not alone! Lots of homeowners are jumping on the kitchen remodel bandwagon, hoping to create their perfect culinary haven. But here’s the thing: a kitchen makeover isn’t just about picking pretty countertops or fancy appliances. It’s a journey filled with important decisions, potential pitfalls, and exciting possibilities. That’s why knowing the dos and don’ts of kitchen remodeling is super important. Whether you’re planning a small update or a major overhaul, this guide will help you navigate the tricky waters of kitchen design and renovation. We’ll cover everything from budgeting tips to layout tricks, and help you avoid common mistakes that could turn your dream kitchen into a nightmare.

    So, grab a cup of coffee, and let’s dive into the world of kitchen upgrades together!

    Planning Your Kitchen Remodel

    Let’s talk money, honey! Setting a realistic budget for your kitchen remodel is like laying the foundation for a house. It’s not the most exciting part, but boy, is it important! First things first, take a good, hard look at your finances. How much can you comfortably spend without eating ramen for the next year?

    Now, onto the fun part – designing your kitchen layout! This is where you get to play architect and think about how you want your kitchen to function. But remember, a good kitchen design isn’t just about looks. It’s about creating a space that works for you and your family.

    Start by thinking about your current kitchen. What works? What doesn’t? Maybe you’re always bumping into your partner while cooking, or you can never reach that one high shelf. These are the things you want to fix in your new layout.

    One of the most important concepts in kitchen design is the work triangle. This is the imaginary line between your sink, stove, and refrigerator. Ideally, these three key areas should form a triangle, with each leg measuring between 4 and 9 feet. This setup ensures that everything you need is within easy reach while cooking.

    The Dos of Kitchen Remodeling

    1. Do: Plan for the Unexpected

    When it comes to kitchen remodeling, expecting the unexpected isn’t just good advice – it’s essential! Even the most meticulously planned renovations can throw curveballs your way. Maybe you’ll discover some outdated plumbing that needs to be replaced or find that the perfect kitchen cabinets you ordered have been on backorder for months.

    That’s why it’s crucial to build some flexibility into your plan. This means having a contingency fund (remember that extra 10-20% we talked about earlier?) and being prepared to make some on-the-fly decisions. It’s also a good idea to have a backup plan for meals during the renovation. Your kitchen might be out of commission for longer than you expect, so having a mini-fridge and microwave set up in another room can be a lifesaver.

    2. Do: Prioritize Functionality

    While it’s tempting to focus on aesthetics, functionality should be the star of your kitchen remodel. After all, a beautiful kitchen that’s a pain to cook in isn’t serving its purpose, is it?

    Start by thinking about how you use your kitchen. Are you an avid cook who needs lots of prep space? Do you often entertain and need room for guests to gather? Or maybe you’re all about quick, efficient meals and need everything within arm’s reach. Your answers to these questions should guide your design decisions.

    Consider the kitchen work triangle we mentioned earlier. This concept ensures that your main work areas – the sink, stove, and refrigerator – are arranged efficiently. But don’t stop there. Think about other functional aspects like:

    • Storage solutions: Do you need deep drawers for pots and pans? A pantry for dry goods?
    • Counter space: Where do you need it most? Near the stove for prep work? By the sink for cleaning up?
    • Appliance placement: Are your appliances arranged logically for your cooking style?

    3. Do: Invest in Quality Materials

    When it comes to kitchen remodeling, the old saying “you get what you pay for” really rings true. While it might be tempting to cut corners to save a few bucks, investing in quality materials can save you money and headaches in the long run.

    Think about it – your kitchen takes a beating every day. From hot pans on the countertops to spills on the floor, everything in your kitchen needs to be tough enough to withstand daily wear and tear. That’s why it’s worth splurging on durable materials that will stand the test of time.

    For countertops, materials like quartz or granite might cost more upfront, but they’re incredibly durable and can last for decades with proper care. When it comes to flooringporcelain tile or hardwood can be great options that combine durability with style.

    Don’t forget about the less visible elements either. High-quality plumbing fixtures and electrical components might not be as exciting as a shiny new fridge, but they’re crucial for a well-functioning kitchen. And when it comes to cabinetry, solid wood construction will hold up much better than cheaper particle board options.

    4. Do: Consider Energy Efficiency

    In today’s world, energy efficiency isn’t just good for the environment – it’s good for your wallet too! When planning your kitchen remodel, consider how you can make your space more energy-efficient. Not only will this help reduce your carbon footprint, but it can also lead to significant savings on your energy bills over time.

    Start with your appliances. Look for models with the ENERGY STAR label. These appliances meet strict energy efficiency guidelines set by the U.S. Environmental Protection Agency and the U.S. Department of Energy. They might cost a bit more upfront, but the energy savings over time can more than makeup for it.

    Lighting is another area where you can make a big impact. LED lights use up to 75% less energy than traditional incandescent bulbs and last much longer too. Consider installing dimmer switches as well – they can help you save energy and create the perfect ambiance for any occasion.

    Don’t forget about your windows. If you’re replacing them as part of your remodel, opt for energy-efficient models that can help keep your kitchen cool in summer and warm in winter. And if new windows aren’t in the budget, even adding window treatments can help with temperature control.

    Even small changes can make a difference. Low-flow faucets can reduce water usage, while proper insulation in your walls can help maintain a comfortable temperature with less energy. By considering energy efficiency in your kitchen design, you’re not just creating a beautiful space – you’re creating a smarter, more sustainable one too!

    The Don’ts of Kitchen Remodeling

    1. Don’t: Neglect the Work Triangle

    Okay, we’ve talked about the kitchen work triangle before, but it’s so important that it deserves it’s own “don’t”. The work triangle is the path between your sink, stove, and refrigerator – the three main work areas in any kitchen. Neglecting this crucial concept is one of the biggest kitchen remodeling mistakes you can make.

    Here’s why: imagine you’re cooking dinner. You need to grab ingredients from the fridge, wash them in the sink, and then cook them on the stove. If these three areas are too far apart or awkwardly placed, you’ll be doing a lot of unnecessary walking (and probably getting pretty frustrated in the process).

    The ideal work triangle should have a total distance of 13 to 26 feet between all three points. Each leg of the triangle should be between 4 and 9 feet. This setup ensures that everything is within easy reach, but there’s still enough space to move around comfortably.

    But don’t worry – this doesn’t mean your kitchen has to be boring or cookie-cutter. You can still get creative with your kitchen layout. Maybe you want to add an island or create a galley-style kitchen. That’s fine! Just make sure you’re keeping the work triangle in mind as you plan.

    2. Don’t: Overlook Storage Solutions

    Let’s face it – we all have more kitchen stuff than we’d like to admit. From that bread maker you use once a year to the collection of mismatched Tupperware, kitchens have a way of accumulating stuff. That’s why overlooking storage solutions is a big no-no in kitchen remodeling.

    Good storage isn’t just about having enough space – it’s about having the right kind of space. Think about the items you use most often and make sure they’re easily accessible. Pots and pans might do well in deep drawers near the stove, while everyday dishes could go in upper cabinets near the dishwasher for easy unloading.

    Don’t forget about those tricky corner cabinets. Lazy Susans or pull-out organizers can turn these often-wasted spaces into storage powerhouses. And if you’re short on cabinet space, consider adding a pantry. It doesn’t have to be a walk-in – even a tall, narrow cabinet can provide tons of storage for dry goods and small appliances.

    Here are some clever storage ideas to consider:

    • Vertical storage: Use the height of your kitchen by installing cabinets that go all the way to the ceiling. The top shelves are perfect for storing those rarely-used items.
    • Island storage: If you’re adding an island, make it work double-duty with built-in storage.
    • Pull-out organizers: These can be great for spices, utensils, or even trash and recycling bins.
    • Open shelving: While not for everyone, open shelves can be a great way to add storage while keeping your kitchen feeling open and airy.

    3. Don’t: Skimp on Lighting

    Picture this: you’ve just finished your kitchen remodel. The cabinets are perfect, the countertops are gleaming, but… something’s off. The space feels dark and uninviting. Yep, you’ve fallen into the all-too-common trap of skimping on lighting.

    Good lighting isn’t just about being able to see what you’re cooking (although that’s pretty important!). It’s about creating the right atmosphere, highlighting your beautiful new features, and making your kitchen a warm, welcoming space.

    When planning your kitchen lighting, think in layers:

    1. Task lighting: This is the workhorse of your kitchen lighting. It illuminates specific areas where you’ll be working, like under-cabinet lights for countertops or pendant lights over an island.
    2. Ambient lighting: This provides overall illumination for the room. Recessed lights or a central fixture can do the job here.
    3. Accent lighting: Use this to highlight specific features in your kitchen, like a beautiful backsplash or open shelving.

    Don’t forget about natural light either! If possible, maximize your windows to let in as much daylight as possible. Not only does this make your kitchen feel more open and airy, but it can also help reduce your energy bills.

    4. Don’t: Rush the Process

    We get it – living through a kitchen renovation can be tough. The dust, the noise, the takeout meals… it’s tempting to want to rush through the process and get it over with. But here’s the thing: rushing your kitchen remodel is a recipe for disaster (pun intended!).

    A well-executed kitchen remodel takes time. On average, you’re looking at about 9-13 weeks from start to finish. And that’s just the actual construction phase! Before that, you’ve got planning, designing, and ordering materials, which can take several months.

    Here’s a rough timeline of what you might expect:

    1. Planning and Design: 1-3 months
    2. Ordering Materials: 2-4 weeks (or more for custom items)
    3. Demolition: 1-2 weeks
    4. Construction: 6-8 weeks
    5. Finishing Touches: 1-2 weeks

    Rushing through any of these stages can lead to mistakes, poor workmanship, or design decisions you’ll regret later. Remember, you’re going to be living with this kitchen for years to come. It’s worth taking the time to get it right!

    Plus, rushing often ends up costing more in the long run. You might have to redo work that wasn’t done properly or replace materials that were hastily chosen and don’t hold up.

    Key Elements to Consider

    Cabinetry and Hardware

    When it comes to kitchen remodelingcabinetry is often one of the biggest investments you’ll make. It’s not just about storage – your cabinets set the tone for the entire room. So, it’s worth taking the time to get them right!

    First, think about the style you want. Are you going for a sleek, modern look with flat-panel doors? Or maybe a more traditional feel with Shaker-style cabinets? Your choice should complement the overall style of your home.

    Next, consider the material. Wood cabinets are classic and can be painted or stained to match any decor. Laminate is a more budget-friendly option that comes in a wide range of colors and finishes. And don’t forget about metal or glass-front cabinets for a unique touch!

    But cabinets aren’t just about looks. Think about functionality too. Soft-close hinges can prevent slamming, while pull-out organizers can make it easier to access items in deep cabinets. And if you’re short on space, consider extending your cabinets to the ceiling for maximum storage.

    Countertops and Backsplashes

    Next up on our kitchen remodel journey: countertops and backsplashes. These elements not only need to be functional but also serve as key design features in your kitchen.

    Let’s start with countertops. They’re one of the most used surfaces in your kitchen, so durability is key. Quartz countertops have become increasingly popular due to their durability and low maintenance. They’re non-porous, resistant to stains and scratches, and come in a wide variety of colors and patterns.

    Granite is another popular choice. It’s heat-resistant and each slab is unique, giving your kitchen a one-of-a-kind look. However, it does require periodic sealing to prevent stains.

    For those on a tighter budget, laminate countertops have come a long way in recent years. They now come in designs that mimic the look of stone or wood at a fraction of the cost.

    When choosing your countertop, think about how you use your kitchen. Do you do a lot of baking? You might want a section of marble for rolling out dough. Love to entertain? A large island with plenty of seating might be perfect for you.

    Now, onto backsplashes. These aren’t just about protecting your walls from splashes – they’re a great opportunity to add personality to your kitchen. Ceramic tiles are a classic choice and come in endless colors and patterns. For a sleek, modern look, consider large format tiles or even a single sheet of glass.

    Don’t be afraid to get creative with your backsplash. It’s a relatively small area, so it’s a great place to try out bold colors or patterns that might be overwhelming on a larger scale. Just make sure it complements your countertops and cabinets rather than competing with them.

    Appliances and Fixtures

    Last but certainly not least in our kitchen design elements are the appliances and fixtures. These are the workhorses of your kitchen, so choosing the right ones is crucial.

    When it comes to appliances, think about both function and form. Energy-efficient appliances can help lower your utility bills and are better for the environment. Look for the ENERGY STAR label when shopping.

    Consider the size of your appliances too. A huge professional-grade range might look impressive, but if you rarely cook elaborate meals, it might not be the best use of your space (or your budget). On the flip side, if you love to cook and entertain, investing in high-quality appliances could be well worth it.

    Don’t forget about the layout when choosing your appliances.

    As for fixtures, your sink and faucet are used countless times a day, so choose wisely. A deep, double-bowl sink can be great for washing large pots and pans. For the faucet, consider features like a pull-down sprayer or touch-activated operation for added convenience.

    Lighting fixtures are another important consideration. We’ve already talked about the importance of good lighting, but the fixtures themselves can also be a design feature. A statement pendant light over an island or a sleek row of under-cabinet lights can add both function and style to your kitchen.

    Common Mistakes to Avoid

    When it comes to kitchen remodeling, knowing what not to do is just as important as knowing what to do. Let’s look at some common mistakes and how to avoid them:

    Mistake Consequence Solution
    Ignoring the workflow Inefficient kitchen layout Plan your kitchen around the work triangle
    Choosing style over function Beautiful but impractical kitchen Balance aesthetics with functionality
    Skimping on storage Cluttered countertops and lack of space Incorporate various storage solutions
    Poor lighting Dark, uninviting space Layer your lighting with task, ambient, and accent lights
    Improper ventilation Odors, moisture, and grease buildup Install a high-quality range hood
    Overlooking outlets Inconvenience when using appliances Plan for plenty of well-placed outlets
    Neglecting the budget Overspending or cutting corners Set a realistic budget with a 20% buffer for unexpected costs
    DIYing beyond your skill level Poor workmanship, potential safety issues Know when to call in the professionals
    Choosing trendy over timeless Dated look in a few years Opt for classic designs with trendy accents
    Forgetting about trash and recycling Unsightly bins taking up floor space Plan for built-in trash and recycling storage

    By avoiding these common pitfalls, you’ll be well on your way to a successful kitchen renovation!

    Budgeting Wisely

    Let’s talk money! Budgeting is a crucial part of any kitchen remodel, and it’s important to understand where your money is likely to go. Here’s a rough breakdown of how costs are typically distributed in a kitchen renovation:

    Category Percentage of Budget
    Cabinetry and Hardware 29%
    Installation 17%
    Appliances and Ventilation 14%
    Countertops 10%
    Flooring 7%
    Lighting 5%
    Walls and Ceilings 5%
    Design Fees 4%
    Doors and Windows 4%
    Faucets and Plumbing 4%
    Other 1%

    By planning your budget carefully and sticking to it as much as possible, you can achieve the kitchen of your dreams without breaking the bank.

    Hiring Professionals vs. DIY

    One big decision you’ll need to make in your kitchen remodel is whether to hire professionals or go the DIY route. Both have their pros and cons:

    Hiring Professionals:

    Pros:

    • Expertise and experience
    • Time-saving
    • Access to high-quality materials
    • Guaranteed work (usually)
    • Proper licenses and insurance

    Cons:

    • More expensive
    • Less control over the process
    • Potential for miscommunication

    DIY:

    Pros:

    • Cost-saving
    • Complete control over the project
    • Sense of personal accomplishment
    • Flexibility in timeline

    Cons:

    • Time-consuming
    • Potential for mistakes
    • May lack necessary skills for complex tasks
    • Could void warranties or violate building codes if not done correctly

    The right choice depends on your skills, budget, and the scope of your project. Many homeowners opt for a mix of both – DIYing simpler tasks like painting or installing hardware, while leaving more complex jobs like plumbing or electrical work to the pros.

    If you do decide to hire professionals, make sure to:

    • Check references and read reviews
    • Verify licenses and insurance
    • Get detailed, written estimates
    • Understand the timeline and payment schedule
    • Communicate clearly about your expectations

    Timeline and Project Management

    Managing the timeline of your kitchen remodel is crucial for keeping the project on track and minimizing disruption to your daily life. Here’s a typical timeline for a kitchen renovation:

    1. Planning and Design (4-8 weeks)
      • Develop your vision
      • Set budget
      • Create design plans
    2. Hiring Professionals (2-4 weeks)
      • Get quotes
      • Check references
      • Sign contracts
    3. Ordering Materials (4-8 weeks)
      • Choose and order cabinets, countertops, appliances, etc.
      • Allow for shipping and delivery times
    4. Demolition (1-2 weeks)
      • Remove old cabinets, appliances, flooring, etc.
    5. Structural Work (1-2 weeks)
      • Make any necessary changes to walls, plumbing, or electrical
    6. Installation (4-6 weeks)
      • Install flooring
      • Install cabinets
      • Install countertops
      • Install appliances
      • Install backsplash
    7. Finishing Touches (1-2 weeks)
      • Paint
      • Install hardware
      • Final inspections

    With good planning and management, you can navigate your kitchen renovation smoothly and efficiently.

    Conclusion

    Embarking on a kitchen remodel is an exciting journey that can transform the heart of your home. By following these dos and don’ts of kitchen remodeling, you’re setting yourself up for success.

    Your new kitchen should be a reflection of your lifestyle and taste, while also increasing the value of your home. Whether you’re going for a minor update or a major overhaul, keep in mind that the average kitchen remodel takes 9-13 weeks to complete. So be patient, stay flexible, and enjoy the process!

    With thoughtful planning and execution, you’ll soon be cooking up a storm in the kitchen of your dreams.

    Happy remodeling!

  • How to Plan the Perfect Kitchen Layout

    How to Plan the Perfect Kitchen Layout

    Ever dreamed of a kitchen that feels like it was made just for you? Well, you’re in luck! Planning the perfect kitchen layout isn’t rocket science, but it does take some thought and creativity. Whether you’re starting from scratch or giving your current kitchen a makeover, this guide will help you cook up a space that’s both functional and fabulous.

    So, let’s roll up our sleeves and dive into the world of kitchen design!

    Understanding Kitchen Layout Basics

    When it comes to planning your dream kitchen, it’s all about getting the basics right. At the heart of it all is the work triangle concept. This nifty idea has been around for ages, and good reason – it just works!

    The work triangle is all about connecting your three main work areas: the sink, the stove, and the refrigerator. Imagine drawing lines between these three spots. The idea is to keep them close enough for easy access, but not so close that you’re tripping over yourself. It’s like a well-choreographed dance in your kitchen!

    But wait, there’s more! While the work triangle is super important, it’s not the only game in town. There are several popular kitchen layout types to choose from. You’ve got your one-wall kitchens, perfect for small spaces. Then there’s the galley layout, which is like a hallway of culinary goodness. L-shaped and U-shaped kitchens offer more counter space and storage. And let’s not forget about island and peninsula layouts, which are great for socializing while you cook.

    Assessing Your Space and Needs

    Before you start moving things around in your head (or on paper), it’s crucial to know what you’re working with. Measuring your kitchen is step one. Grab a tape measure and jot down the dimensions of your space. Don’t forget to note the locations of windows, doors, and any fixed elements like plumbing or electrical outlets.

    But size isn’t everything! You also need to think about your cooking style and habits. Are you a solo chef or do you love cooking with your family? Do you bake up a storm or are you more of a microwave meal kind of person? Your answers to these questions will help shape your perfect kitchen layout.

    For instance, if you’re all about big family dinners, you might want to consider an open layout with an island for extra prep space and seating. On the other hand, if you’re more of a quick-and-easy meal maker, a compact galley layout might be just the ticket.

    And don’t forget about storage! Take stock of your kitchen gadgets, pots, pans, and pantry items. Do you need extra space for a fancy stand mixer or a collection of spices? Knowing what you need to store will help you plan for the right amount of cabinets and shelving.

    Choosing the Right Layout for Your Kitchen

    Now that you’ve got a handle on the basics and know what you’re working with, it’s time to pick a layout that’ll make your kitchen sing. Let’s break down the most common types and see how they stack up:

    Layout Type Best For Key Features
    One-Wall Small spaces, studios Everything along one wall
    Gallery Narrow spaces, efficiency Two parallel walls of cabinets
    L-Shaped Medium spaces, corner kitchens Cabinets along two adjoining walls
    U-Shaped Large spaces, lots of storage Cabinets on three walls
    Island Open floor plans, social cooking Freestanding workspace in the center
    Peninsula Medium to large spaces, defined areas Extended counter from wall or cabinets

    But wait, there’s more! Each layout has its own set of pros and cons. Let’s break it down:

    One-Wall Layout

    • Pros:
      • Space-saving
      • Budget-friendly
      • Great for open floor plans
    • Cons:
      • Limited counter space
      • Can feel cramped for multiple cooks
      • Less storage options

    Galley Layout

    • Pros:
      • Efficient for one or two cooks
      • Plenty of counter space
      • Good for narrow rooms
    • Cons:
      • Can feel closed off
      • Limited space for dining
      • Potential traffic jams in busy households

    L-Shaped Layout

    • Pros:
      • Offers good flow
      • Can accommodate a dining area
      • Versatile for different-sized spaces
    • Cons:
      • Corner cabinets can be tricky
      • May need additional storage solutions
      • Can feel spread out in larger spaces

    U-Shaped Layout

    • Pros:
      • Lots of storage and counter space
      • Great for multiple cooks
      • Efficient work triangle
    • Cons:
      • Can feel enclosed in smaller spaces
      • Potentially wasted corner spaces
      • May be too much for solo cooks

    Island Layout

    • Pros:
      • Extra prep and storage space
      • Great for socializing while cooking
      • Can house additional appliances
    • Cons:
      • Requires ample space
      • Can disrupt the work triangle if not planned well
      • May be costly to install

    Peninsula Layout

    • Pros:
      • Adds counter and storage space
      • Creates division between kitchen and living areas
      • A good alternative to the island in smaller spaces
    • Cons:
      • Can create dead ends
      • May limit traffic flow
      • Less flexible than a freestanding island

    Remember, there’s no one-size-fits-all solution. The best layout for you depends on your space, needs, and lifestyle. Don’t be afraid to mix and match elements from different layouts to create your perfect kitchen!

    Creating Functional Zones

    Now that you’ve got your layout sorted, it’s time to think about zones. A well-planned kitchen isn’t just about looks – it’s about function too. By dividing your kitchen into zones, you’ll create a space that flows smoothly and makes cooking a breeze.

    Let’s start with the cooking zone. This is where the magic happens! Your stove or cooktop is the star here, but don’t forget about counter space for hot pots and pans. Keep your oven mitts, spices, and cooking utensils within arm’s reach. And if you’re a fan of gadgets, consider adding a spot for your slow cooker or air fryer.

    Next up is the prep zone. This is where you’ll be chopping, mixing, and getting everything ready to cook. Ideally, this zone should be between your sink and cooking zone. Make sure you’ve got plenty of counter space and good lighting. A cutting board drawer or a pull-out trash bin can be real game-changers here.

    Don’t forget about the cleaning zone. Your sink is the main player, but think about where you’ll put your dishwasher (if you have one) and where you’ll store cleaning supplies. A dish drying rack or a second sink can be super helpful if you have the space.

    Last but not least, there’s the storage zone. This includes your fridge, pantry, and cabinets. Try to keep frequently used items at eye level and heavier items in lower cabinets. And here’s a pro tip: create a “breakfast station” with your coffee maker, toaster, and breakfast foods all in one spot. Morning you will thank you!

    Optimizing Kitchen Storage

    Let’s face it, we all dream of a clutter-free kitchen. But unless you’re a minimalist chef (is that even a thing?), you’re going to need some serious storage solutions. Don’t worry, we’ve got you covered!

    First up, let’s talk cabinetry solutions. Gone are the days of simple shelves behind doors. Today’s cabinets are like mini storage systems. Think pull-out drawers for pots and pans, vertical dividers for baking sheets, and lazy Susans for corner cabinets. And don’t forget about the space above your upper cabinets – it’s perfect for storing those once-a-year items like your turkey roaster.

    Next, let’s tackle pantry organization. Whether you have a walk-in pantry or just a few dedicated cabinets, organization is key. Clear containers are your friends here – they keep things fresh and let you see what you’ve got at a glance. Use risers to maximize vertical space and consider door-mounted racks for spices or small items.

    Speaking of vertical space, let’s talk about maximizing vertical space throughout your kitchen. Wall-mounted magnetic knife strips, hanging pot racks, and ceiling-mounted wine glass holders are all great ways to free up cabinet and counter space. And don’t forget about the sides of your cabinets – they’re perfect for mounting hooks or narrow shelves.

    Selecting Appliances and Fixtures

    Choosing the right appliances and fixtures can make or break your kitchen layout. It’s not just about picking the prettiest ones – size and placement are crucial too.

    When it comes to sizing and placement considerations, think about how you use your kitchen. If you’re a big baker, you might want a double oven. Love to entertain? A larger fridge or even a separate beverage fridge might be on your wish list. But remember, bigger isn’t always better. Oversized appliances can overwhelm a small kitchen and mess with your work triangle.

    Don’t forget about clearance space either. You need room to open doors and drawers fully, and space to stand in front of appliances comfortably. A good rule of thumb is to leave at least 36 inches of clearance in walkways.

    Now, let’s talk about energy-efficient options. Not only are they good for the planet, but they can also save you money in the long run. Look for appliances with the ENERGY STAR label – they use 10-50% less energy than standard models. And consider LED lighting for your kitchen – it uses less energy and lasts longer than traditional bulbs.

    When it comes to fixtures, think about function as well as form. A pull-down faucet can make washing big pots a breeze, while a touchless model is great for when your hands are messy. And don’t forget about your sink – a deep single basin can be more versatile than a double sink for many cooks.

    Incorporating an Island or Peninsula

    Ah, the kitchen island – it’s like the cool kid of the kitchen world. Everyone wants one, but is it right for you? Let’s weigh the benefits and drawbacks.

    On the plus side, an island adds extra counter space, and storage, and can even house appliances like a cooktop or sink. It’s great for prep work and can double as a casual dining spot. Islands are also fantastic for social cooking – your guests can hang out and chat while you whip up dinner.

    But islands aren’t all sunshine and rainbows. They need space – lots of it. You should have at least 36 inches of clearance on all sides, more if it’s a main traffic path. Islands can also break up your work triangle if not planned carefully. And let’s be honest, they can be pricey to install, especially if you need to run plumbing or electrical.

    If an island isn’t in the cards, don’t despair! A peninsula might be your new best friend. It offers many of the same benefits as an island but takes up less floor space. Plus, it can help define your kitchen in an open floor plan.

    Now, let’s talk about design ideas for different kitchen sizes. In a small kitchen, consider a narrow island on wheels. You can move it when you need more floor space. For medium-sized kitchens, an L-shaped island can provide lots of workspace without overwhelming the room. And in large kitchens? Go wild! A massive island with different levels for prep, cooking, and dining can become the heart of your home.

    Lighting Your Kitchen Layout

    Lighting might not be the first thing you think about when planning your kitchen layout, but trust me, it’s super important. Good lighting can make your kitchen feel bigger, brighter, and more inviting. Plus, it helps you see what you’re doing when you’re wielding sharp knives!

    Let’s start with task lighting. This is the workhorse of kitchen lighting. It’s all about illuminating your work areas so you can chop, mix, and cook safely. Under-cabinet lights are perfect for this – they light up your countertops without casting shadows. Pendant lights over an island or peninsula can also provide great task lighting (and look pretty cool too).

    Next up is ambient lighting. This is your general, overall lighting that sets the mood in your kitchen. Recessed ceiling lights are a popular choice – they provide even light without taking up visual space. If you have a large kitchen, consider adding a central fixture like a chandelier or a group of pendant lights.

    Don’t forget about accent lighting. This is the fun stuff that adds personality to your kitchen. Use it to highlight architectural features, illuminate glass-front cabinets, or create a cozy glow in the evening. LED strip lights are great for this – you can tuck them under toe kicks or above cabinets for a subtle effect.

    And here’s a pro tip: put all your lights on dimmer switches. This lets you adjust the lighting throughout the day, from bright and energizing in the morning to soft and relaxing in the evening. Your future self will thank you!

    Considering Traffic Flow and Accessibility

    A kitchen isn’t just about cooking – it’s about moving around too. Good traffic flow can make the difference between a kitchen that’s a joy to use and one that’s a constant frustration.

    Start by creating clear pathways through your kitchen. Aim for at least 36 inches of walking space, more in busy areas, or if you have multiple cooks. Think about how you move between your fridge, sink, and stove (remember that work triangle?). Are there any obstacles in the way? Can you open all your appliance doors fully without bumping into anything?

    Don’t forget about the rest of your home too. If your kitchen opens into other rooms, make sure there’s a clear path. And if you have a dining area in or near your kitchen, leave plenty of space to pull out chairs and walk around the table.

    Now, let’s talk about universal design principles. These are all about making your kitchen accessible and comfortable for everyone, regardless of age or ability. Some ideas to consider:

    • Varied counter heights to accommodate both tall and short family members (or sitting and standing tasks)
    • Pull-out shelves in lower cabinets for easier access
    • Lever-style handles on faucets and cabinets, which are easier to use than knobs
    • A wall oven at counter height instead of above the stove
    • Good lighting throughout the kitchen (remember our lighting section?)

    These features aren’t just for people with specific needs – they can make your kitchen more comfortable and convenient for everyone. Plus, they can be real selling points if you ever decide to move.

    Finalizing Your Kitchen Layout Plan

    Whew! We’ve covered a lot of ground. Now it’s time to put it all together and finalize your kitchen layout plan. Don’t worry if it feels overwhelming – there are tools to help!

    Using design software or professional services can be a game-changer. There are lots of free online kitchen design tools that let you play around with different layouts. You can input your room dimensions, add cabinets and appliances, and see how everything fits together. It’s like playing The Sims but for your kitchen!

    If you’re not confident in your DIY design skills, or if you’re planning a major renovation, consider hiring a professional kitchen designer. They can bring expertise and fresh ideas to your project, and might even save you money in the long run by avoiding costly mistakes.

    Once you have a basic plan, it’s time to make adjustments and refinements. This is where you fine-tune your layout to make it perfect for you. Maybe you realize you need more counter space near the fridge, or that your spice rack would work better on the other side of the stove. Don’t be afraid to make changes – this is your chance to get everything just right.

    Conclusion

    Planning the perfect kitchen layout is like putting together a puzzle – all the pieces need to fit just right. But with careful thought and a bit of creativity, you can create a kitchen that’s not just functional, but a joy to cook and live in.

    Whether you’re dreaming of a cozy galley kitchen or a sprawling chef’s paradise, the key is to plan carefully and think about how you’ll use the space. Consider your work triangle, create functional zones, maximize your storage, choose the right appliances, and don’t forget about lighting and accessibility.

    And most importantly, have fun with it! Your kitchen is the heart of your home, so make it a space you love. Whether you’re whipping up gourmet meals or just reheating leftovers, a well-planned kitchen layout will make every culinary adventure a little bit easier and a lot more enjoyable.

    So go ahead, and start planning your perfect kitchen layout. Who knows? You might just cook up the kitchen of your dreams!

  • 10 Creative Ideas for a Modern Kitchen Remodel

    10 Creative Ideas for a Modern Kitchen Remodel

    Are you dreaming of a kitchen that’s not just functional but also a showstopper? Well, you’re in luck! Today, we’re diving into 10 creative ideas for a modern kitchen remodel that’ll make your space the talk of the town. From smart tech to eco-friendly solutions, we’ve got it all covered.

    So, grab a cup of coffee, and let’s explore how you can transform your kitchen into a stunning, efficient, and contemporary space that’ll make cooking a joy and entertaining a breeze.

    Did you know that according to the 2024 U.S. Houzz Kitchen Trends Study, a whopping 43% of homeowners are now opening up their kitchens to other indoor spaces? That’s up from 38% in 2022! It’s clear that people are craving more open, versatile kitchen designs. And it’s not just about looks – 85% of folks who’ve remodeled their kitchens say it’s improved family bonding and made them happier at home. Now, isn’t that something to chew on?

    But here’s the kicker: the median spend on major kitchen remodels has shot up by 22% in just one year, reaching $55,000 in 2023. Don’t let that number scare you, though! We’re here to show you how to get the most bang for your buck with these ten amazing ideas. Whether you’re looking to go all out or just want to make a few smart upgrades, we’ve got you covered. Let’s roll up our sleeves and dive into the world of modern kitchen design!

    1. Open-Concept Kitchen Design

    Gone are the days when kitchens were tucked away in a corner, isolated from the rest of the house. Open-concept kitchen designs are all the rage now, and for good reason! They’re like a breath of fresh air, literally and figuratively.

    By knocking down walls and creating a seamless flow between your kitchen, dining, and living areas, you’re not just opening up space – you’re opening up possibilities. Imagine chatting with your guests while whipping up a gourmet meal, or keeping an eye on the kids doing homework while you prepare dinner. It’s multitasking at its finest!

    But the benefits don’t stop there. An open-concept kitchen lets natural light flood in, making your space feel brighter and more inviting. Plus, it creates an illusion of a larger area, perfect for those of us who aren’t blessed with mansion-sized homes. It’s like magic, but better – because it’s real!

    2. Smart Technology Integration

    Welcome to the future, folks! Smart kitchen technology is no longer just a fancy add-on – it’s becoming a must-have in modern kitchen remodels. And trust me, once you go smart, you’ll wonder how you ever lived without it.

    Imagine a fridge that tells you when you’re running low on milk, or an oven you can preheat from your smartphone while you’re still at the grocery store. Sounds like science fiction? Nope, it’s just a smart kitchen! These high-tech appliances not only make your life easier but can also help you save energy and reduce waste.

    But wait, there’s more! How about a voice-activated faucet for those moments when your hands are covered in cookie dough? Or a smart trash can that orders new garbage bags when you’re running low? The possibilities are endless, and they’re all designed to make your kitchen work smarter, not harder.

    3. Sustainable Materials and Eco-Friendly Solutions

    Let’s face it – we all want to do our part for Mother Earth. And what better place to start than in the heart of your home? Sustainable kitchen materials are not just good for the planet; they’re also stunning to look at.

    Consider bamboo for your cabinets or flooring. It’s not only eco-friendly but also incredibly durable and naturally resistant to water and bacteria. Or how about recycled glass countertops? They’re unique, and beautiful, and give new life to materials that might otherwise end up in a landfill.

    And let’s not forget about energy efficiency. Energy-star-rated appliances can significantly reduce your carbon footprint (and your energy bills!). Water-saving faucets and dishwashers are another great way to go green in the kitchen. It’s like giving Mother Nature a big, eco-friendly hug every time you cook!

    4. Bold Color Schemes and Contrasting Textures

    Who says kitchens have to be all white and stainless steel? It’s time to break out of the box and embrace some color! Bold color schemes are making a big splash in modern kitchen designs, and they’re here to stay.

    Consider painting your kitchen island a vibrant blue or your cabinets a deep forest green. These pops of color can add personality and depth to your space. And don’t be afraid to mix and match! Contrasting textures can create visual interest and make your kitchen truly unique.

    Imagine sleek, glossy cabinets paired with a rough-hewn wooden countertop, or smooth marble surfaces next to textured tile backsplashes. It’s all about creating a space that’s visually exciting and uniquely you. After all, your kitchen should be as colorful and vibrant as the meals you create in it!

    5. Minimalist Storage Solutions

    Clutter is the enemy of a beautiful kitchen. But fear not! Minimalist storage solutions are here to save the day (and your sanity). These clever ideas will help you keep your kitchen organized and looking sleek.

    Consider pull-out pantry shelves that make it easy to access even the items at the very back. Or how about hidden appliance garages that keep your countertops clear of bulky machines? And let’s not forget about drawer dividers – they’re like magic wands that transform chaotic drawers into organized oases.

    But the real game-changer? Floor-to-ceiling cabinets. They maximize storage space and create a clean, uncluttered look. Plus, they’re perfect for hiding away those kitchen gadgets you only use once a year (I’m looking at you, bread maker). With these smart storage solutions, your kitchen will be so organized, you might enjoy putting away the groceries!

    6. Innovative Countertop Materials

    Move over, granite! There’s a new crop of innovative countertop materials in town, and they’re ready to make a statement in your kitchen. These materials aren’t just pretty faces – they’re tough, durable, and ready to handle whatever culinary adventures you throw at them.

    Have you heard of quartz countertops? They’re engineered stones that are non-porous, resistant to stains and scratches, and come in a wide variety of colors and patterns. Or how about recycled glass countertops? They’re eco-friendly and unique, and add a touch of sparkle to your kitchen.

    For those who love a more industrial look, concrete countertops are making a big splash. They can be customized to any shape or color and develop a beautiful patina over time. And let’s not forget about butcher block. It’s warm, natural, and perfect for those who love to chop and prep right on their countertops.

    7. Customized Lighting Designs

    Lighting isn’t just about illumination – it’s about creating ambiance, highlighting features, and making your kitchen shine (literally and figuratively). Customized lighting designs can take your kitchen from drab to fab with the flick of a switch.

    Start with task lighting under your cabinets to illuminate your work surfaces. Then, add some pendant lights over your island or dining area for a touch of style. And don’t forget about ambient lighting – it’s like a warm, cozy hug for your kitchen.

    But why stop there? Smart lighting systems let you control the brightness and color of your lights from your smartphone. Imagine dimming the lights for a romantic dinner or changing them to a fun color for a party. With the right lighting design, your kitchen can set the mood for any occasion.

    8. Multifunctional Work Zones

    Multifunctional Work Zones

    Gone are the days of the traditional kitchen triangle. Modern kitchens are all about multifunctional work zones that make cooking a breeze. It’s like having multiple mini-kitchens within your kitchen!

    Consider creating a baking zone with a lowered countertop for easy kneading, a coffee station for your morning brew, or a meal prep area with easy access to your cutting boards and knives. And don’t forget about a charging station for all your devices – because let’s face it, our phones are as essential in the kitchen as our spatulas these days.

    The key is to think about how you use your kitchen and design zones that work for you. It’s like having a kitchen that’s tailored to your lifestyle – because one size definitely doesn’t fit all when it comes to cooking spaces!

    9. Artistic Elements and Personal Touches

    Your kitchen should be as unique as you are, and that’s where artistic elements and personal touches come in. These are the details that transform your kitchen from a cooking space to a happy place.

    Consider a statement backsplash with bold patterns or vibrant colors. Or how about open shelving to display your favorite cookbooks and family heirlooms? And don’t forget about wall art – who says paintings are just for living rooms?

    But the real magic happens when you incorporate truly personal elements. Maybe it’s a chalkboard wall for family messages and grocery lists or a gallery wall of family photos. Or perhaps it’s a custom-made spice rack that showcases your globe-trotting culinary adventures. Whatever it is, these personal touches are what make your kitchen truly yours.

    10. Ergonomic and Accessible Design Features

    Last but certainly not least, let’s talk about ergonomic and accessible design features. Because a beautiful kitchen isn’t worth much if it’s not comfortable to use.

    Consider varying counter heights to accommodate different tasks and users. Pull-out shelves and lazy Susans can make it easier to reach items in deep cabinets. And touchless faucets aren’t just high-tech – they’re also great for when your hands are full or messy.

    For those thinking long-term, universal design principles can ensure your kitchen remains accessible as you age. This might include lever-style handles, slip-resistant flooring, and good lighting. It’s about creating a kitchen that’s not just beautiful, but also comfortable and functional for everyone who uses it.

    Conclusion

    Whew! We’ve covered a lot of ground, haven’t we? From open-concept designs to smart tech, from bold colors to ergonomic features, these 10 creative ideas for a modern kitchen remodel offer something for everyone. Remember, the key is to choose the ideas that resonate with you and your lifestyle. After all, the best kitchen is one that makes you happy every time you step into it.

    So, are you ready to turn your kitchen dreams into reality? With these ideas in your back pocket, you’re well on your way to creating a kitchen that’s not just modern and functional, but also uniquely yours.

    Happy remodeling!

  • $4.95 Million Brian Deegan House in Morganton, North Carolina

    $4.95 Million Brian Deegan House in Morganton, North Carolina

    The Deegan Lake House, a stunning modern mansion nestled in Morganton, North Carolina, has recently hit the market for $4.95 million. This luxurious property belongs to Brian Deegan House, a professional freestyle motocross rider and rally car racer who has made quite a name for himself in the world of extreme sports. The lakeside retreat offers a perfect blend of contemporary design and natural beauty, making it a coveted piece of real estate for those seeking a high-end lifestyle in a serene setting.

    Who is Brian Deegan?

    Brian Deegan is a household name in the world of action sports, particularly known for his prowess in freestyle motocross and rally car racing. With a career spanning over two decades, Deegan has amassed an impressive collection of accolades, including multiple X Games medals and championships in various motorsports disciplines. His success on the track and in the air has translated into significant financial gains, allowing him to build a substantial net worth estimated to be around $10 million.

    Deegan’s passion for motorsports extends beyond his professional career. He owns a fleet of high-performance vehicles, including custom-built rally cars and motocross bikes. While the exact number of cars in his collection isn’t publicly known, it’s safe to say that his garage is filled with some of the most impressive machines in the motorsports world.

    As for other luxury assets, Deegan’s portfolio includes his primary residence in California and the recently listed Deegan Lake House in North Carolina. While there’s no public information about him owning yachts, private islands, or private jets, his real estate investments showcase his taste for luxury living. The Deegan Lake House, in particular, stands out as a testament to his success and lifestyle preferences.

    Brian Deegan at a Glance

    Detail Information
    Full Name Brian Deegan
    Date of Birth May 9, 1975
    Place of Birth Omaha, Nebraska, USA
    Profession Professional Freestyle Motocross Rider, Rally Car Racer
    Notable Achievements Multiple X Games medals, Rallycross championships
    Net Worth Estimated $10 million
    Primary Residence California
    Secondary Residence Deegan Lake House, Morganton, North Carolina
    Known Assets Multiple high-performance vehicles, real estate properties

    Where Does Brian Deegan Live Now?

    Brian Deegan primarily resides in California, where he’s based for much of his professional activities. However, the Deegan Lake House in Morganton, North Carolina, has served as a luxurious retreat for the action sports star and his family. Morganton, a charming city in Burke County, is known for its picturesque landscapes and outdoor recreational opportunities.

    The Deegan Lake House is situated in a prime location, offering stunning views of Lake James and the surrounding Blue Ridge Mountains. This serene setting provides a perfect contrast to the high-octane lifestyle Deegan is accustomed to in his professional career. The area is renowned for its natural beauty, making it an ideal spot for a lakeside getaway.

    Deegan Lake House

    The Deegan Lake House is a modern architectural marvel that seamlessly blends luxury living with the natural beauty of its surroundings. This lakeside retreat showcases Brian Deegan House taste for contemporary design and high-end amenities. The property stands out as a prime example of upscale real estate in the Morganton area, offering a unique combination of privacy, comfort, and stunning views.

    Situated on a generous plot of land, the Deegan Lake House provides ample space for both indoor and outdoor living. The property’s design takes full advantage of its lakeside location, with large windows and open spaces that invite the outside in, creating a harmonious connection between the home and its natural environment.

    1. Where Is Brian Deegan House?

    Brian Deegan’s Lake House is located in Morganton, North Carolina, a city known for its scenic beauty and outdoor recreational opportunities. Morganton is situated in Burke County, in the western part of the state, nestled in the foothills of the Blue Ridge Mountains. The property’s exact address is not publicly disclosed for privacy reasons, but it’s known to be situated on the shores of Lake James.

    Lake James is a popular destination for water sports enthusiasts and nature lovers alike. The lake covers an area of about 6,812 acres and boasts 150 miles of shoreline, providing ample opportunities for boating, fishing, and other water-based activities. The Deegan Lake House’s location on this beautiful body of water offers residents and guests direct access to these recreational pursuits.

    The surrounding area is characterized by lush forests and rolling hills, typical of the Blue Ridge Mountain region. This setting not only provides breathtaking views but also offers a sense of seclusion and tranquility, making it an ideal retreat from the fast-paced world of professional sports.

    Morganton itself is a small city with a population of around 17,000 residents. It’s known for its historic downtown area, outdoor attractions, and proximity to several state parks and forests. The city’s location, about an hour’s drive from Asheville and Charlotte, makes it accessible while still maintaining a sense of escape from urban life.

    Brian Deegan House Features

    2. Features of Deegan Lake House

    The Deegan Lake House is a testament to modern architectural design, seamlessly blending contemporary aesthetics with the natural beauty of its lakeside setting. The house boasts a striking exterior that makes use of clean lines, large windows, and natural materials to create a visually stunning structure that complements its surroundings.

    Spanning an impressive area, the house offers generous living spaces both indoors and outdoors. While the exact square footage isn’t publicly disclosed, properties of this caliber in the area typically range from 5,000 to 10,000 square feet or more. The architectural style can be described as modern and temporary, with elements that pay homage to the natural environment.

    The design of the Deegan Lake House prioritizes an open-concept layout, allowing for seamless flow between different living areas. This not only enhances the sense of spaciousness but also facilitates entertainment and family gatherings. Large, floor-to-ceiling windows are a prominent feature throughout the house, offering panoramic views of Lake James and the surrounding Blue Ridge Mountains.

    The exterior of the house likely features a combination of materials such as stone, wood, and glass, creating a harmonious blend with the natural landscape. The use of these materials not only adds to the aesthetic appeal but also helps in maintaining a connection with the outdoor environment.

    One of the standout features of the property is its integration with the outdoors. The house likely includes expansive decks, patios, or terraces that extend the living space outside, allowing residents to fully immerse themselves in the lakeside setting. These outdoor areas are perfect for entertaining, relaxing, or simply enjoying the scenic views.

    The architectural design also likely incorporates sustainable and energy-efficient elements, a common trend in high-end modern homes. This could include features like solar panels, smart home technology, and eco-friendly building materials.

    3. Personal House Touches

    Since acquiring the Lake House, Brian Deegan has likely made several improvements to tailor the property to his family’s needs and lifestyle. While specific details about these improvements aren’t publicly available, we can speculate on some potential enhancements based on common trends in high-end home renovations and Deegan’s background in motorsports:

    1. Custom Garage: Given Deegan’s passion for motorsports, he may add or upgrade a custom garage to house his collection of high-performance vehicles. This could include specialized storage solutions, maintenance areas, and possibly even a small workshop for tinkering with bikes and cars.
    2. Home Gym: As a professional athlete, Deegan likely values fitness. A state-of-the-art home gym with top-of-the-line equipment for strength training and cardio workouts would be a practical addition to maintain his physical condition.
    3. Outdoor Entertainment Area: The lakeside setting is perfect for outdoor gatherings. Deegan may have enhanced the outdoor space with features like a custom fire pit, an outdoor kitchen, or a dedicated area for barbecues and parties.
    4. Smart Home Integration: Modern convenience could be a priority, with the integration of smart home technology for lighting, security, climate control, and entertainment systems throughout the house.
    5. Custom Dock or Boathouse: To take full advantage of the lakefront location, Deegan might have added or upgraded a private dock or boathouse, providing easy access to water activities and a place to store watercraft.

    These improvements, while speculative, would align with the lifestyle of a professional athlete and motorsports enthusiast like Brian Deegan, enhancing both the functionality and enjoyment of the Lake House for his family and guests.

    4. House Amenities

    The Deegan Lake House boasts an impressive array of amenities, befitting its status as a luxury lakeside retreat. While specific details are not publicly disclosed, high-end properties in this category typically offer the following:

    • Gourmet kitchen with top-of-the-line appliances
    • Multiple living and entertainment areas
    • Home theater or media room
    • Wine cellar
    • Private gym
    • Spa-like bathrooms
    • Home office or study
    • Guest suites
    • Outdoor infinity pool
    • Hot tub or jacuzzi
    • Outdoor kitchen and dining area
    • Private dock or boathouse
    • Landscaped gardens
    • Multi-car garage
    • Smart home technology integration
    • High-end security system

    5. Neighborhood Area

    The neighborhood surrounding the Deegan Lake House in Morganton, North Carolina, offers a perfect blend of natural beauty, outdoor recreation, and small-town charm. Situated on the shores of Lake James, the area is known for its stunning landscapes and abundant opportunities for outdoor activities.

    Lake James itself is a major draw for residents and visitors alike. With its crystal-clear waters and 150 miles of shoreline, the lake provides endless possibilities for boating, fishing, swimming, and water sports. The Lake James State Park, located nearby, offers hiking trails, picnic areas, and camping facilities for those looking to immerse themselves in nature.

    The Blue Ridge Mountains serve as a breathtaking backdrop to the area, offering scenic views and opportunities for hiking, mountain biking, and rock climbing. The nearby Pisgah National Forest and Linville Gorge Wilderness Area are popular destinations for outdoor enthusiasts, featuring waterfalls, diverse wildlife, and challenging trails.

    Morganton itself, while small, has a charming downtown area with local shops, restaurants, and cultural attractions. The city hosts various events throughout the year, including festivals and farmers’ markets, fostering a strong sense of community.

    For those seeking urban amenities, the larger cities of Asheville and Charlotte are within driving distance, offering access to international airports, and world-class dining, shopping, and entertainment options.

    The neighborhood around the Deegan Lake House likely consists of other high-end properties, ensuring a level of privacy and exclusivity. The area is known for its low crime rates and high quality of life, making it an attractive location for those seeking a peaceful retreat or a permanent residence away from the hustle and bustle of city life.

    Market Value

    Detail Information
    Build Year Not publicly disclosed
    Purchase Year Not publicly disclosed
    Purchase Value Not publicly disclosed
    Current Listing Price (2024) $4.95 million
    Estimated Current Value $4.95 million (based on current listing)

    It’s important to note that the exact build year, purchase year, and purchase value of the Deegan Lake House are not publicly available. However, the current listing price of $4.95 million in 2024 gives a clear indication of its current market value. This price point reflects the property’s luxurious features, prime lakeside location, and the prestige associated with its celebrity ownership.

    The real estate market in desirable areas of North Carolina, particularly for luxury lakefront properties, has seen steady appreciation over the years. Factors such as the property’s unique features, the limited availability of lakefront land, and the growing popularity of the area for second homes and retreats all contribute to its high valuation.

    Brian Deegan’s Real Estate Portfolio

    While detailed information about Brian Deegan’s complete real estate portfolio is not publicly available, we can provide some insights based on known information:

    1. Primary Residence in California: Deegan’s main home is located in California, where he’s based for much of his professional activities. The exact location and details of this property are not publicly disclosed.
    2. Deegan Lake House in Morganton, North Carolina: This is the property currently listed for sale at $4.95 million. It serves as a luxurious retreat for Deegan and his family.
    3. Previous Properties: Given Deegan’s success in his career, it’s likely that he has owned or invested in other properties over the years. However, specific details about previous homes or investment properties are not readily available.
    4. Childhood Home: Information about Deegan’s childhood home is not publicly known. He was born in Omaha, Nebraska, but details about his early residences are not part of the public record.
    5. Other Current Properties: While it’s possible that Deegan owns other properties or has real estate investments, this information is not publicly disclosed.

    It’s worth noting that many professional athletes and celebrities often keep details about their real estate holdings private for security reasons. Therefore, this list may not be exhaustive and only includes information that is publicly available or can be reasonably inferred from known facts about Brian Deegan’s career and lifestyle.

    Conclusion

    The Deegan Lake House stands as a testament to Brian Deegan’s success in the world of action sports and his taste for luxury living. This modern mansion, nestled in the picturesque setting of Morganton, North Carolina, offers a perfect blend of contemporary design and natural beauty. With its prime location on Lake James and stunning views of the Blue Ridge Mountains, the property provides an ideal retreat from the high-octane world of motorsports.

    Currently listed at $4.95 million, the Deegan Lake House represents a significant piece of real estate in Brian Deegan House portfolio. Its impressive features, from the likely custom garage to the presumed state-of-the-art amenities, reflect the lifestyle of a professional athlete at the top of his game. As Deegan moves on to new ventures, this lakeside mansion offers a unique opportunity for a discerning buyer to own a piece of action sports history while enjoying the serene beauty of North Carolina’s lake country.

    Whether used as a permanent residence or a luxurious getaway, the Deegan Lake House promises to provide its next owner with an unparalleled living experience, combining the thrill of lakeside living with the comfort of modern luxury. As it changes hands, this property will undoubtedly continue to stand as a shining example of high-end real estate in the beautiful landscape of Morganton, North Carolina.

  • $9.3 Million Carroll O’Connor House in Malibu

    $9.3 Million Carroll O’Connor House in Malibu

    Carroll O’Connor’s house, a stunning oceanfront property in Malibu, California, recently sold for $9.3 million. This iconic residence, once home to the legendary actor best known for his role as Archie Bunker in “All in the Family,” boasts a rich history and breathtaking views of the Pacific Ocean. The sale of this remarkable property has sparked renewed interest in O’Connor’s life and legacy, as well as the luxurious real estate market in Malibu.

    Who is Carroll O’Connor?

    Carroll O’Connor was an American actor, producer, and director who left an indelible mark on the entertainment industry. Born on August 2, 1924, in Manhattan, New York City, O’Connor rose to fame with his portrayal of Archie Bunker in the groundbreaking sitcom “All in the Family.” His career spanned over four decades, during which he amassed a considerable fortune and acquired several properties.

    O’Connor’s net worth at the time of his death in 2001 was estimated to be around $20 million. While he wasn’t known for extravagant displays of wealth, he did own a few notable assets. His Malibu beach house was undoubtedly the crown jewel of his real estate portfolio. O’Connor wasn’t particularly known for owning multiple cars, yachts, or private jets. Instead, he seemed to prefer investing in real estate, with his Malibu home being his most significant and well-known property.

    Carroll O’Connor at a Glance

    Detail Information
    Full Name John Carroll O’Connor
    Date of Birth August 2, 1924
    Place of Birth Manhattan, New York City
    Date of Death June 21, 2001
    Place of Death Culver City, California
    Age at Death 76
    Nationality American
    Profession Actor, Producer, Director
    Notable Works “All in the Family,” “Archie Bunker’s Place,” “In the Heat of the Night”
    Spouse Nancy Fields O’Connor (m. 1951-2001)
    Children 1 (adapted)
    Net Worth Estimated $20 million at time of death
    Notable Assets Malibu Beach House

    Where Does Carroll O’Connor Live Now?

    Carroll O’Connor passed away on June 21, 2001, in Culver City, California. However, his legacy lives on through his work and the properties he once called home. The most notable of these is his Malibu beach house, which remained in the family for over three decades before its recent sale.

    The Malibu house is located on the prestigious Broad Beach, known for its stunning coastline and celebrity residents. This area has long been a favorite among Hollywood’s elite, offering privacy, luxury, and unparalleled ocean views. The location of O’Connor’s former home perfectly encapsulates the allure of Malibu living, combining natural beauty with exclusive amenities.

    Carroll O’Connor House

    Carroll O’Connor’s Malibu house is a testament to coastal luxury and architectural charm. This oceanfront property, which the O’Connor family owned for more than 30 years, recently sold for an impressive $9.3 million. The house stands as a unique blend of Moorish influences and beachfront practicality, creating a one-of-a-kind residence that captures the essence of Malibu living.

    Built in 1974, this home witnessed much of O’Connor’s career success and family life. It’s not just a house; it’s a piece of Hollywood history, having been home to one of television’s most iconic actors. The property’s recent sale has brought renewed attention to its features and the legacy of its famous former owner.

    1. Where Is Carroll O’Connor House?

    Carroll O’Connor’s house is situated on the coveted Broad Beach in Malibu, California. Broad Beach is renowned for its expansive stretches of sand and its popularity among celebrities and high-profile individuals. The area offers residents a perfect balance of privacy and natural beauty, with the Pacific Ocean as a constant backdrop.

    The specific location of the house provides it with 42 feet of prime beachfront, allowing for unobstructed views of the ocean and direct access to the sand. This positioning is highly desirable in Malibu real estate, as it offers residents the ultimate beach lifestyle with the ocean at their doorstep.

    Malibu itself is located along the Pacific Coast Highway, about 30 miles west of downtown Los Angeles. This proximity to LA allows residents to enjoy the tranquility of beach living while still having easy access to the amenities and entertainment options of a major city. The area is known for its Mediterranean climate, with warm, dry summers and mild winters, making it an ideal location for a beach house.

    Carroll O'Connor House Features

    2. Features of Carroll O’Connor House

    The Carroll O’Connor house is a striking example of architectural design that seamlessly blends Moorish influences with coastal aesthetics. Built in 1974, the house boasts over 3,600 square feet of living space, making it a spacious and comfortable residence.

    One of the most notable features of the house is its distinctive exterior. The white-walled structure is adorned with loggias featuring arched openings, a hallmark of Moorish architecture. These arches not only add visual interest but also create transitional spaces between the indoor and outdoor areas, perfect for enjoying the ocean breeze.

    The green-hued roof provides a striking contrast against the white walls, adding to the home’s unique character. Decorative tiles further enhance the Moorish theme, creating a visually rich exterior that sets the house apart from its neighbors.

    Inside, the house is designed to maximize its oceanfront location. Large windows and glass doors allow natural light to flood the interior spaces while providing panoramic views of the Pacific. The open floor plan creates a sense of spaciousness and flow, ideal for both everyday living and entertaining.

    The house includes a living room, dining area, three bedrooms, and four bathrooms. A sauna adds a touch of luxury and relaxation to the property. One of the most striking features is the inner courtyard with a swimming pool, a private oasis that offers an alternative to the beach just steps away.

    A second-floor balcony overlooks the 42 feet of beachfront, providing an elevated vantage point for enjoying sunsets over the Pacific. This outdoor space is perfect for al fresco dining or simply relaxing while taking in the coastal views.

    The architectural style of the house, with its blend of Moorish and coastal elements, creates a unique and charming aesthetic that stands out even in the high-end real estate market of Malibu. It’s a home that reflects both the character of its location and the personality of its former owner, Carroll O’Connor.

    3. Personal House Touches

    While specific details about personal improvements made by Carroll O’Connor to the house are not available in the search results, we can speculate on some likely enhancements based on common practices and the era in which O’Connor owned the home. Here are five potential improvements that may have been made:

    1. Interior Decor Updates: O’Connor likely personalized the interior with decor that reflected his tastes and career. This could have included memorabilia from “All in the Family” and other productions he was involved in.
    2. Landscaping Enhancements: Given the property’s beachfront location, O’Connor may have invested in landscaping that complemented the coastal environment while providing privacy.
    3. Kitchen Modernization: Over the three decades of ownership, the kitchen was probably updated with modern appliances and finishes to keep up with culinary trends and technology.
    4. Bathroom Renovations: The bathrooms may have been renovated to include luxury features like spa-like showers or soaking tubs, enhancing the home’s comfort and value.
    5. Entertainment System Installation: As an actor, O’Connor might have installed a high-end entertainment system, possibly including a home theater, to enjoy films and television in the comfort of his home.

    These improvements, while speculative, would be in line with maintaining and enhancing a luxury beachfront property over a long period of ownership.

    4. House Amenities

    The Carroll O’Connor House boasts several amenities that contribute to its luxury and comfort:

    • Oceanfront location
    • Private swimming pool
    • Inner courtyard
    • Sauna
    • Second-floor balcony
    • Direct beach access
    • Arched loggias
    • Open floor plan
    • Multiple bathrooms
    • Spacious living areas

    5. Neighborhood Area

    The neighborhood surrounding Carroll O’Connor’s former house is one of the most prestigious in Malibu. Broad Beach, where the property is located, is known for its beautiful stretches of sand and its popularity among celebrities and high-net-worth individuals.

    The area offers a perfect blend of privacy and natural beauty. Residents of Broad Beach enjoy a secluded lifestyle, away from the hustle and bustle of city life, yet with all the amenities one could desire. The beach itself is a major draw, providing opportunities for swimming, surfing, sunbathing, and long walks along the shore.

    Despite its secluded feel, the neighborhood is not far from the amenities of Malibu. Just a short drive away, residents can find high-end shopping at the Malibu Country Mart or enjoy fine dining at renowned restaurants like Nobu Malibu. For nature enthusiasts, the Santa Monica Mountains National Recreation Area is nearby, offering hiking trails and stunning views.

    The community is known for its strong sense of environmental stewardship. Residents of Broad Beach have been actively involved in efforts to protect and preserve the coastline, including measures to combat beach erosion.

    Schools in the area are part of the Santa Monica-Malibu Unified School District, known for its high standards of education. For families with children, this adds to the appeal of the neighborhood.

    Security is another key feature of the area. Many homes, including celebrity properties, have advanced security systems and the neighborhood is known for its privacy, making it a safe haven for high-profile residents.

    The Broad Beach area, with its mix of natural beauty, privacy, and proximity to high-end amenities, represents the epitome of luxurious Malibu living. It’s easy to see why Carroll O’Connor chose to make this his home for over three decades.

    Market Value

    Detail Information
    Build Year 1974
    Purchase Year Not specified (owned for over 30 years)
    Purchase Value Not available
    Most Recent Sale Price $9.3 million (2016)
    Current Estimated Value Likely higher due to Malibu real estate appreciation

    Carroll O’Connor Real Estate Portfolio

    While the Malibu beach house is the most well-known property associated with Carroll O’Connor, information about his complete real estate portfolio is limited in the search results. However, we can provide some context about his living situations throughout his life:

    1. Childhood Home: Carroll O’Connor was born and raised in Forest Hills, a neighborhood in the borough of Queens, New York City. While specific details about this childhood home are not provided, Forest Hills was and continues to be a desirable residential area known for its tree-lined streets and mix of housing styles.
    2. College Years: During his time at the University of Montana and later at the National University of Ireland, O’Connor likely lived in student housing or rentals, though specific details are not available.
    3. New York Residence: After returning from Ireland in 1954, O’Connor lived in New York while attempting to break into Broadway. The specific location of this residence is not mentioned in the search results.
    4. Malibu Beach House: This is the most well-documented property owned by O’Connor. Located on Broad Beach in Malibu, California, this house was owned by the O’Connor family for over 30 years until its sale in 2016 for $9.3 million.
    5. Other Potential Properties: Given O’Connor’s long and successful career in television, it’s possible he owned other properties throughout his life, potentially in Los Angeles or New York, but specific details are not provided in the search results.

    The Malibu beach house stands out as the most significant and well-known property in Carroll O’Connor’s real estate history. Its recent sale has brought renewed attention to this aspect of the late actor’s life and legacy.

    Conclusion

    Carroll O’Connor’s Malibu house stands as a testament to the actor’s success and his appreciation for coastal living. This $9.3 million property, with its unique Moorish-inspired architecture and prime beachfront location, encapsulates the luxury and allure of Malibu real estate. From its spacious interiors to its private pool and direct beach access, the house offers a glimpse into the lifestyle of one of television’s most iconic figures. While O’Connor may no longer be with us, his legacy lives on through his work and the beautiful home he cherished for over three decades. The recent sale of this property not only marks the end of an era but also highlights the enduring value and appeal of Malibu’s Broad Beach area.

  • How to Build a Luxurious Mansion Under Budget

    How to Build a Luxurious Mansion Under Budget

    Ever dreamed of living in a fancy mansion but thought it was way out of your price range? Well, you’re in for a treat! Building a luxurious mansion doesn’t have to break the bank. With some smart planning and clever tricks, you can create your dream home without emptying your wallet.

    Let’s dive into how you can build a luxurious mansion that’ll make your neighbors green with envy, all while staying within your budget.

    Overview of Luxurious Mansion Design

    When you think of a luxurious mansion, what comes to mind? Maybe it’s sprawling rooms, high ceilings, or fancy finishes. But luxury isn’t just about size or expensive stuff. It’s about creating a space that feels special and makes you go “wow” every time you walk in. A luxurious mansion is all about smart design, quality materials, and those little touches that make a big impact.

    Nowadays, luxury homes come in all shapes and sizes. You might picture a massive estate with columns and fountains, or maybe a sleek, modern house with lots of glass and clean lines. The cool thing is, you can make any style luxurious if you know how. It’s not about copying what’s in magazines – it’s about making a home that feels luxurious to you.

    One big trend in luxury home design is bringing the outdoors in. Think big windows that let in tons of natural light, or indoor gardens that make you feel like you’re in a fancy resort. Another popular idea is creating spaces that can do double duty, like a home office that turns into a guest room when needed. And don’t forget about tech – smart home features are a must in modern luxury homes.

    Benefits of Luxurious Mansion Design

    So, why go for a luxurious mansion design? Well, for starters, it’s just plain awesome to live in a beautiful space that makes you feel like royalty. But there are some practical perks too. A well-designed luxury home can save you money in the long run. How? By using energy-efficient materials and systems, you can cut down on those pesky utility bills.

    Plus, a luxurious mansion isn’t just about looking good – it’s about living good too. Imagine having spaces that are perfectly tailored to your lifestyle. Maybe it’s a killer home gym, a cozy movie room, or a kitchen that would make a chef jealous. When your home fits your life like a glove, everyday living becomes a breeze.

    And let’s not forget about the wow factor. A luxurious mansion is sure to impress your friends and family. It’s a great place for entertaining, whether you’re hosting fancy dinner parties or just having the gang over for game night. Plus, if you ever decide to sell, a well-designed luxury home can be a great investment. People are always willing to pay more for quality and style.

    Steps to Achieve Luxurious Mansion Design Under Budget

    Now, here’s the million-dollar question (or should we say, the under-budget question): How do you get all this luxury without spending a fortune? It’s all about being smart with your choices. You don’t need solid gold faucets to make a bathroom feel luxurious – sometimes, it’s the little things that count.

    The key is to focus on what matters most to you. Maybe you’re all about having a killer kitchen, or perhaps you dream of a master suite that feels like a five-star hotel. By prioritizing what’s important, you can splurge where it counts and save in other areas. And remember, luxury is in the details. Sometimes, it’s the small touches – like great lighting or unique hardware – that can make a big difference.

    Here’s a quick rundown of steps to help you build your luxurious mansion without breaking the bank:

    1. Planning and Research
    2. Choosing Cost-Effective Materials
    3. Maximizing Space and Efficiency
    4. Affordable Décor and Finishes
    5. Focusing on Efficiency and Sustainability

    Let’s break these down one by one.

    1. Planning and Research

    First things first: you gotta have a plan. This is where you’ll figure out what you want, what you need, and how much you can spend. Start by making a wish list of everything you’d love in your dream home. Then, do some digging to see what’s realistic for your budget.

    Research is your best friend here. Look at lots of home designs, both online and in magazines. Visit open houses or home shows to get ideas. And don’t be shy about asking for advice – talk to architects, builders, or friends who’ve been through the home-building process. The more you know, the better decisions you’ll make.

    This is also the time to figure out your budget. Be realistic about what you can afford, and don’t forget to leave some wiggle room for unexpected costs. It’s a good idea to set aside about 10-20% of your budget for surprises that might pop up during construction.

    2. Choosing Cost-Effective Materials

    Now, let’s talk materials. This is where you can save some dough without sacrificing style. The trick is to find materials that look expensive but don’t cost an arm and a leg. For example, engineered hardwood can give you the look of solid wood floors at a fraction of the price. Or, consider using porcelain tiles that mimic the look of marble – they’re way cheaper and easier to maintain.

    Don’t be afraid to mix high-end materials with more budget-friendly options. Maybe you splurge on a fancy countertop in the kitchen but save by using less expensive cabinets. Or, you could use pricier materials in small doses for big impact – like using a luxurious wallpaper on just one accent wall instead of the whole room.

    Another smart move is to shop around for deals. Check out salvage yards, outlet stores, or online marketplaces for discounted materials. Sometimes, you can find great stuff that’s been discontinued or is slightly imperfect – perfect for getting that luxury look for less.

    3. Maximizing Space and Efficiency

    In a luxurious mansion, every square foot counts. The key is to make the most of the space you have. Open floor plans are great for making a home feel spacious and airy. High ceilings can also make rooms feel bigger and more luxurious.

    But it’s not just about making things look big – it’s about making them work well too. Think about how you’ll use each space. Maybe instead of a formal dining room, you’ll rarely use, you could have a multi-purpose area that serves as both a dining space and a home office.

    Storage is super important too. Built-in shelves and cabinets can give you tons of storage without taking up floor space. And don’t forget about those often-overlooked areas – spaces under stairs or in attics can be turned into useful storage or even cozy nooks.

    4. Affordable Décor and Finishes

    Here’s where you can let your creativity shine. Décor and finishes are what give a home its personality, and you don’t need to spend a fortune to make a big impact. Paint is your best friend – a fresh coat in the right color can totally transform a space. And don’t be afraid to go bold with an accent wall or some fun wallpaper.

    Lighting is another area where you can get a lot of bang for your buck. Good lighting can make a room feel warm and inviting, or sleek and modern. Mix different types of lighting – overhead, task, and accent – to create the perfect ambiance.

    When it comes to furniture and accessories, think of quality over quantity. It’s better to have a few well-made pieces than a bunch of cheap stuff. Look for classic designs that won’t go out of style quickly. And don’t forget about secondhand options – you can often find great quality furniture at thrift stores or estate sales.

    5. Focusing on Efficiency and Sustainability

    Last but not least, let’s talk about making your luxurious mansion efficient and eco-friendly. Not only is this good for the planet, but it can also save you money in the long run. Energy-efficient appliances and systems might cost a bit more upfront, but they’ll pay for themselves over time with lower utility bills.

    Consider things like solar panels, smart thermostats, or energy-efficient windows. Good insulation is a must – it’ll keep your home comfortable year-round without cranking up the heat or AC. And don’t forget about water efficiency – low-flow fixtures and drought-resistant landscaping can make a big difference.

    Sustainable materials are another great option. Things like bamboo flooring or recycled glass countertops can look super luxurious while also being eco-friendly. Plus, using sustainable materials can be a great selling point if you ever decide to move.

    Common Mistakes to Avoid

    When you’re building a luxurious mansion on a budget, it’s easy to get caught up in the excitement and make some costly mistakes. Here are some common pitfalls to watch out for:

    • Overbuilding for the neighborhood: Make sure your home fits in with the area. A mansion that’s way bigger or fancier than everything else around it might not be a great investment.
    • Skimping on important stuff: Don’t cut corners on things like foundation, roofing, or insulation. These might not be exciting, but they’re super important for the long-term health of your home.
    • Forgetting about maintenance costs: A big house means more to clean, heat, cool, and maintain. Make sure you factor these ongoing costs into your budget.
    • Choosing trendy over timeless: It’s fun to follow trends, but some can look dated quickly. Stick to classic designs for big-ticket items, and save the trendy stuff for things that are easy to change.
    • Not planning for the future: Think about how your needs might change over time. Will this home still work for you in 5, 10, or 20 years?
    • Overlooking outdoor spaces: Don’t forget about landscaping and outdoor living areas. These can add a lot of value and enjoyment to your home.

    Budget Breakdown

    To give you an idea of where your money might go when building a luxurious mansion, here’s a rough breakdown of costs:

    Category Percentage of Budget
    Land 20-25%
    Construction 50-60%
    Design and Permits 10-15%
    Finishes and Fixtures 10-15%
    Landscaping 5-10%

    Remember, these are just estimates. Your actual costs might vary depending on your location, the size of your home, and the specific choices you make.

    Can I DIY this design?

    So, you’re wondering if you can DIY your luxurious mansion? Well, it depends on your skills and how much time you’ve got. While it’s probably not realistic to build the whole thing yourself (unless you’re a pro builder), there are areas where you can roll up your sleeves and save some cash.

    Painting is a great DIY project – it’s amazing what a fresh coat of paint can do to transform a space. You might also be able to handle some of the finishing touches, like installing hardware or light fixtures. If you’re handy, you could even tackle some of the landscaping or build some custom shelving.

    But here’s the thing: know your limits. Some jobs are best left to the pros, especially when it comes to things like electrical work, plumbing, or structural changes. Messing these up could cost you way more in the long run. And remember, your time is valuable too. Sometimes it’s worth paying someone else to do a job quickly and correctly, rather than spending weeks trying to figure it out yourself.

    Conclusion

    Building a luxurious mansion on a budget might seem like a tall order, but it’s doable with some smart planning and clever choices. Remember, luxury is all about how a space makes you feel – it’s not just about how much money you spend. By focusing on what matters most to you, choosing materials wisely, and paying attention to the details, you can create a home that feels like a million bucks without the million-dollar price tag.

    So go ahead, dream big! With these tips and tricks, you’re well on your way to building the luxurious mansion of your dreams, all while keeping your wallet happy.

    Happy building!

  • How to Design a Minimalist Eco-Friendly Home Under Budget

    How to Design a Minimalist Eco-Friendly Home Under Budget

    Design a Minimalist Eco-Friendly Home—sounds fancy, right? But it’s not just for the rich and famous. You can create a beautiful, simple, and green home without breaking the bank. Did you know that minimalist homes not only look great but can also save you money in the long run? They help reduce waste and energy use, which is good for your wallet and the planet.

    So, let’s dive into how you can make your dream home a reality with some smart planning and eco-friendly choices.

    Overview of Minimalist Home Design

    A minimalist home design is all about keeping things simple and clutter-free. Imagine walking into a room with clean lines, open spaces, and just the right amount of furniture. It’s like having a blank canvas where every piece has its place and purpose. Minimalism isn’t about living in a bare space; it’s about choosing quality over quantity and making each item count.

    In a minimalist home, you’ll often find neutral colors like white, gray, or beige. These colors make spaces feel calm and serene. Plus, they make it easy to add pops of color with plants or artwork without overwhelming the room. Natural light is also a big deal in minimalist homes. Large windows let in lots of sunlight, making spaces feel bigger and more inviting.

    The minimalist design also emphasizes open floor plans that enhance flow and connectivity between spaces. This design approach not only maximizes space but also encourages interaction among family members by removing unnecessary barriers between rooms.

    Benefits of Minimalist Home Design

    There are tons of perks to going minimalist. First off, less stuff means less stress. When your home is clutter-free, it’s easier to relax and focus on what really matters. Plus, cleaning becomes a breeze because there are fewer things to dust or move around.

    Minimalist homes are also super functional. With fewer items, you can focus on pieces that serve multiple purposes—like a sofa that turns into a bed or tables with hidden storage. This means you get more use out of each piece of furniture.

    Another big benefit is cost savings. By buying less and choosing durable, timeless pieces, you spend less money over time. And because minimalist homes often use natural light and energy-efficient designs, you’ll save on utility bills too.

    Finally, minimalist design is great for the environment. It encourages using sustainable materials like bamboo or recycled wood. By reducing waste and energy use, you’re helping to protect our planet for future generations.

    Moreover, minimalist homes often incorporate energy-efficient technologies such as solar panels or rainwater harvesting systems that further reduce environmental impact while cutting down on utility costs.

    Steps to Achieve Minimalist Eco-Friendly Home Design Under Budget

    Creating your dream home doesn’t have to cost a fortune. Here are some steps to help you get started:

    1. Planning and Research

    Before you start buying anything, take some time to plan out your space. Think about what you need versus what you want. Look for inspiration online or in magazines to get ideas for your design. Make a list of must-have items and stick to it when shopping.

    Consider creating a mood board with images of designs you love to help visualize your space better. This can guide your decisions on color schemes, furniture styles, and décor elements.

    2. Choosing Cost-Effective Materials

    Look for materials that are both affordable and eco-friendly. Reclaimed wood, bamboo, and recycled metal are great options. These materials not only look good but also reduce environmental impact.

    Consider using low-VOC paints and finishes to improve indoor air quality while being kind to the environment. These options are often available at similar prices to traditional products but have added health benefits.

    3. Maximizing Space and Efficiency

    Make the most of your space by choosing furniture that serves multiple purposes. For example, use shelves that double as room dividers or beds with storage underneath. This helps keep your home organized without adding extra clutter.

    Think vertically by using wall-mounted storage solutions or tall shelving units to maximize floor space while keeping items accessible.

    4. Affordable Décor and Finishes

    Decorate with items that have personal meaning or are made from sustainable materials. You don’t need expensive art pieces; even simple DIY projects can add charm to your space.

    Consider thrift stores or flea markets for unique finds that add character without costing much money. Upcycling old items into new décor pieces can be both fun and rewarding.

    5. Focusing on Efficiency and Sustainability

    Incorporate energy-efficient appliances and lighting into your home. Use LED bulbs and smart thermostats to save on energy costs. Consider installing solar panels if possible—they’re a great long-term investment.

    Look into water-saving fixtures like low-flow faucets or dual-flush toilets which can significantly reduce water usage without sacrificing performance.

    Common Mistakes to Avoid

    • Overbuying: Stick to your list and avoid impulse purchases.
    • Ignoring Functionality: Choose items that are both beautiful and useful.
    • Neglecting Natural Light: Don’t block windows with heavy curtains or furniture.
    • Skipping Quality: Invest in durable pieces that will last.
    • Forgetting Sustainability: Always opt for eco-friendly materials when possible.
    • Overlooking Maintenance: Choose materials that are easy to maintain over time.

    Budget Breakdown

    Here’s a simple budget breakdown for designing your minimalist eco-friendly home:

    Item Estimated Cost Notes
    Planning & Design $100 – $500 Depends on whether you hire help
    Sustainable Materials $500 – $2,000 Includes flooring, walls, etc.
    Multifunctional Furniture $1,000 – $3,000 Choose pieces that offer storage solutions
    Energy-Efficient Appliances $500 – $1,500 Look for ENERGY STAR-rated products
    Décor & Finishes $200 – $800 DIY projects can lower costs

    Can I DIY this design?

    Absolutely! DIY projects are perfect for creating a minimalist eco-friendly home on a budget. You can repurpose old furniture by painting it or adding new hardware. Simple tasks like installing shelves or creating wall art can be done with minimal tools and skills.

    Plus, DIY projects add a personal touch to your space that can’t be bought in stores. Whether it’s crafting custom picture frames from reclaimed wood or sewing your own curtains from organic fabrics—the possibilities are endless!

    Conclusion

    Designing a minimalist eco-friendly home doesn’t have to be expensive or complicated. With careful planning and smart choices, you can create a beautiful space that’s both stylish and sustainable. Remember to focus on functionality, choose eco-friendly materials, and keep things simple for the best results.

  • How to Build a Traditional Saltbox Home Under Budget

    How to Build a Traditional Saltbox Home Under Budget

    Ever dreamed of living in a cozy, historic-looking home without breaking the bank? Well, you’re in luck! Building a traditional saltbox home might be just the ticket. These charming houses, with their distinctive sloped roofs and simple elegance, have been around since colonial times. But don’t worry, you don’t need a time machine to build one.

    Let’s dive into how you can create your very own saltbox home without emptying your wallet.

    Overview of Saltbox Home Design

    Saltbox homes are a real blast from the past. They got their start way back in colonial New England, and boy, have they stood the test of time! These houses are easy to spot with their unique shape. Picture this: two stories in the front, but only one in the back, with a long, sloping roof that looks like it’s sliding down the back of the house. It’s this roof that gives the saltbox its name, ’cause it looks just like the wooden boxes folks used to keep their salt in back in the day.

    But there’s more to these homes than just a funky roof. They usually have a big central chimney, which was super important for keeping everyone toasty in those chilly New England winters. And don’t forget the symmetrical front face – it’s like the house is giving you a big, welcoming smile! With windows lined up neatly on either side of the front door, these homes have a simple, clean look that’s hard not to love.

    Inside, saltbox homes are all about making the most of space. The front part of the house typically has two big rooms downstairs and two upstairs. The back part, under that sloping roof, often started as a lean-to addition. It’s like the house grew along with the family! This space was perfect for a kitchen or extra bedrooms. And let’s not forget those exposed beams and wide pine floors – they’re like a warm hug from the past.

    Benefits of Saltbox Home Design

    Now, you might be wondering, “Why should I build a saltbox home?” Well, buckle up, ’cause there are plenty of reasons! First off, these homes are tough cookies. That sloped roof isn’t just for looks – it helps snow and rain slide right off, which is a big plus in areas with heavy snowfall. And speaking of that roof, it creates some seriously cozy spaces inside. Who doesn’t love a room with slanted ceilings?

    But wait, there’s more! Saltbox homes are masters of efficiency. That compact design means less space to heat and cool, which can save you a pretty penny on energy bills. Plus, the simple shape makes them easier (and often cheaper) to build than some fancier styles. And let’s not forget about curb appeal – these homes have a timeless charm that never goes out of style.

    Another cool thing about saltbox homes is how flexible they are. Need more space? Just add on to the back, keeping that classic saltbox shape. It’s like playing with building blocks but for grown-ups! And if you’re into history, living in a saltbox home is like having your little piece of Americana. It’s a conversation starter and a cozy home all rolled into one.

    Steps to Achieve Saltbox Home Design Under Budget

    Alright, let’s get down to brass tacks. Building a saltbox home doesn’t have to cost an arm and a leg. With some smart planning and a bit of elbow grease, you can create your dream home without emptying your piggy bank. Here’s the game plan: we’ll cover everything from initial planning to putting on those finishing touches, all while keeping an eye on your wallet.

    1. Planning and Research

    First things first, you’ve gotta do your homework. Start by looking at lots of saltbox home designs. What do you like? What don’t you like? Make a list of must-haves and nice-to-haves. This will help you focus on what’s important when it comes time to make budget decisions.

    Next, check out local building codes and zoning laws. You don’t want to get halfway through your project only to find out you’re breaking some obscure rule! And while you’re at it, look into any historical preservation guidelines in your area. Some places have special rules for building traditional-style homes.

    Don’t forget to research materials and labor costs in your area. Prices can vary a lot depending on where you live. And hey, why not reach out to some local contractors who’ve built saltbox homes before? They might have some great tips on how to save money without cutting corners.

    2. Choosing Cost-Effective Materials

    Now, let’s talk materials. The good news is, that saltbox homes are all about simplicity, so you don’t need a bunch of fancy stuff. For the exterior, consider using vinyl siding instead of wood clapboard. It’s cheaper and needs less maintenance. For the roof, asphalt shingles are a budget-friendly option that still looks great.

    Inside, go for drywall instead of plaster for your walls. It’s easier to install and repair, which means lower labor costs. For flooring, laminate can give you the look of hardwood without the hefty price tag. And when it comes to windows, vinyl frames are a good bet – they’re energy-efficient and won’t break the bank.

    Don’t be afraid to shop around for deals. Check out salvage yards for things like doors or light fixtures. You might find some real gems that add character to your home without costing a fortune. And keep an eye out for sales at big home improvement stores – you can save a bundle if you time your purchases right.

    3. Maximizing Space and Efficiency

    One of the best things about saltbox homes is how efficient they can be with space. To make the most of every square foot, think about built-in storage solutions. Shelves tucked under the sloping ceilings in upstairs rooms can turn awkward spaces into useful storage areas.

    In the kitchen, consider an open-plan layout. It’ll make the space feel bigger and brighter, and you’ll save money on interior walls. Plus, it’s great for entertaining! For bedrooms, think about ways to use the space under the sloped roof. Built-in dressers or desks can be a smart use of this area.

    Don’t forget about the outdoors, either. A simple deck or patio can extend your living space without the cost of a full addition. And if you’re feeling handy, building it yourself can save you a bundle.

    4. Affordable Décor and Finishes

    When it comes to decorating your saltbox home, less is often more. Stick to a simple color palette – think warm, earthy tones that complement the home’s traditional style. Paint is one of the cheapest ways to make a big impact, so don’t be afraid to get creative with it.

    For fixtures and hardware, look for pieces that have a vintage or colonial feel. You can often find these at thrift stores or flea markets for a fraction of the cost of new items. And don’t underestimate the power of a good DIY project. Making your curtains or refinishing second-hand furniture can save you money and give your home a personal touch.

    In the kitchen and bathrooms, consider laminate countertops instead of pricier materials like granite. They’ve come a long way in recent years and can look sharp. For backsplashes, simple subway tiles are classic and affordable.

    5. Focusing on Efficiency and Sustainability

    Building an energy-efficient home isn’t just good for the planet – it’s good for your wallet, too. Start with good insulation. It might cost a bit more upfront, but it’ll save you loads on heating and cooling bills in the long run. Look into options like spray foam insulation for those tricky sloped ceilings.

    For windows, double-pane glass is a must. It’ll keep your home cozy in winter and cool in summer. And speaking of temperature control, a programmable thermostat is a cheap addition that can make a big difference in your energy use.

    Consider installing a tankless water heater. They’re more efficient than traditional models and can save you money over time. And don’t forget about lighting – LED bulbs use way less energy than old-school incandescent and last much longer.

    Common Mistakes to Avoid

    • Skimping on the roof: It’s tempting to cut costs here, but a good roof is crucial for a saltbox home.
    • Ignoring the foundation: Make sure it’s solid and well-insulated to avoid problems down the line.
    • Overcomplicated design: Remember, saltbox homes are all about simplicity. Stick to the basics.
    • Neglecting natural light: Those sloped ceilings can make rooms dark, so plan for plenty of windows.
    • Forgetting about storage: Built-ins are your friend in a saltbox home. Plan for them from the start.
    • Rushing the process: Take your time with planning and research. It’ll save you headaches (and money) later.

    Budget Breakdown

    Item Percentage of Total Budget
    Foundation 10-15%
    Framing 15-20%
    Exterior Finishing 15-20%
    Interior Finishing 25-30%
    Mechanical Systems 10-15%
    Site Work 5-10%
    Miscellaneous 5-10%

    Can I DIY this design?

    So, you’re feeling brave and wondering if you can tackle this project yourself. Well, it depends on your skills and experience. Building a whole house is a big job, even for a pro. If you’re handy and have some construction experience, you might be able to take on parts of the project. Things like painting, installing flooring, or even some of the framing could be DIY-friendly.

    But remember, there are some things you shouldn’t mess with unless you’re a certified pro. Electrical work, plumbing, and structural elements are best left to the experts. Not only is it safer, but it’ll also ensure your home meets all the necessary codes and regulations.

    If you’re determined to DIY as much as possible, consider acting as your general contractor. This means you’d hire and manage subcontractors for different parts of the job. It can save you money, but it’s a lot of work and responsibility. Make sure you’re up for the challenge before diving in!

    Conclusion

    Building a traditional saltbox home on a budget is doable with some smart planning and a bit of creativity. From choosing cost-effective materials to maximizing space and efficiency, there are plenty of ways to keep costs down without sacrificing style or quality. Remember, the key is to focus on what’s important – creating a cozy, efficient home that captures the timeless charm of the saltbox style. So go ahead, and start planning your dream home. With these tips in your toolbelt, you’ll be well on your way to building a beautiful saltbox home that won’t break the bank. Happy building!